Sheet No.
Issue Date: Rev. C September 19, 2011
© SPX
Parts List & Operating Instructions Form No. 538016
2 of 4
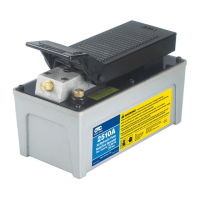
Operating Instructions
Hydraulic Connections
1. It is necessary to vent the pump before using it. Loosen the oil ll knob by turning it counterclockwise.
(The oil ll knob was installed and tightened to prevent the oil from leaking during shipment.)
2. Clean all the areas around the uid ports of the pump and cylinder.
3. Inspect all threads and ttings for signs of wear or damage, and replace as needed.
4. Clean all hose ends, couplers, and union ends.
5. Remove the thread protector from the hydraulic uid outlet. Connect the hose assembly to the hydraulic
uid outlet, and couple the hose to the cylinder.
Important: Seal external pipe connections with high-grade thread sealant.
Air Connections
1. Remove the thread protector from the air inlet of the pump. Install a threaded tting that is compatible with
your air supply tting.
2. Connect shop air (with an air line lter installed) to the tting, and regulate air supply pressure to between
6 bar (90 psi) and 9 bar (140 psi).
Priming the Pump
1. Press the RELEASE end of the pedal while holding down the air intake valve with a athead screwdriver.
(The air intake valve is located directly under the pedal in the area marked PUMP.)
2. Allow the pump to cycle for approximately 15 seconds.
3. Remove the screwdriver, and press the PUMP end of the pedal. If the cylinder extends and pressure builds,
the pump has been successfully primed. If the pump does not respond, repeat steps 1–3, jogging the air
intake valve while holding the pedal in the RELEASE position.
Operation
1. To extend the cylinder, press the end of the pedal marked PUMP.
2. To hold the cylinder in position, release the pedal.
3. To retract the cylinder, press the end of the pedal marked RELEASE.