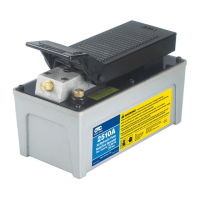
Parts List & Operating Instructions Form No. 538016, Sheet 2 of 4, Back
CAUTION: To prevent personal injury,
•
Only qualied personnel shall perform inspections and repairs to this air/hydraulic pump.
•
Use only those repair parts called out in the parts list in this document. Items found in the parts
list have been carefully tested and selected by OTC.
Bleeding Air from the System
During the rst moments of operation or after prolonged use, air may accumulate within the hydraulic system,
causing the cylinder to respond slowly or in an unstable manner. To remove the air,
1. Position the cylinder at a lower level than the pump. (This allows air to be released through the pump
reservoir.)
2. Run the system through several cycles of extending and retracting the cylinder, free of any load.
Lubrication
If the pump is operated on a continuous duty cycle for extended periods, the manufacturer recommends
installing an automatic air line oiler in the air inlet line, as close to the pumping unit as possible. Set the unit
to feed approximately one drop of oil (SAE No. 10) per minute into the system.
Inspecting the Hydraulic Fluid Level
Check the hydraulic uid level after every 10 hours of use. The uid level should be 19 mm (3/4 inch) from the
ller / vent cap when the cylinder is retracted. Add OTC-approved hydraulic uid—215 SSU@ 38°C (100°F),
if necessary.
1. Retract the cylinder, and disconnect the air supply.
2. Clean the area around the ller/vent plug. Remove the ller/vent plug.
3. Insert a clean funnel with a lter. Add OTC-approved hydraulic uid—215 SSU@ 38°C (100°F)—to a level
19 mm (3/4 inch) from the ller/vent plug.
4. Replace the ller/vent plug.
Draining and Flushing the Reservoir
Drain the reservoir after every 300 hours of use. Dispose of the uid according to local, state, and federal
laws.
1. Release pressure and disconnect the pump from other hydraulic system components (hose, cylinder, etc.).
Clean the pump exterior of dirt and oil.
2. Remove the bolts that hold the pump assembly to the reservoir. Remove the pump assembly, being careful
not to damage the gasket, lter, or safety valve.
3. Drain the reservoir of all uid, and rell half-full using clean hydraulic uid. Rinse the lter clean.
4. Place the pump assembly back onto the reservoir, and secure it using two of the bolts, assembled in
opposite corners of the housing.
5. Press the RELEASE end of the pedal while holding down the air intake valve with a athead screwdriver.
(The air intake valve is located directly under the pedal marked PUMP.) Allow the pump to cycle for
approximately 15 seconds.
6. Drain and clean the reservoir, and ll it with new OTC hydraulic uid to a level of 19 mm (3/4 inch) from
the ller / vent cap when the cylinder is retracted.
Preventive Maintenance
 Loading...