S3 User Guide 20 PN 875-0196-000 Rev C1
Chapter 2: Installation and Setup
To access the GPS Setup screen:
1. Touch the GPS tab.
2. Touch the Setup button.
Table 2-4 describes the buttons and fields on the GPS Setup screen.
Table 2-4: GPS Setup screen button and field descriptions
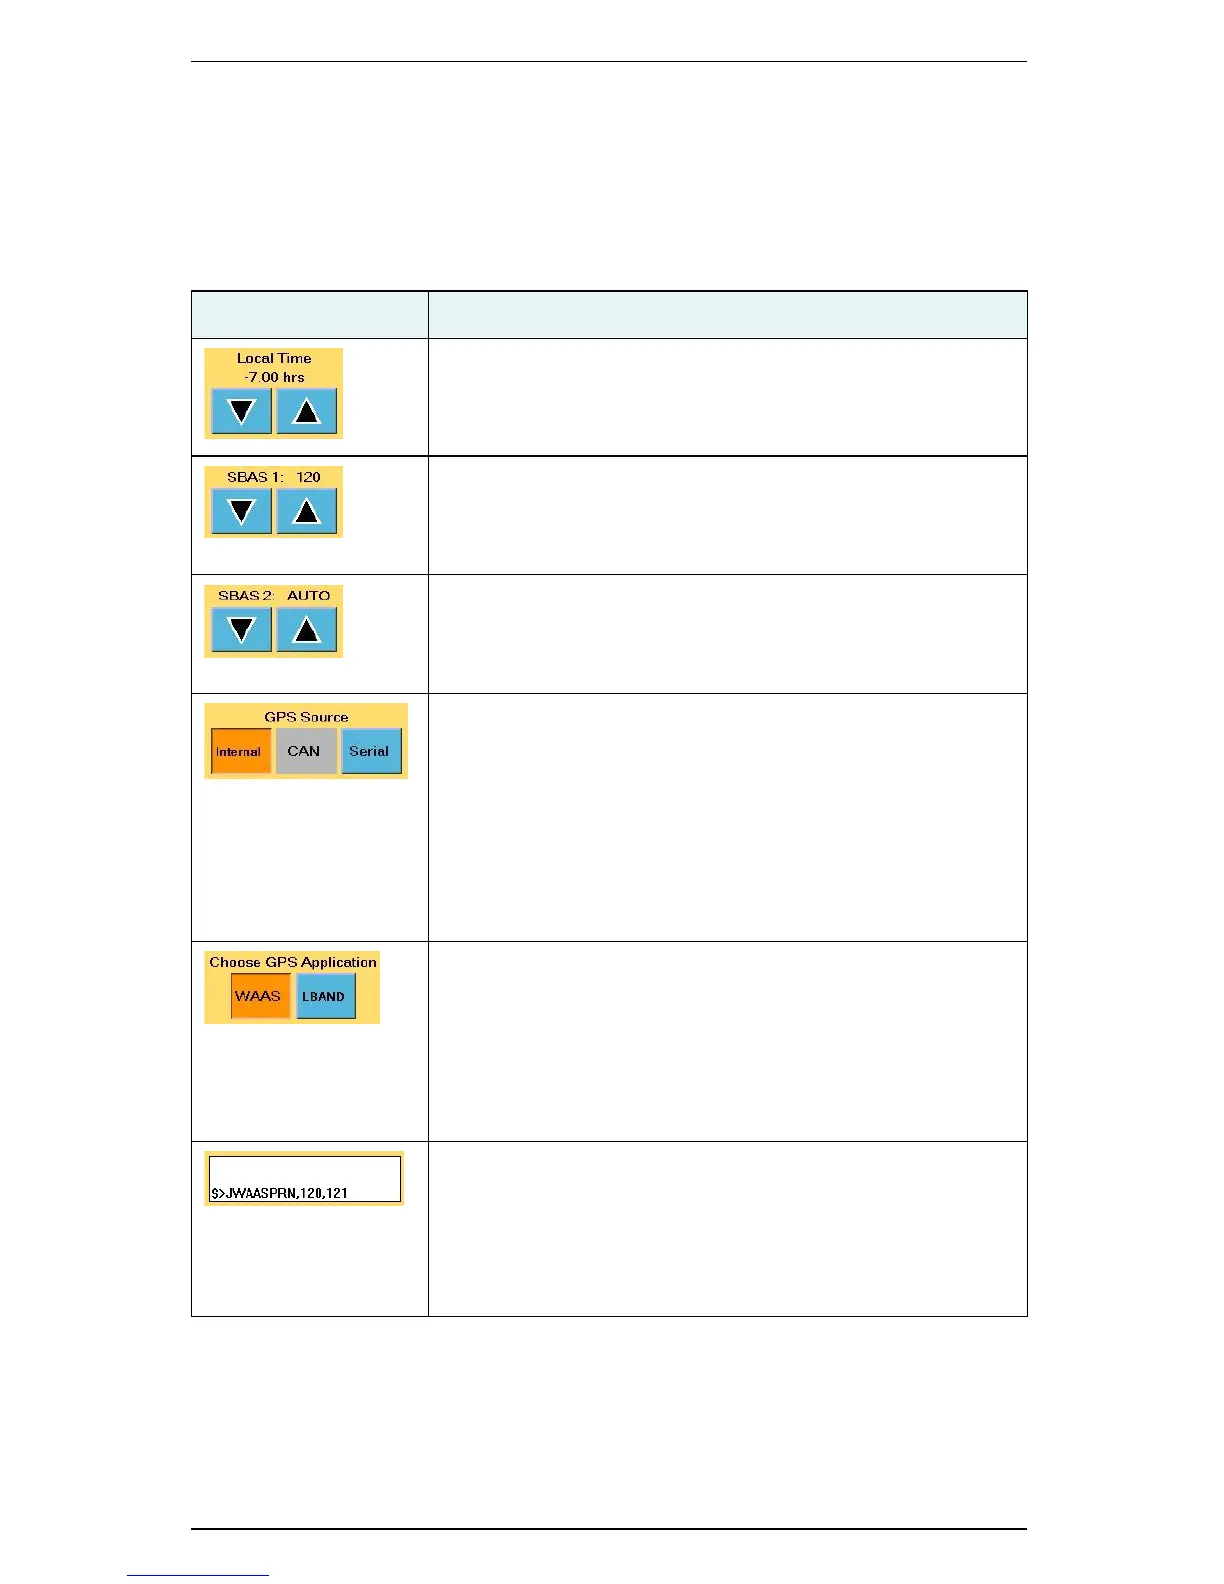
Button/Field Description
Local Time
Set the system clock to the local time.
SBAS 1
Change 1 of 2 SBAS satellites used in the system’s position
calculation (default value is Auto, which allows the S3 to
automatically select from the available satellites).
SBAS 2
Change 2 of 2 SBAS satellites used in the system’s position
calculation (default value is Auto, which allows the S3 to
automatically select from the available satellites).
GPS Source
Select the GPS source:
• Internal
•CAN
• Serial (S3 uses GPS data from the RS-232 source
instead of from the internal Crescent receiver)
• Radio—see “Radio Screen” on page 75 for more
information on setting radio options
Choose GPS Application
Set the type of differential corrections S3 uses to calculate a
position (S3 has two of three factory installed differential
correction types from which to choose—available options are:
SBAS (WAAS), e-Dif, L-Band, and RTK).
See Chapter 5, “Differential Correction Types” for more
information on differential corrections.
Message window
Displays system generated messages (useful when performing
diagnostics).
Refer to the Hemisphere GPS Technical Reference (go to
www.hemispheregps.com/support and click the GPS Reference
icon) for more information on system-generated messages.
 Loading...