Do you have a question about the Outsunny 840-193 840-193V01 and is the answer not in the manual?
| Brand | Outsunny |
|---|---|
| Model | 840-193 840-193V01 |
| Category | Outdoor Furnishing |
| Language | English |
Improper installation and operation can result in severe personal injury and product failure.
Read safety precautions before proceeding with assembly to prevent injury or damage.
Guidelines for safe installation and operation, including environmental and usage restrictions.
List of all parts and hardware required for assembly, with quantities.
Instructions for setting up the workspace and laying out tools and parts before assembly.
Warning about the safety wrap securing the awning arms, emphasizing caution during removal.
Instructions for assembling the roller with connectors and securing it with bolts.
Steps to connect the torsion bar with connectors and attach the arms to the torsion bar.
Instructions for connecting the front bar with connectors and securing it with bolts.
Steps for sliding the front bar feet into the front bar.
Instructions for bolting the front bar feet through the arm holes and tightening nuts.
Procedure for linking the self-locking nut into the screw using a wrench, ensuring proper alignment.
Steps for spreading fabric and valance, and guiding wire through the fabric.
Instructions for rolling the fabric onto the roller, maintaining spacing and fabric direction.
Steps for inserting fabric into the front bar groove and the roller shaft into the gear case.
Instructions for inserting the roller shaft into the support and tightening the hexagon bolt.
Instructions for assembling the valance and covers to complete the awning structure.
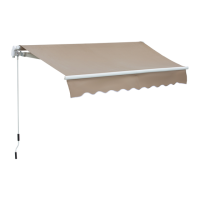
Details on product materials, surface treatment, applicable wall types, installation height, and weather suitability.
Notes on securing the awning to different wall types and avoiding insecure surfaces.
Identification of hardware components used for wall mounting, including brackets and screws.
Considerations for mounting height, ensuring clearance from doors and avoiding interference.
Formula and variables for calculating the appropriate awning pitch or angle for optimal performance.
Steps for measuring and marking the wall to determine the correct placement of wall brackets.
Information on the number of wall brackets needed based on awning size and spacing between them.
Instructions for drilling bolt holes of specific depth and diameter, ensuring vertical and horizontal alignment.
Steps for inserting expansion bolts and using a mallet for secure installation, with a note on thread protection.
Procedure for mounting wall brackets onto bolts, securing them with washers and nuts, and ensuring firmness.
Steps to install the awning onto the secured wall brackets using torsion bars and hex screws.
Instructions for completing the awning installation by attaching torsion bars and opening the awning.
Guidance on how to adjust the awning's pitch or angle using the jack bolt for optimal performance.
Warning about raising the front bar, increasing rain water pooling risk, and the need to retract the awning.
Identification of common operational mistakes and warnings regarding product damage from improper adjustments.