This document is an assembly and instruction manual for an Outsunny Garden Swing, model INbgb012_DE, 84A-211. It provides detailed guidance for assembling and maintaining the swing, along with important safety precautions and usage tips.
Function Description:
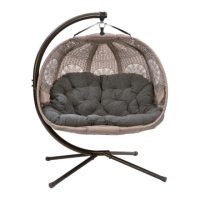
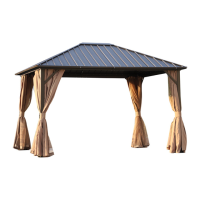
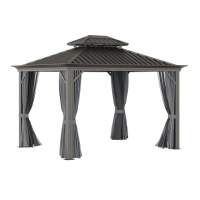
The Outsunny Garden Swing is designed for domestic use as a comfortable outdoor seating option. It features a suspended chair with a canopy, providing shade and a relaxing place to sit. The swing is intended for stable placement on a flat surface and is designed to be mounted in a sheltered location to protect it from weather elements.
Important Technical Specifications:
- Model Number: INbgb012_DE, 84A-211
- Maximum Load Capacity: 230 kg (indicated by an icon on the cover page)
- Components (Parts):
- Upper Bow (1)
- Lower Bow (1)
- Feet (4)
- Side Straps (2)
- Center Strap (1)
- Canopy (1)
- Pillow (1)
- Legs (4)
- Base Pad (1)
- Hardware:
- Big Nut (6)
- Small Nut (4)
- Medium Bolt (4)
- Small Bolt (4)
- Long Bolt (2)
- Shim (4)
Usage Features:
- Stability: The swing must be placed stably on a flat floor to ensure safe operation.
- Sheltered Mounting: The swing arm should be mounted in a location sheltered from the weather to protect the structure and users.
- Fire Safety: Keep the swing away from open flames.
- No Overload: Do not hang anything on the structure, and avoid overloading the anchors to prevent damage or accidents.
- Weather Precautions: It is advised not to use the swing during storms. For strong winds or rain, and when not in use, it is recommended to protect the swing.
- Domestic Use Only: The product is exclusively intended for domestic use.
Maintenance Features:
- Cleaning: Clean the swing with a soft fabric to preserve its appearance and material integrity.
- Regular Debris Removal: Regularly remove leaves and any water that may collect on the canvas to prevent accumulation and potential damage.
- Anchor Checks: Periodically check the anchors to ensure they are secure and in good condition.
- Storage: For long-term storage, the fabric should be completely dry and stored in a clean, dry place to prevent mold growth.
Precautions Before Assembly:
- Clean and Dry Area: Prepare a clean and dry mounting area to facilitate assembly and prevent dirt or moisture from affecting components.
- Product Inspection: Verify that the product is not damaged before beginning assembly.
- Parts Check: Ensure that all pieces are present and none are missing by comparing them against the provided parts list.
Assembly Steps Overview:
The manual provides a step-by-step visual guide for assembly, including:
- Connecting Bows: Inserting long bolts with nuts to connect the upper and lower bows.
- Attaching Legs: Inserting medium bolts with nuts to attach the legs to the lower bow structure.
- Inserting Feet: Placing the feet onto the legs.
- Expanding Canopy: Expanding the canopy roof and floor.
- Securing Canopy Ribs: Inserting small bolts with nuts to hold the front rib open and in place.
- Lever Tool Use: Inserting a lever tool into the center of the plate to assist with rib manipulation.
- Grasping Ribs: Grasping the lever tool and the first rib.
- Inserting Bolts for Ribs: Inserting short bolts and small nuts to secure the ribs.
- Squeezing Ribs: Squeezing the lever tool and front rib together until the hole is clear for bolt insertion.
- Shim Insertion (Optional): Inserting shims between the first rib and long bolt, ensuring shim teeth are against the plastic sleeve on the first rib.
- Threading Center Strap: Threading the long end of the center strap through the plate.
- Pulling Short End: Pulling the short end of the center strap through the long end until the ring is through.
- Affixing Hooks: Pulling the flap over the short end, threading the short end through the flap, and affixing hooks to small rings under the canopy.
- Installing Side Straps: Installing side straps into rib loops and pulling them through.
- Sliding Side Strap Rings: Sliding side strap rings onto the center strap.
- Positioning Top Bow: Positioning the top bow near the center strap.
- Sliding Collar: Sliding the collar into the center strap, ensuring the center strap is under the collar tabs.
- Securing Flap: Swinging the flap up and securing it onto Velcro.
- Inserting Pad and Pillow: Inserting the base pad inside the canopy and then inserting the pillow.
Safety Warnings:
- Caution is advised regarding the risks of pinching or cuts during assembly.
- The manufacturer disclaims all responsibility for damages resulting from improper installation or weather influences.