EasyManua.ls Logo

OVE TAMPA - User Manual

OVE TAMPA
33 pages
Print Icon
To Next Page IconTo Next Page
Loading...
P. 1
TAMPA ALCOVE SHOWER
INSTALLATION MANUAL | MANUEL D’INSTALLATION | MANUAL DE INSTALACIÓN
DOOR PANEL & INLINE PANEL
PANNEAU DE PORTE & PANNEAU INLINE
PANEL DE PUERTA & PANEL INLINE ALTURA
www.ovedecors.com | customerservice@ovedecors.com
Questions, problems, need help?
Call our customer service department at
1-866-839-2888, 8 a.m. - 5 p.m., EST, Monday - Friday
Questions, problèmes ou besoin d’aide?
Contactez notre service à la clientèle au
1-866-839-2888, du lundi au vendredi de 8 h à 17 h HNE.
Preguntas, problemas o necesita ayuda?
Llame a nuestro departamento de servicio al cliente al
1-866-839-2888, 8 am. – 5 pm., HDE, Lunes a Viernes.
2020-12-08
Question and Answer IconNeed help?

Do you have a question about the OVE TAMPA and is the answer not in the manual?

Summary

Shower Dimensions

Shower Width (W)

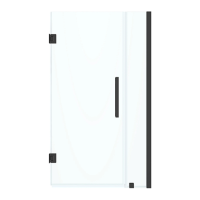
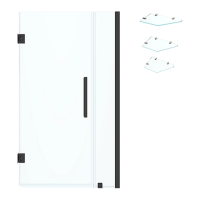
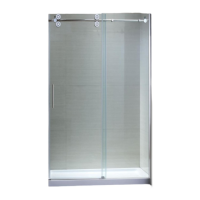
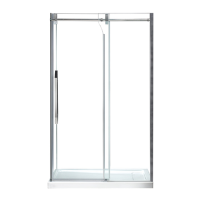
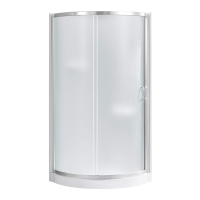
Width of the shower from the leftmost edge to the rightmost edge.

Shower Enclosure Depth (D)

Depth from the front edge to the back edge, including the base.

Shower Total Height (H)

Height from the floor to the top of the shower, including the base.

Shower Height (H2)

Height from the floor to the top of the shower, excluding the base.

Shower Overall Depth (A)

Depth from the front edge to studs or finished wall.

Finished Shower Depth (B)

Depth from the front edge to the finished wall.

Shower Overall Width (C)

Width between side walls or stud to stud.

Finished Shower Width (E)

Width from finished wall to finished wall.

Door Opening (O)

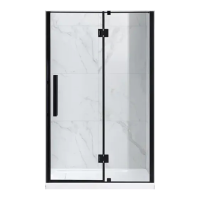
Width of the door opening.

Distance Between Handle Holes (P)

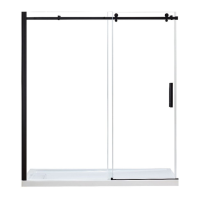
Center to center distance of handle screw holes.

Front Wall Track Installation Distance (Y)

Distance from back finished wall to front track center.

Side Wall Track Installation Distance (X)

Distance from side finished wall to side track center.

Fixed Panel (FP)

Total width of the glass for the fixed panel.

Door Panel (DP)

Total width of the glass for the door panel.

Inline Panel (IP)

Total width of the glass for the inline panel.

Side Panel (SP)

Total width of the glass for the side panel.

Installation Structure Overview

Package Content

Part List

Wall Track (Fixed Panel)

Glissière for the fixed panel.

Fixed Panel Track

Rail for the fixed panel.

Fixed Panel

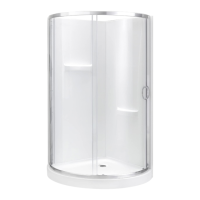
The main fixed glass panel.

Door Panel

The main glass door panel.

Support Bar Anchor

Anchor for the support bar.

Support Bar

The support bar itself.

Support Arm Bracket

Bracket for the support arm.

Fixed Panel Vertical Seal Strip

Vertical seal for the fixed panel.

Magnetic Strip

Magnetic strip for door closure.

Shower Door Hinge

Hinges for the shower door.

Fixed Panel Bottom Seal Strip

Bottom seal strip for the fixed panel.

Glass Panel Clamp

Clamp to support glass panels.

Door Bottom Seal Strip

Bottom seal strip for the door.

Door Handle

Handle for the shower door.

Magnetic Track

Track for the magnetic strip.

Wall Track (with Q)

Wall track for the magnetic track.

Complete Hardware Kit

All necessary hardware for assembly.

Supplied Hardware List

Tools Required

Reversibility

Safety Information

Safety Notice

Preparation

Wall Track Installation

Positioning and Securing Wall Track

Position, level, drill, anchor, and secure the wall track.

Silicone Application and Panel Insertion

Apply silicone to track and insert fixed panel, allowing it to dry.

Fixed Panel Installation

Bottom Seal and Panel Insertion

Install bottom seal strip and insert fixed panel into wall track.

Shower Door Installation

Hinge Preparation and Mounting

Disassemble, install, and align door hinges on the fixed panel.

Door Seal Strip Installation

Install vertical and bottom seal strips on the door and fixed panel.

Magnetic Strip and Track Assembly

Insert magnetic strip on door and attach magnetic track to wall track.

Positioning and Marking Wall Track

Close door, level wall track, and mark its position on the wall.

Glass Panel Clamp and Handle Installation

Install glass panel clamp and door handle.

Sealing

Trim Support Arm

Support Arm Installation

Mounting and Wall Preparation

Mount arm components, mark wall, and prepare wall for anchors.

Arm Adjustment and Securing

Reinstall arms, adjust anchor angle, and secure components.

Final Adjustments and Tightening

Loosen, adjust, and retighten screws for precise panel alignment.

Maintenance and Care

Limited Product Warranty

Annex Guidelines

Annex Dimensions Drawings

Annex Imperial Measurements

Annex Metric Measurements

OVE TAMPA Specifications

General IconGeneral
BrandOVE
ModelTAMPA
CategoryBathroom Fixtures
LanguageEnglish

Related product manuals