05INSTALLATION
2.1 INSTALLING THE SSD
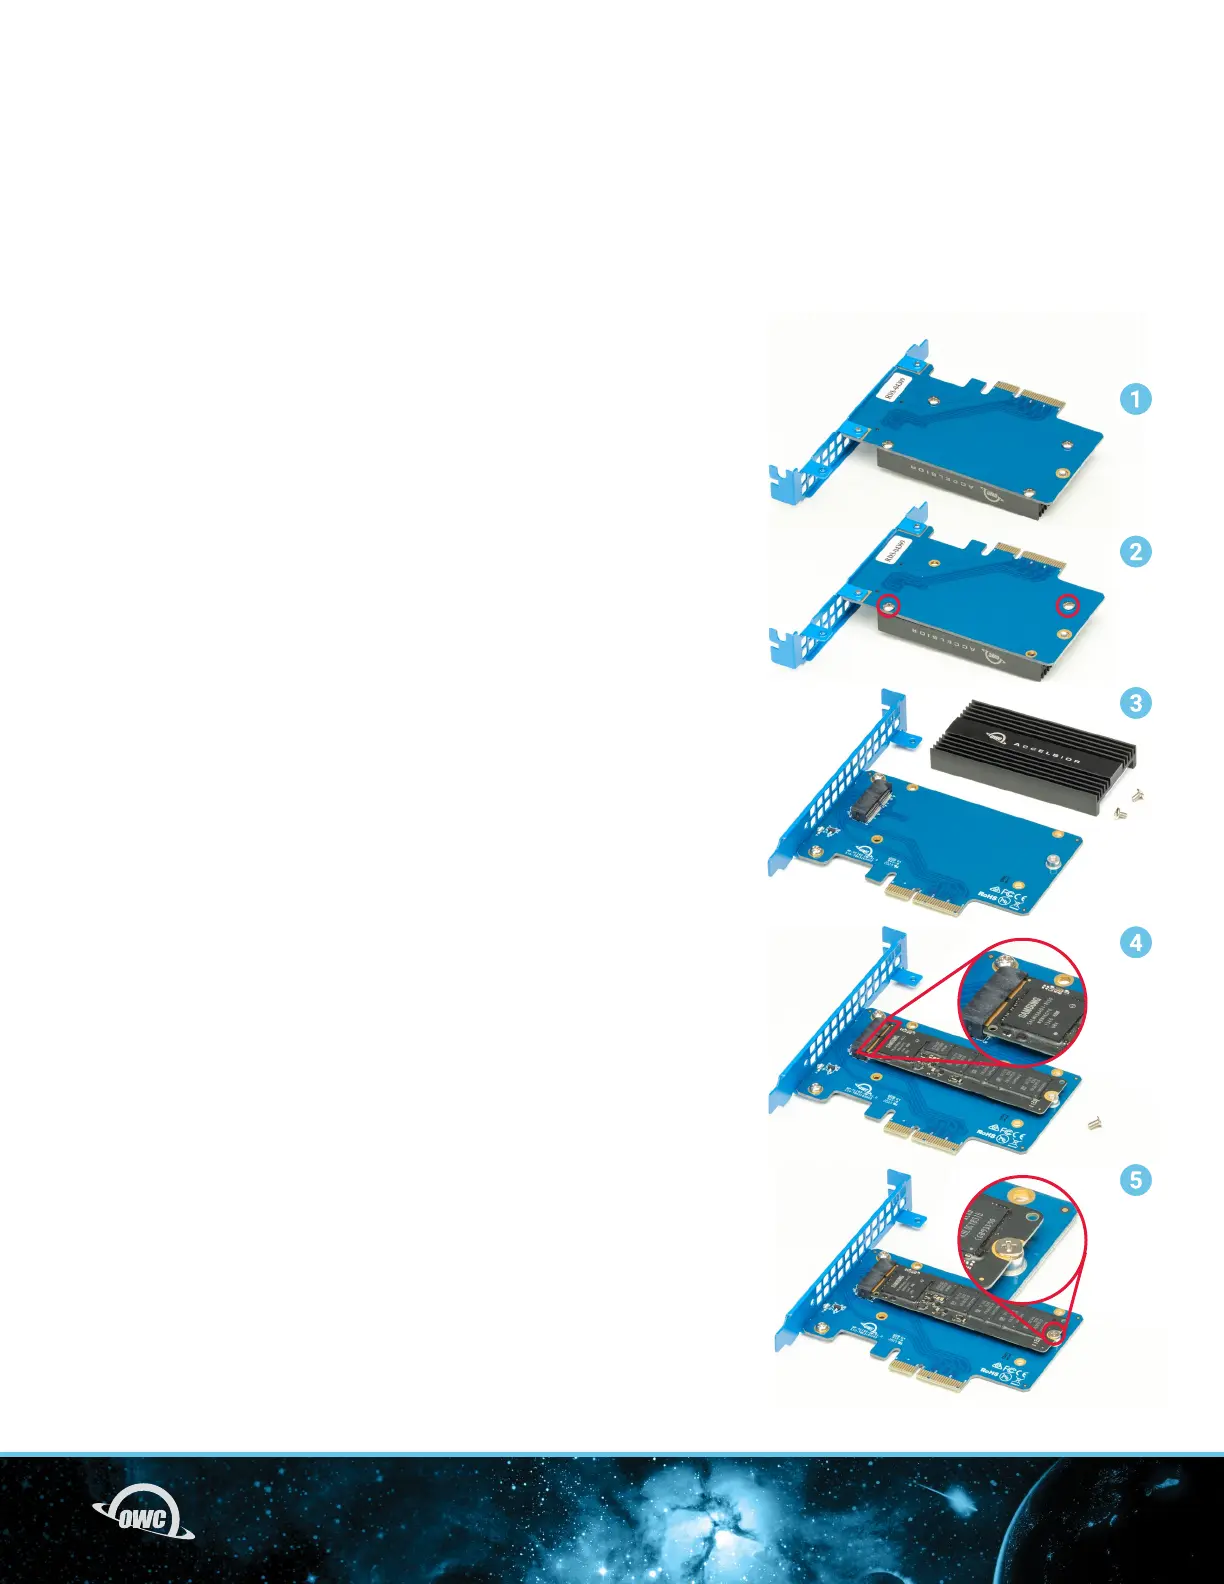
The steps below show how to install the SSD. Note that Steps 1-5 are
the same for all drive types. Steps 6 and 7 are required only if your SSD
does not include a heat sink. Please see Section 3.2 if you are unsure;
our Support Team is happy to assist you with next steps
1. Remove the device from its packaging and set it on a flat work
surface, heat sink facing down.
2. Remove the two highlighted screws and set them aside; this will
detach the heat sink on the opposite side.
3. Turn the card over and set the heat sink aside.
4. Take the SSD (an Apple model is shown here) and align its
connector with the slot on the PCBA, then insert the drive until fully
seated. Minimal force is required; if the drive does not seat, don’t
apply more force, instead remove the drive, re-align it and try again.
5. Use the at-top screw from the included packet, to ax the drive to
the post.
INSTALLATION