06INSTALLATION
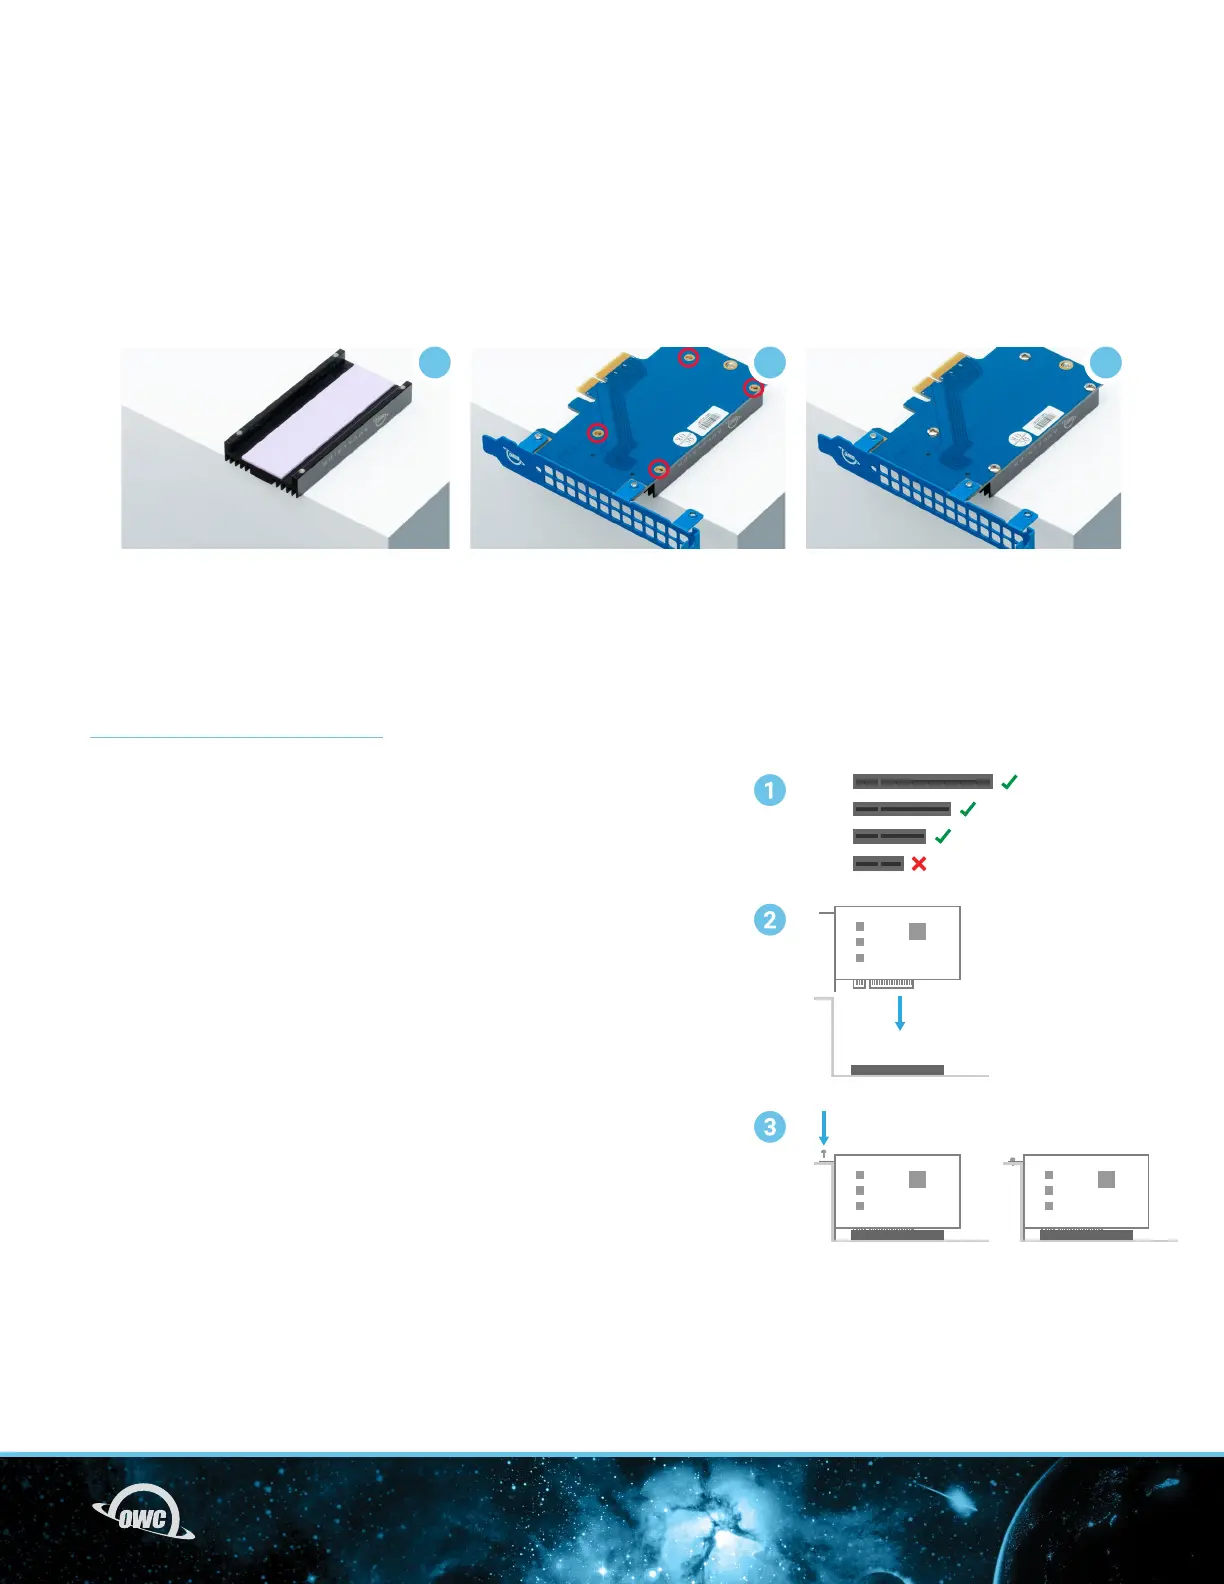
6. Place the heat sink (shown in 6a) near the edge of a table.
With the PCIe card face down, align the four screw holes on the card
(shown in 6b) with the corresponding ones on the heat sink. Then,
rest the card on the heat sink. Note the bracket should rest over the
edge of the work surface so that the heat sink and card are
perfectly at.
7. To complete the installation, re-ax the two screws that were
removed in Step 2, and ax the two additional screws from the
included packet, at the locations highlighted in image 6b.
2.2 INSTALLING THE CARD IN A HOST COMPUTER OR PCIE ENCLOSURE
Please follow the steps below to install the Accelsior 1A PCIe SSD into a host computer or enclosure with a
compatible PCIe slot. Note: this card is susceptible to invisible damage if not protected during installation.
For proper grounding, we recommend using a grounding strap. Work in a clean, static-free area, and avoid
wearing clothing that retains static charges. Please visit this URL for more information:
www.owc.com/support/anti-static
1. Disconnect all power and powered devices from your desktop
computer or Thunderbolt PCIe expansion chassis, then open the
case so that the compatible PCIe slot is visible and accessible.
2. Align the PCIe connector on the Accelsior 1A SSD with the
compatible slot then carefully seat the card into the slot as shown
at right. If there is resistance, do not force the card into the slot.
Remove it, re-align the card’s connector and try again.
3. Once the card is fully seated affix the included screw to the
bracket as shown. Notes: a) no auxiliary power connectors or other
attachments are required to use this SSD; b) Some computers and
PCIe chassis may use a plate with spring-loaded screws or other
method to secure PCIe cards; please follow the manufacturer’s
recommended method.
6a
7
6b
x8
x16
x1
x4