EasyManuals Logo
Home>OWC>Storage>Mercury Elite Pro Dual

OWC Mercury Elite Pro Dual Assembly Manual And User Guide

OWC Mercury Elite Pro Dual
16 pages
To Next Page IconTo Next Page
To Previous Page IconTo Previous Page
Page #7 background imageLoading...
Page #7 background image
OWC MERCURY ELITE PRO DUAL
SYSTEM SETUP
5
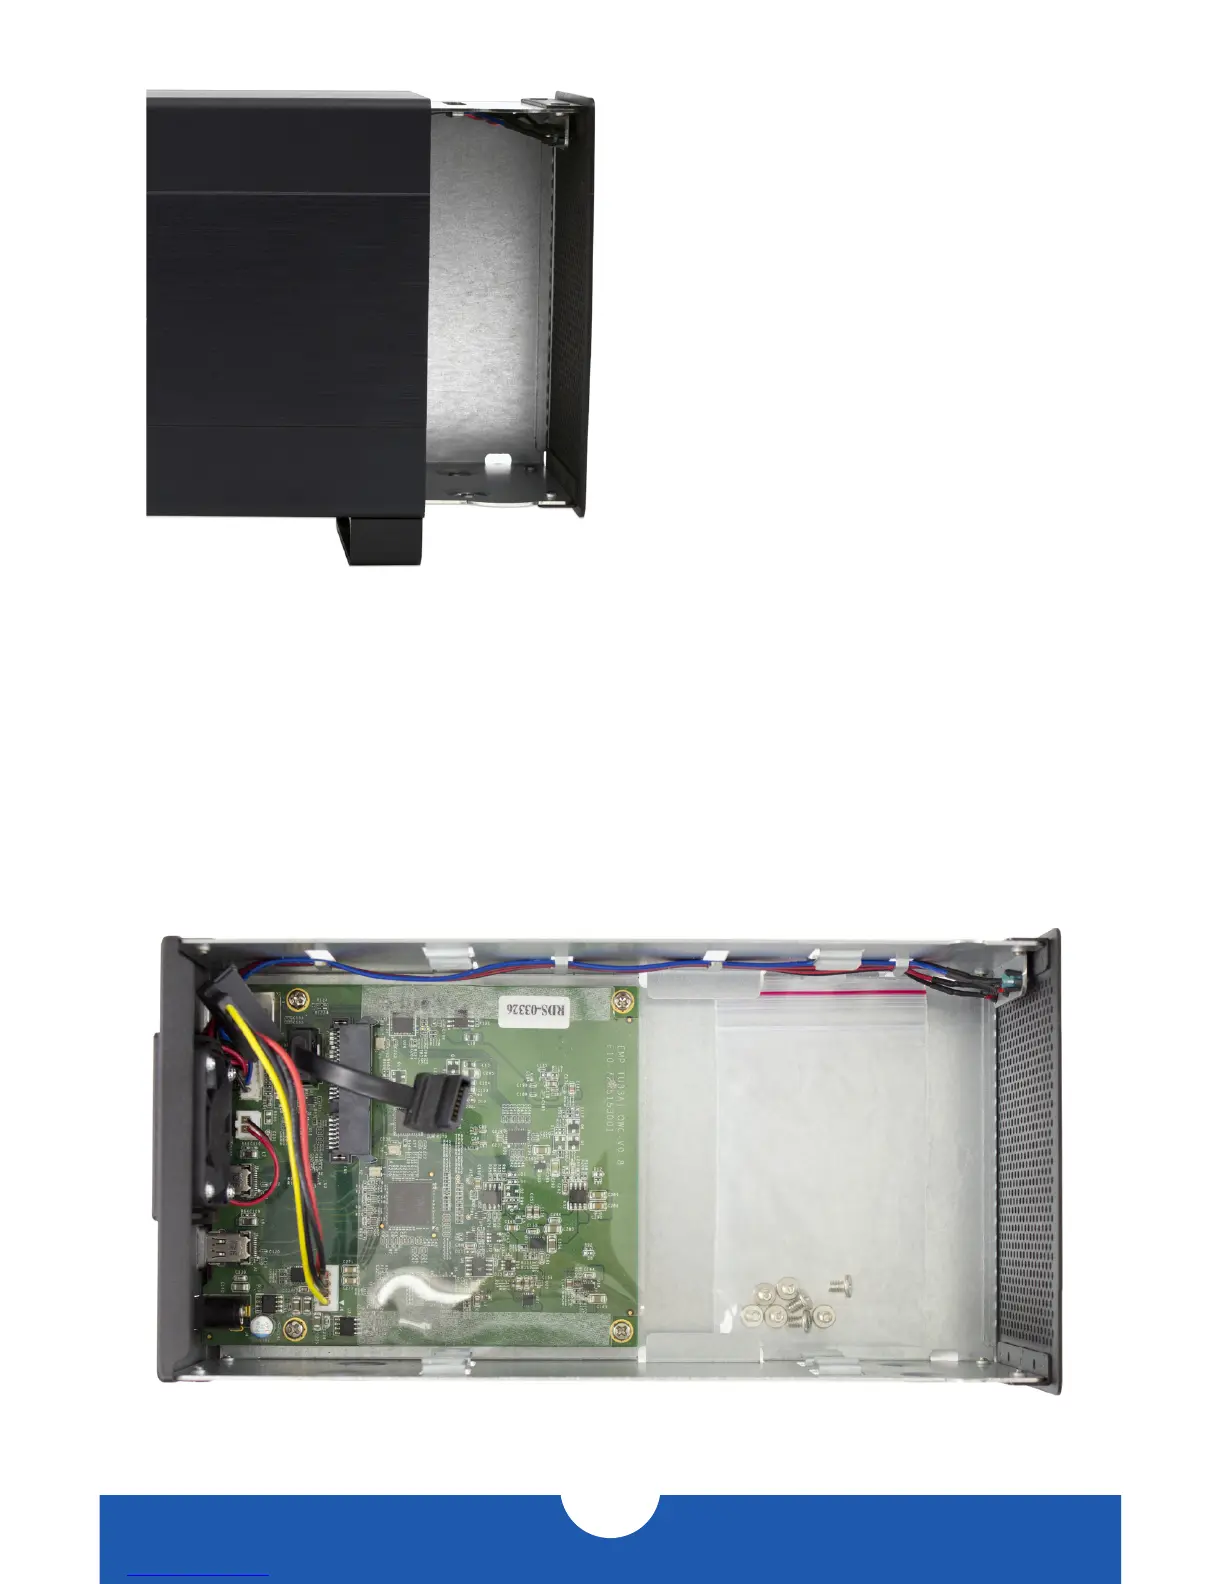
2. Once the two screws have been removed,
slide the inner chassis out of the front of the
outer enclosure, as shown to the right. Start
by pushing on the rear of the inner chassis,
then when you are able to get a grip on the
front grill of the inner chassis, pull it the rest
of the way.
3. When removed from the outer enclosure, the inner chassis will appear as shown below.
Remove the packet of screws and use the screws as directed later in the assembly
instructions. Note that the plastic shield over the circuit board is there by design and
should not be removed.

Other manuals for OWC Mercury Elite Pro Dual

Questions and Answers:

Question and Answer IconNeed help?

Do you have a question about the OWC Mercury Elite Pro Dual and is the answer not in the manual?

OWC Mercury Elite Pro Dual Specifications

General IconGeneral
Hot-swapYes
RAID levels0, 1
Storage drive size3.5 \
Total storage capacity8000 GB
Number of storage drives supported2
InterfaceThunderbolt
Product colorAluminum
Storage temperature (T-T)-40 - 65 °C
Operating temperature (T-T)5 - 42 °C
Storage relative humidity (H-H)5 - 95 %
Operating relative humidity (H-H)8 - 90 %
Cache internal128 MB
Weight and Dimensions IconWeight and Dimensions
Depth228.6 mm
Width71.2 mm
Height133.4 mm

Related product manuals