MERCURY ELITE PRO Qx2
DEVICE SETUP
5
2.2 QUICK START
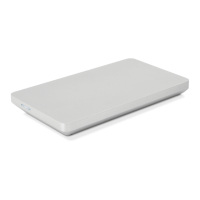
If you purchased the OWC Mercury Elite Pro Qx2 with drives, they have been pre-configured
as a RAID 5 array and the OWC Drive Guide formatting utility has been pre-installed to assist
you with the formatting process. Follow the steps below to use the Drive Guide to format
your Qx2 for Mac (OS X 10.4 and later) or Windows (XP and later).
1. Plug in your Qx2, then connect it to your computer using the proper cable. If you prefer to
use a different formatting utility, do so at this time and skip to Section 2.3.
2. Your drive will show up as “OWC SETUP”. Open your drive to view its contents.
3. Double-click the OWC Drive Guide application.
4. Follow the simple on-screen instructions to complete the formatting process.
5. Once the formatting is finished the drive is ready to use.
NOTICE: If you purchased the Qx2 without drives and are adding your own pre-formatted
drives, be aware that the default mode is set to RAID 5. This means the Qx2 will erase any
pre-existing data or formatting on the drives that you install in the Qx2. This is true of all
modes except Independent Drive Mode. See Section 2.3.2 for more information.
2.3 RAID SETTINGS
2.3.1 Setting the RAID Mode
IMPORTANT NOTE: Drives of identical model and capacity are required for
all RAID types other than independent drive mode and span mode.
To switch RAID modes, follow these three steps (continued on next page):
1. With the Mercury Elite Pro Qx2 turned off, adjust the RAID dial so that the arrow is
pointing to the desired RAID level (see section 1.5.2, RAID Selector Dial).
2. While using a paperclip or small screwdriver to hold down the “Confirm” button, turn
on the Qx2. The Qx2 will build the newly selected RAID, during which time the LEDs
will flash. This process will take 20-30 seconds. When the LEDs stop flashing, release
the “Confirm” button. The Qx2 will show up on your computer as an unformatted
volume (or individual disks if you selected independent drive mode).
3. Format the new volume. Formatting instructions can be found at:
www.owcdigital.com/format
WARNING: Changing the RAID mode will create
a new array and destroy all data on the drives.
Changing the RAID mode will also require you to
reformat the array afterward.

 Loading...