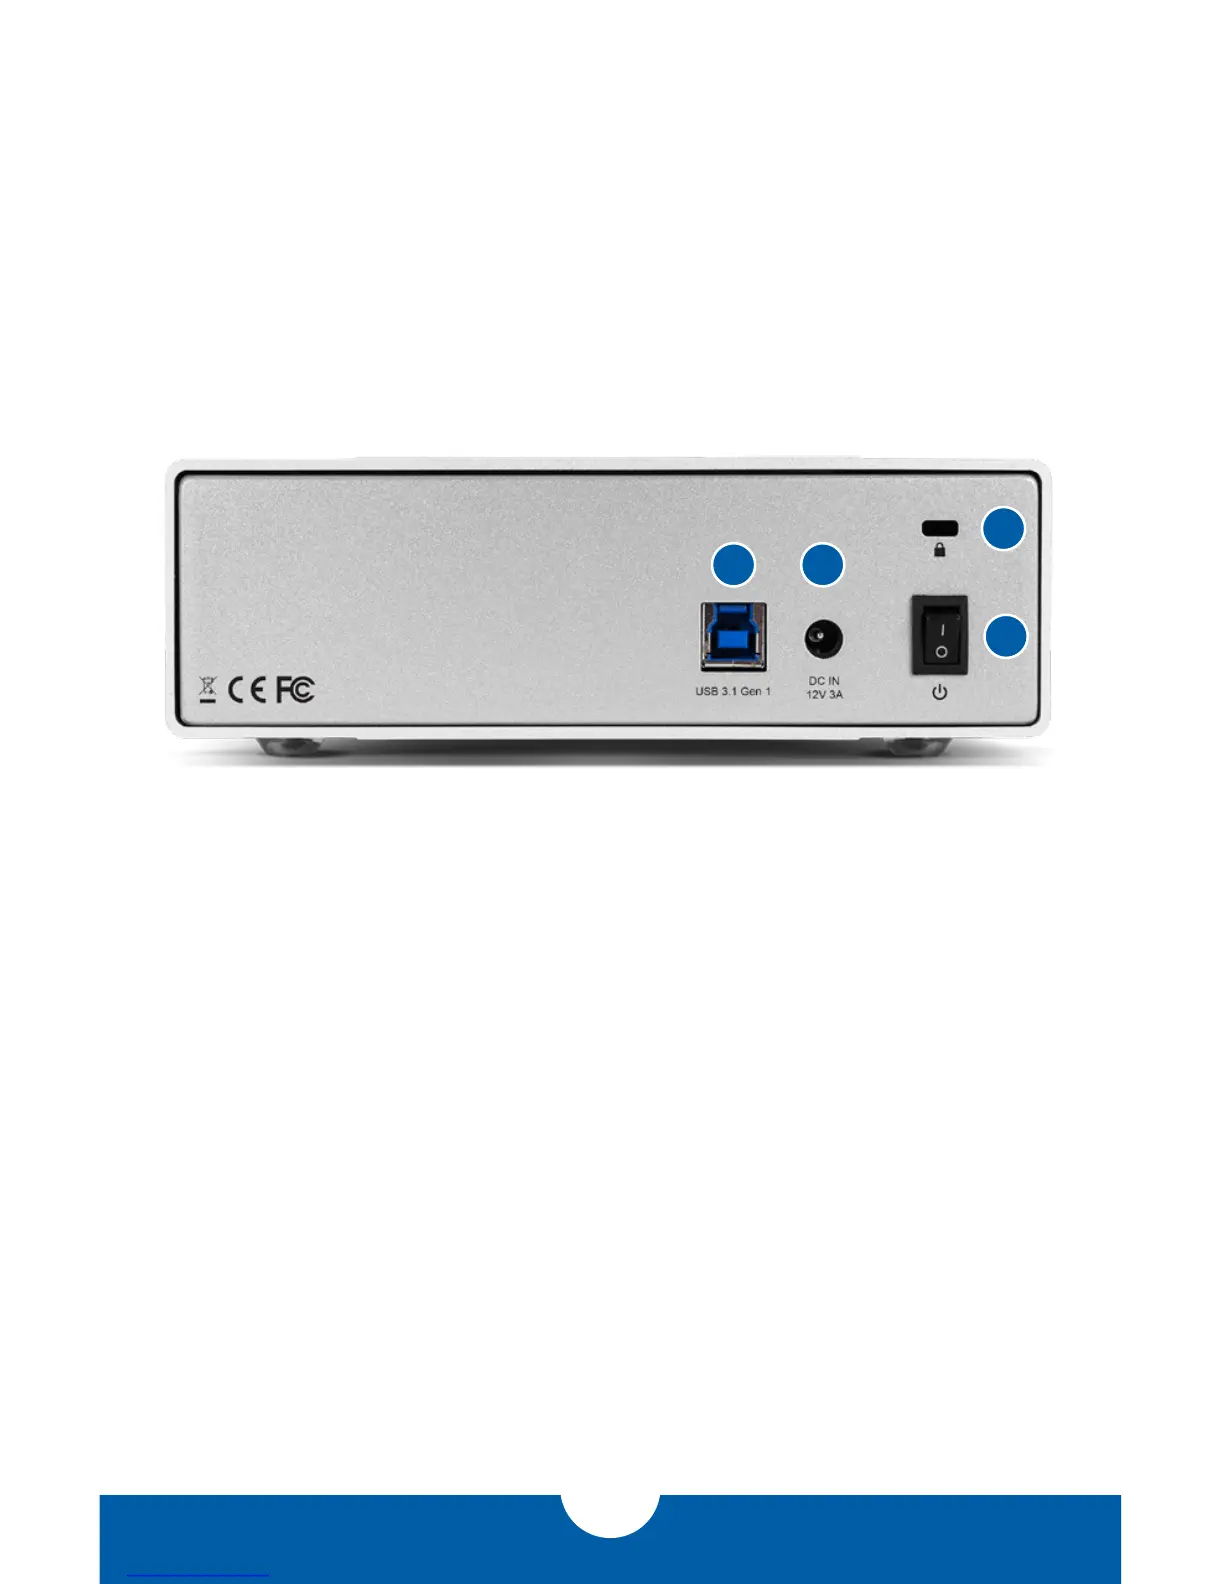
EasyManuals Logo

OWC Mercury Pro User Manual

OWC Mercury Pro
8 pages
To Next Page IconTo Next Page
To Previous Page IconTo Previous Page
Page #5 background imageLoading...
Page #5 background image
OWC MERCURY PRO
3
1.5 REAR VIEW
1.6 QUICK START
Plug the power supply into the DC power port on the OWC Mercury Pro and into a power
outlet. Connect the included USB 3.1 Gen 1 cable to your computer and the Mercury Pro,
then power on the Mercury Pro using the Power switch.
Notes: always unmount and eject the disc before powering off the optical drive.
1
3
4
1. USB 3.1 Gen 1 port — Connect the included USB 3.1 Gen 1 (Standard-A to Standard-B)
cable here.
2. DC Power — Connect to the included power supply here.
3. Kensington® Security Slot — Connect a security tether here.
4. Power Switch — Use this switch to power the drive on or off.
INTRODUCTION
2

Other manuals for OWC Mercury Pro

Questions and Answers:

Question and Answer IconNeed help?

Do you have a question about the OWC Mercury Pro and is the answer not in the manual?

OWC Mercury Pro Specifications

General IconGeneral
Storage drive size5.25 \
Number of storage drives supported-
Supported storage drive interfacesSerial ATA, Serial ATA II
USB version3.2 Gen 1 (3.1 Gen 1)
USB connectivityYes
USB connector typeUSB Type-A
USB connector genderMale
MaterialAluminum
Product colorBlack, White
Input voltage12 V
AC adapter output current3 A
Cables includedUSB
Weight and Dimensions IconWeight and Dimensions
Width168 mm
Height58 mm
Weight1100 g
Cable length0.6 m

Related product manuals