08DEVICE SETUP
8. Make sure the ports on the back of the inner chassis and
the port cut-outs on the back of the outer enclosure are
oriented the same way, then slide the inner chassis into the
outer enclosure so that the chassis’ front plate is flush with
the cover’s front edge.
9. Re-affix the screws you removed in Step 2.
This completes the assembly process.
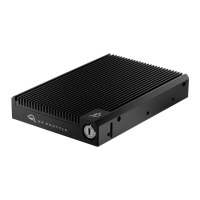
Once you’ve completed the installation steps, you can
format and/or RAID the M.2 drives using SoftRAID or the
RAID Assistant feature in Apple’s Disk Utility application,
and then begin using the drives. You can also format and
use the individual M.2 drives as independent volumes,
or a mix of independent and RAID volumes.
9
8
8
2.5 USAGE NOTES
- When using this device with a ThunderBay Flex 8, the top-left drive bay is recommended because it
provides the greatest PCIe bandwidth, to be shared among the drives installed in the Shuttle. The other 3
bays in the top row will function, but at potentially much slower speeds, unless you’re using a single M.2
drive in the shuttle.