you may choose to y in the bottom part of the weight range. Remember, you can
always add ballast for when conditions are stronger.
BASIC FLIGHT TECHNIQUES
To familiarise yourself with the glider it is a good idea to perform practice inations and
small ights on a training hill. This will enable you to set up your equipment correctly. If
in any doubt please get advice and help from your local dealer or instructor.
Preparation
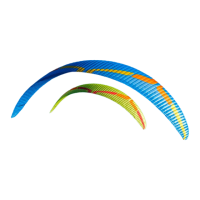
Lay out the Mojo 2 on its top surface in a pronounced arc, with the centre of the wing
higher than the tips. Lay out the lines one side at a time. Hold up the risers and starting
with the brake lines, pull all lines clear. Repeat with the C, B and A lines, laying the
checked lines on top of the previous set, and making sure no lines are tangled, knotted
or snagged. Mirror the process on the other side.
Take-off checklist:
1. Check reserve parachute - pin in and handle secure
2. Helmet on and fastened
3. All harness buckles closed - check leg-loops again
4. Karabiners and maillons tight
5. Holding the A's and your brake handles
6. Leading edge open
7. Aligned directly into wind
8. Airspace and visibility clear
Launching
Your Mojo 2 will launch with either the forward or reverse techniques.
Whilst inating your wing, you should hold both of the A risers (main A and baby A) on
each side. Once clipped in, and you have gone through the take-off check list (above),
stand central to the wing to ensure an even and progressive ination.
Forward Launch - Nil to Light winds
When the wind is favourable, move forward positively: your lines should become
tight within one or two steps. The Mojo 2 will immediately start to inate. You should
maintain a constant pressure on the risers until the wing is overhead.
Don't pull down or push the risers forward excessively, or the leading edge will deform
and possibly collapse making taking-off more difcult and potentially dangerous.
Move smoothly throughout the entire launch, there is no need to rush or snatch at it.
You should have plenty of time to look up and check your canopy before committing
yourself.
Once you are happy that the Mojo 2 is inated correctly, accelerate smoothly off the
launch.
Reverse Launch -Light to Strong Winds
Lay out your Mojo 2 as you would for the forward launch. However, this time turn to
face the wing, passing one entire set of risers over your head as you turn. Now you
can pull the Mojo 2 by its A-risers. Once the wing is overhead, brake it gently, turn and
launch.
In stronger winds, be prepared to take a few steps towards the glider as it inates.
This will take some of the energy out of the glider and it will be less likely to overy
you. This reverse-launch technique can be used in surprisingly light winds too.
IMPORTANT : Never take off with a glider that is not fully inated or if you are
not in control of the pitch/roll of your wing.
Practice ground handling a lot! It's great fun, and will give you a much better feel for
your Mojo2's ight characteristics. It will also improve your overall enjoyment of ying
by making your launches easier.
In Flight Characteristics
The Mojo 2 shows no unusual ying characteristics, consequently it is suitable for a
very wide range of pilot. In turns, the Mojo 2 is smooth and co-ordinated, on glides it
remains solid and well pressured, even through the accelerated speed range. It has a
very high resistance to both collapses and stalls. However, to get the most out of your
Mojo 2 we advise you to consider the following information:
Normal Flight
Flying at 'trim speed' (hands-up), the Mojo 2 will achieve its 'best
glide' speed for normal air. You should y at this speed when gliding downwind or
when the air is not excessively sinking.
For better penetration in headwinds and improved glide performance in sinking
air, crosswinds or headwinds, you should y faster than trim speed by using the
accelerator system. Using up to half bar does not degrade the glide angle or stability
signicantly and will improve your ying performance, as you will reach the next
thermal faster and higher. At full speed the Mojo 2 is stable; however we recommend
that you do not y at full speed close to the ground or in turbulence.
By applying the brakes approximately 30cm, the Mojo 2 will achieve its minimum-sink
rate; this is the speed for best climb and is the speed to use for thermalling and ridge
soaring.
Turning
To familiarize yourself with the Mojo 2 your rst turns should be gradual and
progressive.
To make efcient and coordinated turns with the Mojo 2 rst look in the direction you
want to go, then lean into it. Your rst input for directional change should be weight-
shift, followed by the smooth application of the brake until the desired bank angle is
6