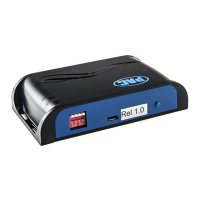
EasyManua.ls Logo

PAC BCI-CH21 - User Manual

PAC BCI-CH21
17 pages
Print Icon
To Next Page IconTo Next Page
Loading...
BCI-CH21
Navigation Unlock & Reverse Camera Input
Interface for Chrysler/Dodge/Jeep/Ram Vehicles
Pacific Accessory Corporation
J1850
Class 2
VPW
Class 2
J1850
100011101111001001101100
111010000110110111001100
Arbitration
CRC
100011101111001001101100
111010000110110111001100
Class 2
Class 2
J1850
The BCI-CH21 is a Navigation Unlock integration interface that allows the factory navigation features
of your Chrysler/Dodge/Jeep radio or the reverse camera to be used by the passenger at anytime. The
BCI-CH21 will program the factory radio to allow the addition of a reverse camera input if the vehicle
is not equipped with one from the factory (reverse camera sold separately). The interface also offers
extra features such as: VES activation & Audio/Video input capabilities.
Introduction & Features
Important Notes
1. It is very important to follow the exact sequence of installation steps as listed below. Failure to do so will result in the interface not
working as intended.
2. If you change the dipswitch settings, you must disconnect and reconnect power for the change to take effect
3. The navigation unlock feature must be activated every time the key is cycled.
4. The AVS21 A/V switcher must be used in order to use more than one video source with the BCI-CH21.
5. If the vehicle is equipped with an external VES Player, the RCAs labeled “Audio/Video To Head Unit” will not allow an additional input
to the head unit. You must use the factory A/V aux in located in the rear of the vehicle.
6. If the vehicle’s reverse lights come on when the reverse camera feature is engaged the diode is not wired properly. Please refer to “Fig.
C” on page two for proper diode wiring.
7. If the factory radio does not come on or “ickers” off & on, the factory amplier does not turn on or you are receiving audio on only one
side of the vehicle, please make sure that the male pins in the BCI-CH21 plug are not bent or out of place.
8. In order to see the text generated by the BCI-CH21 on the multi-function display (MFD), it must be set to display audio text.
1. Turn on the dipswitches that correspond with the features you want to add.
These dipswitches must be set to the proper conguration before connecting the
interface to the vehicle.
2. Depending on the vehicle you are installing the BCI-CH21 into, you may need to
cut the white/red loop in the harness. Please refer to the chart to the right to see if
you need to cut the loop. If your vehicle is listed, cut the loop. If not, do not cut the
loop. Please see the Troubleshooting section on page 4 for further explanation of
the loop and its purpose.
3. If the vehicle is not equipped with an MFD or external Uconnect module mount
the LED in a location that is visible to the driver. In vehicles equipped with a Multi-
Function Display (MFD) in the instrument cluster or an external Uconnect module
it is not necessary to connect and mount the LED. The best way to determine if
the UConnect is external is if the vehicle has an external iPod or USB input (not
including the one built into the front of the radio).
4. Remove the factory radio and disconnect the factory harness(es).
5. Connect the BCI-CH21 harness to the back of the factory radio.
6. If adding reverse camera or additional A/V inputs, connect the BCI-CH21-AUX
Harness to the back of the factory radio.
7. Connect the aftermarket reverse camera’s video output to the female yellow RCA
located on the radio side of the BCI-CH21-AUX harness. Use the BCI-CH21’s
red camera turn on wire to power the aftermarket reverse camera. If you are only
using the BCI-CH21 as a navigation unlock, this step is not necessary.
Installation Steps
DIP
1 2 3 4
ON
Reverse Camera Navigation Unlock VES Not Used
1 2 3 4
SET FEATURE DIPSWITCHES TO THE ON POSITION
Make Model Year
Chrysler 200 20112014
Chrysler 300 20082010
Chrysler Sebring 20082010
Dodge Avenger 20082013
Dodge Caliber 20102012
Dodge Challenger 20082014
Dodge Charger 20082010
Dodge Dakota 20082010
Dodge Durango 20082009
Jeep Commander 20082010
Jeep Compass 20092013
Jeep GrandCherokee 20082010
Jeep Liberty 20082013
Jeep Patriot 20082015
CutRed/WhiteLoopinTheseVehicles
Rev. 051915 ***Only applicable to revision 1.1.2 firmware on BCI-CH21***

Other manuals for PAC BCI-CH21

Question and Answer IconNeed help?

Do you have a question about the PAC BCI-CH21 and is the answer not in the manual?

Summary

BCI-CH21 Product Overview and Installation

Important Notes and Safety Precautions

Critical guidelines for proper installation, operation, and safety warnings for the BCI-CH21.

Core Installation Steps

Initial steps for installing the BCI-CH21, including DIP switch settings and harness connections.

Vehicle-Specific Installation Procedures

Reverse Camera Wire Location (Caravan;T&C;Routan)

Detailed instructions for locating the reverse camera wire in specific Chrysler/Dodge/VW models.

Reverse Camera Wire Location (Journey)

Detailed instructions for locating the reverse camera wire in Dodge Journey vehicles.

Operation and Feature Activation

Operation with Steering Wheel Controls (SWC)

How to activate navigation unlock and reverse camera using steering wheel buttons.

Operation Without Steering Wheel Controls

Activating navigation unlock using radio controls when SWC is unavailable.

VES Mode and Advanced Features

Activating VES Mode

Steps to access and utilize the Video Entertainment System (VES) feature.

Connecting VS41 Camera Switcher

Guide for integrating the VS41 for multiple camera inputs and system overview.

Configuration and Troubleshooting

PAC App Programming Guide

Instructions for programming the BCI-CH21 with custom features using the PAC app.

Troubleshooting and LED Status Interpretation

Solutions for common issues and understanding the module's LED indicators.

Overview

The PAC BCI-CH21 is a navigation unlock and reverse camera input interface designed for Chrysler, Dodge, Jeep, and Ram vehicles. This device allows passengers to use the factory navigation features of their vehicle's radio at any time, even while the vehicle is in motion. It also enables the addition of an aftermarket reverse camera if the vehicle was not originally equipped with one from the factory (reverse camera sold separately). Beyond these core functions, the BCI-CH21 offers additional features such as VES (Video Entertainment System) activation and Audio/Video input capabilities.

Important Technical Specifications and Notes:

  • Firmware Compatibility: The device is only applicable to specific firmware revisions. Early versions (Rev. 051915) are compatible with revision 1.1.2 firmware, while later versions (Rev. 090916) require revision 1.1.6 firmware, and the most recent versions (Rev. 032317) require revision 1.1.9 firmware or higher. For app programmability, the BCI must be programmed with revision 9 or higher firmware.
  • Installation Sequence: Strict adherence to the installation steps is crucial for the interface to function as intended.
  • Dipswitch Settings: Any changes to the dipswitch settings require disconnecting and reconnecting power for the changes to take effect.
  • Navigation Unlock Activation: The navigation unlock feature must be activated every time the key is cycled.
  • A/V Switcher Requirement: If using more than one video source with the BCI-CH21, an AVS21 A/V switcher (sold separately) is required.
  • VES Player Compatibility: If the vehicle has an external VES Player, the RCAs labeled "Audio/Video To Head Unit" on the BCI-CH21-AUX harness will not allow an additional input to the head unit. In this case, the factory A/V aux input located in the rear of the vehicle must be used.
  • Reverse Light Issue: If the vehicle's reverse lights come on when the reverse camera feature is engaged, it indicates improper diode wiring.
  • Radio/Amplifier Issues: If the factory radio does not turn on, flickers, or if the factory amplifier does not turn on (resulting in audio on only one side), ensure that the male pins in the BCI-CH21 plug are not bent or out of place.
  • MFD Text Display: To view text generated by the BCI-CH21 on the multi-function display (MFD), the MFD must be set to display audio text.
  • CAN Termination Resistor (Harness Loop): The loop in the BCI-CH21-HAR serves as a CAN termination resistor. Depending on the vehicle, this loop may need to be cut or reconnected. Incorrect configuration can lead to the radio not turning on and an amber LED blinking.
  • VS41 Compatibility: For adding front and blind spot cameras, a VS41 Intelligent 4 Camera Switcher (sold separately) is needed. The BCI must have firmware version 6 or higher to support the VS41. When using the VS41 with the BCI-CH21, the input triggers on the VS41 do not need to be manually wired; the 10-pin harness from the VS41 connects to the Expansion Port on the BCI-CH21.

Usage Features:

  • Reverse Camera Input:
    • Aftermarket Camera: Dipswitch 1 set to ON enables the aftermarket reverse camera. The aftermarket camera's video output connects to the female yellow RCA on the BCI-CH21-AUX harness. The BCI-CH21's red camera turn-on wire powers the aftermarket camera.
    • Forced Factory Camera (Caravan/Town & Country/Routan/Journey): For specific vehicles equipped with a factory reverse camera, the BCI-CH21 can force its activation. This involves locating the white/green reverse camera wire in the rear harness (or liftgate for Journey), testing it for 12V in reverse, and connecting the BCI-CH21's red camera turn-on wire to it using a diode. The diode prevents reverse lights from activating when the forced camera feature is used. Programmable Output 1 (10A, set to "Accessory" by default) can be used to power the factory reverse camera.
    • Activation: The forced reverse camera can be activated by pressing and holding the "Preset" button on the steering wheel controls (SWC) for at least two seconds. The dash mount LED will blink, and the rearview camera image will display. If the vehicle lacks SWC, an on-demand activation toggle switch can be used.
  • Navigation Unlock:
    • Activation (Vehicles with SWC): Press and hold the "Source" button on the SWC for at least two seconds. If the vehicle has an MFD or external Uconnect module, it will display "Confirm Safe Passenger Use." Press the "Source" button again within 5 seconds to acknowledge "safe use" (agreeing that use is by the passenger when in motion) and activate the BCI-CH21. The MFD/radio will display "Acknowledged," and the dash mount LED will illuminate green.
    • Activation (Vehicles without SWC): Start with the factory radio on. Turn the radio off then on within three seconds by pressing the volume knob. The dash mount LED will illuminate red. Turn the radio off then on again within three seconds to acknowledge "safe use" and activate the BCI-CH21. The dash mount LED will illuminate green.
    • De-activation: For SWC-equipped vehicles, press and hold the "Source" button for at least two seconds. For vehicles without SWC, turn the radio off then on within three seconds.
  • VES Mode Activation:
    • Dipswitch 3 set to ON activates VES mode.
    • Access by pressing the "Media" button on the factory radio, then the "VES" icon, and then the "View Video" icon on the screen.
    • Video and audio from the "Audio/Video To Head Unit" RCAs on the BCI-CH21-AUX-HAR will be displayed.
    • The "Audio/Video To Rear Screen" RCAs on the BCI-CH21-AUX-HAR only output A/V from the internal DVD player and cannot output video from other sources.
  • Additional A/V Inputs: Connect A/V outputs from the source to the A/V inputs on the radio side of the BCI-CH21-AUX harness. An AVS21 is required for multiple sources.
  • Blind Spot Cameras (with VS41): Dipswitch 1 (for reverse cam) and 2 (User Preference) can be set. PC settings allow configuration of Blind Spot Camera (User Preference, can't be OFF).
  • Front Camera (with VS41): Dipswitch 4 set to ON. PC settings allow configuration of Front Camera (User Preference, can't be OFF).
  • Programmable Outputs: The BCI-CH21 offers three programmable 12V+ outputs (Prog Output 1, 2, and 3) with different current ratings (10A for Output 1, 1A for Outputs 2 & 3). These outputs can be configured via the PAC app to trigger based on various events (e.g., accessory/run position, camera activation, reverse gear, forced reverse camera).
  • On-Demand Activation: A toggle switch can be run from the BCI-CH21 harness to a desired location for on-demand activation of features.
  • PAC App Programmability: For advanced features like blind spot cameras, front camera, or programmable outputs 2 & 3, the BCI-CH21 can be programmed using the PAC app on a Windows PC. The app allows configuration of camera settings (double tap turn signal, turn signal, speed-based activation for blind spot cameras; manual, drive-shift, or reverse-shift activation for front camera) and interface user options (programmable output triggers).

Maintenance Features:

  • LED Status Indicators: The module features LEDs (LED1 and LED2) that provide visual feedback on its status.
    • Dual flashing green: Initializing (Turn on ignition, wait for BCI to finish).
    • LED 1 solid green: Active (N/A).
    • LED 2 flashing green: CAN Activity (N/A).
    • LED 1 solid red: Programmable output 1 active (N/A).
    • Single flashing green, Solid amber: Forced reverse camera on (N/A).
    • Single flashing amber: No CAN communication with radio (Change status of loop - cut or re-connect).
    • Single flashing red: No CAN communication with vehicle (Check harness and connector pins for proper connection).
    • LED 2 flashing red: No CAN communication (Check harness and connector pins for proper connection or change status of loop).
    • LED 1 flashing red: Resetting (N/A).
    • LED 2 flashing amber: USB connected (N/A).
  • Module Reset: The module can be reset to factory default settings by pressing and holding the reset button (on the side of the module) for 5 seconds until LED1 begins blinking red. Releasing the button will cause both LEDs to blink green, indicating initialization.

Safety Warning:

To prevent accidents, the driver should never use systems unlocked by the BCI-CH21 while the vehicle is in motion. Even when a passenger operates the system, the driver must maintain full attention on the road.

PAC BCI-CH21 Specifications

General IconGeneral
BrandPAC
ModelBCI-CH21
CategoryCar Navigation system
LanguageEnglish