86
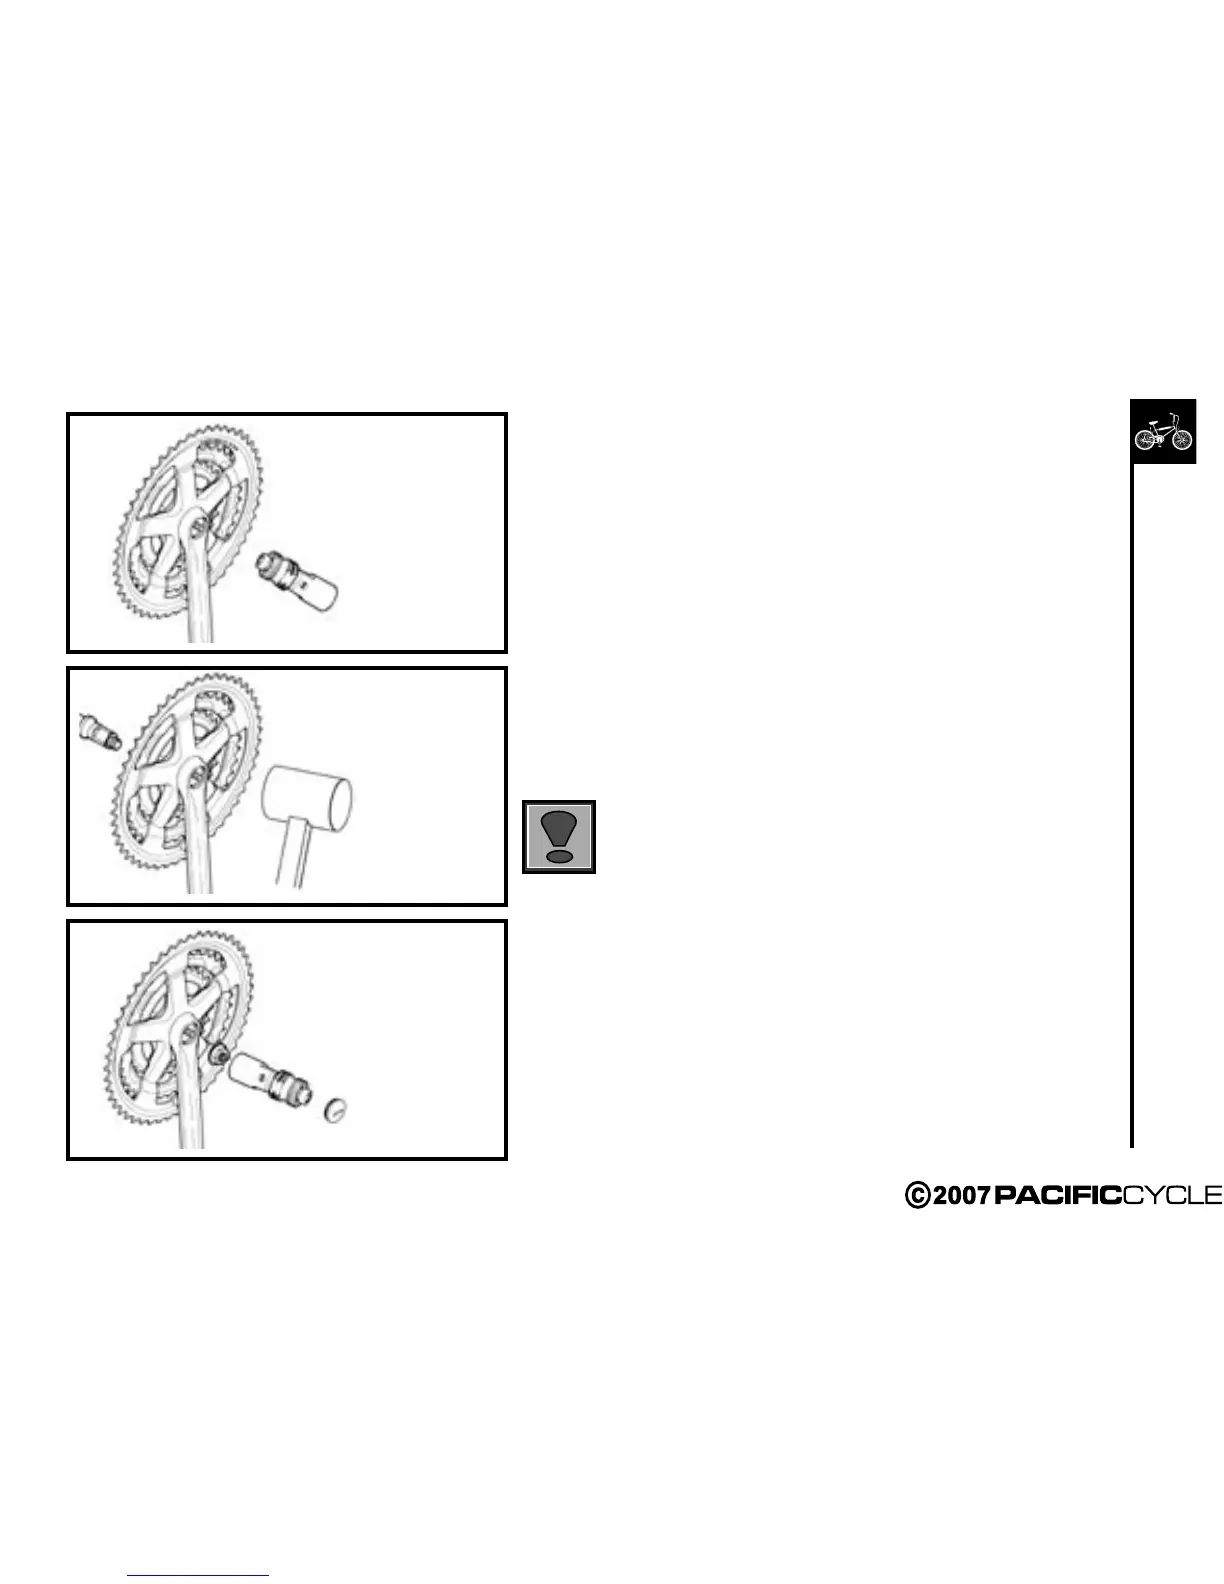
3. Screw the removing tool into the crank and tighten.
4. Turn the screw bolt down until the crank comes away from
the axle.
Cotterless Crank Replacement:
1. Replace the crank arm onto the axle.
2. Tap the crank arm lightly with a mallet.
3. Refit the washer and tighten flange nut or bolt securely to a
torque of 27Nm.
4. Replace the dust cover
Adjustment After Use:
1. Remove dust cap.
2. Tap the crank arm lightly with a mallet.
3. Re-tighten the flange nuts, and refit the dust caps.
New cotterless cranks may become loose with initial
use. Perform the following task after several hours of
riding, and repeat it two or three times after further
use. Cranks should then remain tight.
Tighten the flange nut.
Replace the dust cap.
Position the crank on the axle.
Lightly tap the crank
onto the axle.
Screw in the removal tool.
Turn the screw bolt
clockwise.