8
SPND.BODYA 300309-24
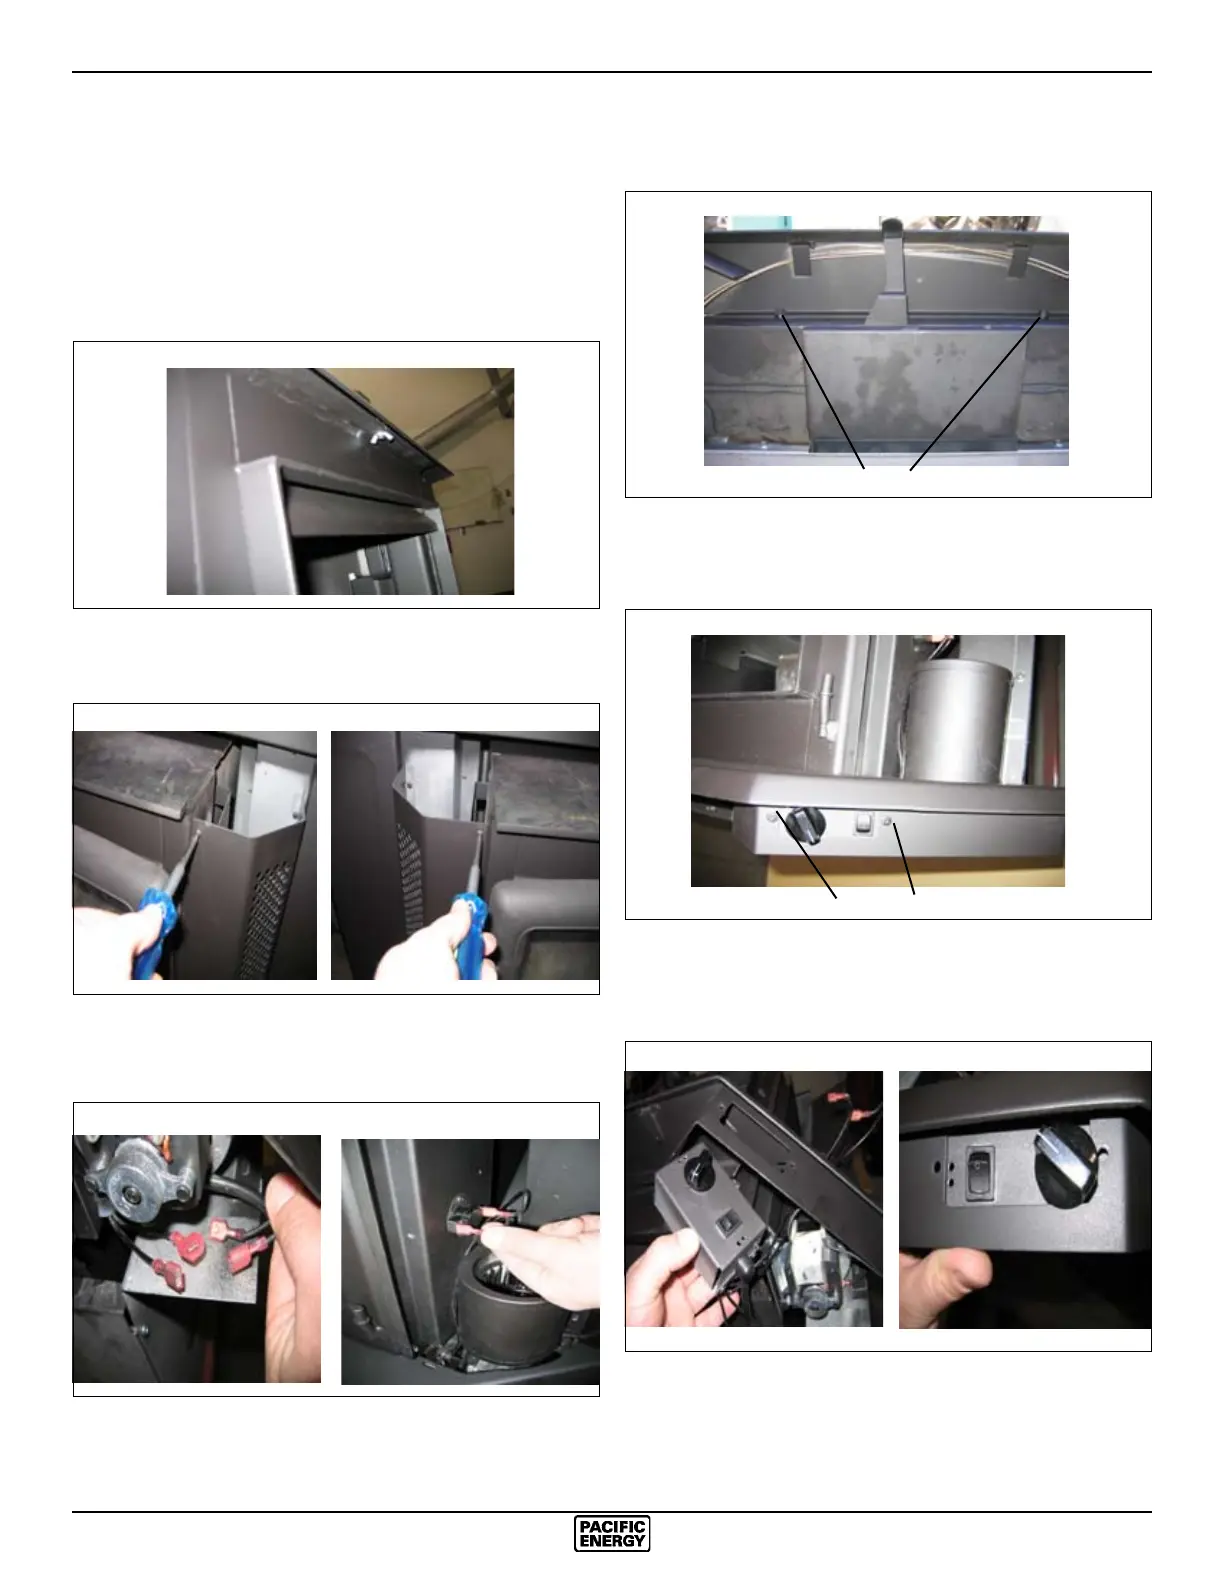
4) Loosen the two bolts that secure the ash lip to the rebox,
carefully lift up the ash lip and remove from the rebox.
5) Remove the two screws securing the speed controls assembly
to the ash lip. The cover plate on the opposite side can also
be removed at this time
6) Remove the control assembly from the right hand side of the
ashlip. Flip it over and reattach on the left hand side of the
ashlip. Use the upper screw holes for best alignment.
Fan Speed Controller
The fan speed controller is factory installed under the ash
lip on the right hand side. If required it can be relocated to
the left side by following the instructions below. To make this
as easy as possible it is suggested that this be done prior to
tting the surround and installation into the replace:
1) Remove centre wing nut that fastens the decorative bay top
to the replace.Remove the bay top.
2) Remove the two screws located at the top of the left and
right panels. Remove the panels and set aside to prevent
damage.
3) Disconnect the wires from the fans(LHS & RHS) and
thermal snap switch. Take note of where the wires are routed
and secured. They must be positioned correctly to avoid
damage.
BOLTS
Fig. # 5
Fig. # 6 Fig. # 7
Fig. # 8
Fig. # 9
Fig. # 10
Fig. # 11
Fig. # 12
SCREWS
 Loading...