Do you have a question about the Panasonic AG-HPX301E and is the answer not in the manual?
| Recording Format | DVCPRO HD, DVCPRO50, DVCPRO, DV |
|---|---|
| Shutter Speed | 1/60 to 1/2000 sec |
| ND Filter | 1/4, 1/16, 1/64 |
| Audio Input | XLR (2 channels) |
| Timecode | Yes |
| Media Type | P2 Card |
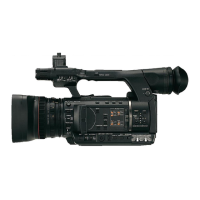
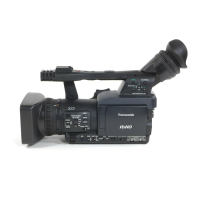
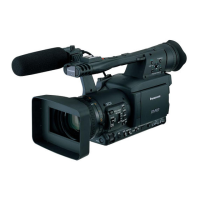
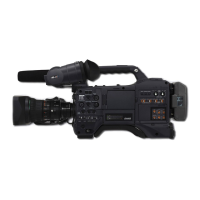
| Type | Professional Camcorder |
| Sensor Type | 3CCD |
| Sensor Size | 1/3" |
| Focus | Manual / Auto |
| Iris | Manual / Auto |
| Gain | 18 dB |
| Viewfinder | Color LCD |
| LCD Screen | 3.5 inch LCD |
| Audio Recording | 16-bit, 48 kHz |
| Video Output | HD-SDI, Component, Composite |
Essential warnings and cautions regarding electrical shock, moisture, liquids, and safe usage of the equipment.
Details about the 3MOS sensor, 14-bit digital circuit, and gamma curves for image quality.
Covers interfaces, P2 card capabilities, immediate startup, and other features.
Explains shutter, scene file, assist functions, CAC, remote control, ATW, and DRS.
Covers ND filters, USER buttons, shutter, white/black balance, gain, and shooting mode selectors.
Details REC button, SDI OUT, REW/FF, PLAY/PAUSE, STOP, and USB connectors.
Step-by-step instructions for P2 card management, including status indicators and precautions.
Covers basic recording, standard/native modes, VFR, and special modes like pre-recording.
Guides on selecting signal formats, system modes, REC SIGNAL, REC FORMAT, and CAMERA MODE.
Explains how to customize USER buttons with various camera functions for quick access.
Explains time code, user bits, and date/time recording, including external locking and output.
Guides on setting time code modes, entering values, selecting run modes, and its function during battery replacement.
Details various indicators and messages shown in the viewfinder and LCD screen for status and settings.
Explains how to use the focus assist feature, including magnification and focus bar.
Guides on opening, adjusting angle, and setting color level, brightness, and contrast of the LCD monitor.
Instructions for adjusting the viewfinder's physical position and diopter for clear viewing.
Explains how scene files and user files are configured, saved, and loaded using SD cards and camera memory.
Details the procedure for saving scene files and user files to an SD memory card.
Guides on selecting audio input signals and adjusting recording levels for channels 1-4.
Guides on formatting, writing, and reading data to/from SD memory cards using the CARD FUNCTIONS screen.
Covers video output selection and detailed procedures for white/black balance adjustments.
Explains how to set the electronic shutter, synchro scan mode, and assign functions to USER buttons.
Describes using batteries or external DC power supplies, listing compatible batteries.
Guides on connecting and using external DC power supplies, including polarity and current requirements.
Step-by-step instructions for mounting a lens, securing cables, and adjusting lens flange back.
Details the procedure for adjusting flange back distance for accurate focus at telephoto and wide-angle.
Explains how to select and adjust white shading compensation data for different lenses.
Details the process of manually adjusting white and black balance, including using the paper method.
Steps to prepare the camera for front microphone connection.
Details how to connect and use the optional remote control unit for camera operation.
Instructions for mounting Anton/Bauer batteries and setting the battery type in the menu.
Guides on performing the white shading adjustment using a white sheet and specific camera settings.
Introduces clip data, thumbnail display, and basic manipulations like playback, delete, copy, and metadata management.
Explains how to set clip metadata like shooter name, location, and text memos using SD cards.
Instructions for formatting SD memory cards via the thumbnail screen or CARD FUNCTIONS menu.
Details the meaning of write-protect marks, card status indications, capacity displays, and warning symbols for remaining space.
Explains the layout and indicators of the thumbnail screen, including display modes, slot numbers, time, recording mode, and duration.
Guides on inserting an SD card with metadata files and loading them into the camera.
Step-by-step guide on how to format a P2 card using the thumbnail menu.
Explains how to view and edit clip properties and metadata.
Details the meaning of write-protect marks, card status indications, capacity displays, and warning symbols for used space.
Guides on selecting multiple clips from the thumbnail screen for playback.
Details how to play back clips from the thumbnail screen, including pause and speed control.
Guides on navigating the main menu, highlighting functions, and making selections using the JOG dial.
Provides a hierarchical overview of the camera's setup menu structure and available options.
Details settings within the SCENE FILE menu, including LOAD/SAVE/INIT, VFR, FRAME RATE, and detail adjustments.
Details system errors, P2 card issues, low battery, recording errors, and reference signal problems with countermeasures.
Continues the table of warning types, indications, descriptions, and countermeasures.