Do you have a question about the Panasonic BL-C230 Series and is the answer not in the manual?
Supports multiple video formats for live viewing and buffering.
Pyroelectric infrared sensor detects temperature differences for triggering.
Motion or sound detection to buffer/transfer images.
Automatically buffers images based on triggers or time for later playback.
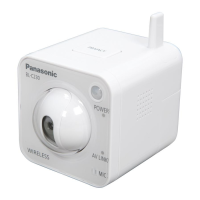
BL-C230 supports wireless standards IEEE 802.11b/g with security.
Instructions on how to access the camera using its IP address or URL.
Steps to view live video streams from the camera.
Guides on registering and viewing images from multiple cameras simultaneously.
Sets up image buffering/transfer based on scheduled times.
Configures triggers based on built-in sensor, external alarms, or motion/sound detection.
Guides on setting up image transfer via FTP, E-mail, or HTTP.
How to set up notifications via E-mail or HTTP when a trigger occurs.
Instructions on accessing and viewing images buffered by the camera.
Fine-tuning the sensitivity of the built-in sensor for optimal detection.
Configuring motion detection threshold and sensitivity for accurate triggering.
Adjusting sound detection threshold and sensitivity for desired audio triggers.
Steps to access camera features using a compatible mobile phone.
Detailed guide on setting up port forwarding on routers for internet access.
Setting up a dynamic DNS service for consistent internet access.
Adjusting the camera's network configuration (IP, DNS, etc.).
Instructions for setting up and using the camera wirelessly.
Adjusting video format, frame rate, bit rate, and streaming protocols.
Securing the camera by changing administrator login credentials.
Adding and managing other cameras for multi-view display.
Enabling privacy mode to hide the camera lens and stop image buffering.
Steps to download and install the latest firmware for the camera.
Returning all camera settings to their factory default values.
Instructions on setting up the router to support IPv6 connections.
Setting up the camera's network connection for IPv6.
Changing network parameters like IP address and port number via the setup program.
Steps to download and install the latest firmware for the camera.
| Brand | Panasonic |
|---|---|
| Model | BL-C230 Series |
| Category | Security Camera |
| Language | English |