Getting Started
Network Camera
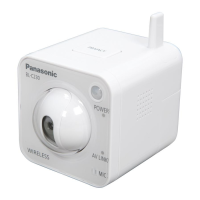
Model No. BL-C30
1.
Check the included accessories.
The following items are provided with the camera.
3.
Connect the camera to your router.
2.
Main Unit . . . . . . . . . . . . . . . . . . 1 pc.
AC Adaptor . . . . . . . . . . . . . 1 pc.
Order No. PQLV202X
(Cord Length: About 3 m)
4.
Turn the camera on.
Inserting the AC plug of the AC cord to the outlet powers up the camera.
2005 Panasonic Communications Co., Ltd. All Rights Reserved.
PSQX3599ZA
KK0205YT0 (CE)
Connect the Ethernet cable to the camera.
AC Cord
CPU
Protocol
Interface
Web Browser
Item
Description
TCP/IP protocol (HTTP, TCP, UDP, IP, DNS, ARP, ICMP)
10/100 Mbps network card installed
Internet Explorer 6.0 or later (Not included on the Setup CD-ROM)
<Bottom>
Please read the Installation/Troubleshooting manual before using.
This Getting Started explains how to connect, set up and mount the
camera. See the Operating Instructions on the Setup CD-ROM for
details about the camera features.
•
The Setup CD-ROM provides Getting Started in the following languages:
English, French, German, Italian, Spanish, Russian and Chinese.
•
If you cannot complete the setup, see the Troubleshooting section of
the Installation/Troubleshooting manual.
AC Cord . . . . . . . . . . . . . . . . . . . 1 pc.
Order No.: PFJA02A006Z
(Cord Length: About 1.8 m)
Setup CD-ROM . . . . . . . . . . 1 pc.
Order No.: PSQX3601ZCD
(Operating Instructions, Installation/
Troubleshooting, Getting Started,
Setup Program, Network Camera
Recorder Trial Version)
Screws . . . . . . . . . . . . . . . . . . 2 pcs.
Order No.: PQHE5004Y
Washers . . . . . . . . . . . . . . . . .2 pcs.
Order No.: XWG35FJ
Getting Started
(This manual) . . . . . . . . . . . .1 pc.
Installation/
Troubleshooting . . . . . . . . .1 pc.
Check the system requirement for
your PC.
Your PC (Personal Computer) and network must meet the following tech-
nical specifications for the camera to work properly.
Operating
System
Microsoft
®
Windows
®
XP, Microsoft
®
Windows
®
2000,
Microsoft
®
Windows
®
Me, Microsoft
®
Windows
®
98SE
Pentium
®
III (500 MHz or greater is recommended.)
•
See Panasonic Network Camera support website at
http://panasonic.co.jp/pcc/products/en/netwkcam/ for the latest information
about web browser.
Trademarks
• Adobe, Acrobat and Reader are either registered trademarks or trademarks of
Adobe Systems Incorporated in the United States and/or other countries.
• Microsoft, Windows, and ActiveX are either registered trademarks or trade-
marks of Microsoft Corporation in the United States and/or other countries.
• Pentium is a trademark or registered trademark of Intel Corporation or its sub-
sidiaries in the United States and other countries.
• Screen shots reprinted with permission from Microsoft Corporation.
•
All other trademarks identified herein are the property of their respective owners.
•
This software is based in part on the work of the Independent JPEG Group.
Abbreviations
•
UPnP is the abbreviation for "Universal Plug and Play".
•
"Network Camera" is called "Camera" in this Getting Started.
Connect the camera to your router with an Ethernet cable to set up the camera.
•
Before you begin the installation, the UPnP™ feature in your router needs to be enabled. Usually, the default setting disables this feature. For more info, please
visit, http://panasonic.co.jp/pcc/products/en/netwkcam/ or contact your router's manufacturer.
•
These instructions assume your PC is already connected to the Internet and your home network includes a router that is UPnP™ (Uversal Plug and Play) compliant.
•
The camera will be connected to your router using a "straight" Cat5 network cable (customer-provided).
Confirm that the switch on the bottom
of the camera is set to WIRED.
To the Ethernet (LAN)
port of the camera
Ethernet cable
(Straight Cat5 cable)
(Customer-provided)
Connect the AC adaptor cord from the
AC adaptor to the DC IN jack.
Connect the
AC plug of the AC
cord to the outlet.
•
Use only specified Panasonic AC adaptor
PQLV202 (Order No.PQLV202X).
Caution: The AC cord is used as the main
disconnect device, ensure that the socket-
outlet is located/installed near the equip-
ment and is easily accessible.
After the lens moves (pan/tilt
operation), confirm that the indicator
lights green after a minute.
•
If the indicator does not light green, see page
19 and 20 of the Installation/Troubleshooting.
•
A noise can be heard during pan/tilt
operation. This is normal.
The indicator
lights green.
To your router
AC Adaptor
To the camera
To the outlet
To a LAN port of your router
To your Modem
To your PC
To the outlet
Ethernet cable
(Straight Cat5 cable)
(Customer-provided)
Connect the Ethernet cable to your
router.
AC adaptor Cord
To the DC IN jack of
the camera
To your router
WIRED
WIRELESS
Switch