EasyManua.ls Logo

Panasonic CQ-DP383U

Panasonic CQ-DP383U
15 pages
To Next Page IconTo Next Page
Loading...
E
N
G
L
I
S
H
8
23
CQ-DP383U
Insert the disc.
1
Stop and eject the disc.
Press [<] (eject).
2
<
<
<
(eject)
Label side
Caution:
Available discs:
Disc size: 5z (12 cm) CD only
CD-DA data recorded CD-R and CD-RW discs
MP3/WMA data recorded CD media
(CD-ROM, CD-R, CD-RW)
3q (8 cm) CD is not available for this unit, so do
not insert it absolutely.
Before loading a disc, check to make sure that a
disc is not already loaded.
Refer to page 41 about notes on CD-Rs/RWs.
Refer to page 27 about notes on MP3/WMA.
Listening to a CD
When CD is in the player
Press [SRC] (source) to change to CD player
mode.
Data reading.
Press and hold.
[9] (5): Fast forward.
[:] (6): Fast reverse.
Release to resume the regular play.
Fast Forward/Fast ReverseTrack (File) Selection
[9]: Next track (file).
[:]: Beginning of the current track (file).
For the previous track (file), press twice.
Folder number
File number
CQ-DP383U
E
N
G
L
I
S
H
7
22
CD Player
Note:
The power will be turned on automatically when
a disc is loaded.
The title can be displayed. (pages 25, 26)
It may take some time to distinguish CD-DA and
MP3/WMA before playback starts.
If you record too many folders and files onto a
disc, it may take some time before playback
starts.
Press [
[ [
/1].
Press [
[ [
/1] again to cancel.
Pause
["]: Next folder.
[#]: Previous folder.
Folder Selection
CD MP3/WMA
Track number
Do not insert a disc when “DISC”
indicator lights.
Lights when the disc is loaded.
[SOURCE]
[BAND]
(pause)
["] [#] (folder)
64
97
5
Car Audio
SOURCE
MUTE
POWER
RAND
VOL
312
DISPBAND
REP
6
5
SET
SEL
#
SCAN
MENU
NUMBER
8
0
[6] [5]
(track/file)
[SRC] (source)
use irregularly shaped discs.
use discs that have a seal or label at-
tached.
Do not
pinch your finger or hand in the front
panel.
insert foreign matter into the disc
slot.
watch the scroll display while driving
a car. (pages 25, 26)
Playing time
The display changes as shown below.
Playback starts automatically.
Note:
Do not insert a disc when DISC indicator
lights.
Insert the disc.

Other manuals for Panasonic CQ-DP383U

Question and Answer IconNeed help?

Do you have a question about the Panasonic CQ-DP383U and is the answer not in the manual?
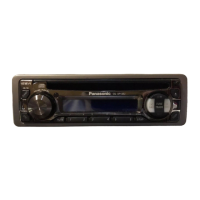
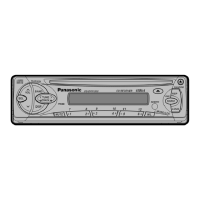
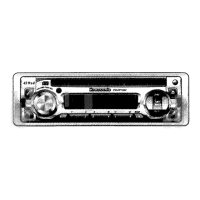
Panasonic CQ-DP383U Specifications

General IconGeneral
BrandPanasonic
ModelCQ-DP383U
CategoryCar Receiver
LanguageEnglish

Summary

CD Player

Insert the disc

How to insert a CD into the player.

Stop and eject the disc

How to stop playback and eject a CD.

Direct Track (File) Selection

How to directly select a specific track or file number.

Direct Folder Selection

How to directly select a specific folder.

Notes on MP3 WMA

Important information regarding MP3/WMA file compatibility, recording, and display.

CD Changer Control

Disc Selection

How to select different discs from the changer.

Track Selection

How to select specific tracks from the changer.

Direct Disc Selection

How to directly select a specific disc number.

Audio Settings

Volume

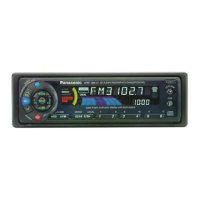
How to adjust the audio volume level.

Troubleshooting

Preliminary Steps

Initial checks and safety precautions before troubleshooting.

If You Suspect Something Wrong

Immediate actions to take if the unit malfunctions.

Common Troubles

Troubleshooting tips for common issues like no power or no sound.

CDMP3 WMA Troubles

Troubleshooting steps for CD, MP3, and WMA playback issues.

MP3 WMA Troubles

Specific troubleshooting for MP3/WMA file playback problems.

Error Display Messages

Explanation of error codes displayed on the unit.

CD Changer Troubleshooting

CD Changer Display Errors

Interpreting error messages from the CD changer unit.

Maintenance

Installation Guide

WARNING

Critical safety warnings for installers.

Identify All Leads

Guide to identifying car wiring leads for connection.

Connect All Leads

Procedure for connecting all electrical leads.

Final Installation

Steps for completing the final installation.

Final Checks

Checks to perform after installation to ensure proper operation.

Installation Procedures

Step-by-step guide for installing the unit.

Electrical Connections

Related product manuals