EasyManua.ls Logo

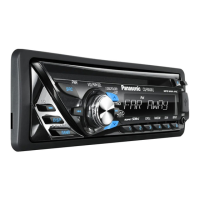
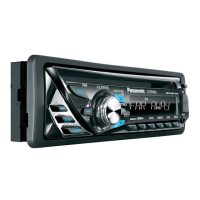
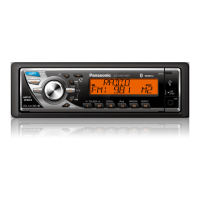
Panasonic CQ-RX400U

Panasonic CQ-RX400U
18 pages
To Next Page IconTo Next Page
To Previous Page IconTo Previous Page
Loading...
Preparation
General
~
2
Press
[SRC]
(PWR:
Power).
,~""
0l:'~~',,--
~"'--:
6Caution
'Set
the
volume
level
10
low
enough
before
the
AUX
connection
is
completed.
Failure
to
observe
this,
the
loud
noise
may
come
out
and
damage
your
speakers
and
your
hearing.
AUX1
Connector
(3.5
mm
cp
stereo)
From
line
output
of
external
sound/audio
device
(ex.
Silicon·
audio
player,
HDO
player,
etc.)
[VOL)
(Volume)
Remote
Control
Sensor
[SO)
(Sound
Ouality)
selects
a
sound
type
(SO).
[SRC)
(Source)
selects
a
source.
[PWR)
(Power)
toggles
power
on/off.
.,.,r,\I,,'
_,,1\,
..ilL"L'
,
I'"
4
Press
[VOL]
(PUSH
SEL:
Select)
to
select
DEMO.
5 Turn
[VOL]
counterclockwise.
For
using
the
remote
control.
press
[0)
(V).
Note:
Battery
Information:
Battery
Type:
Panasonic
lithium
battery
(CR2025)
(Included
in
the
remote
control)
Battery
Life:
Approximately
6
months
under
normal
use
(at
room
temperature)
Notes:
,
To
return
to
the
regular
mode,
press
[DISP).
Refer
to
the
section
on
"Function
Settings".
,
When
"NO
USB"
('OI.e;n""Ii',
or
"NO
DISC"
is
displayed.
the
Demonstration
cannot
be
cancelled.
'"'i]T
'J'
,--"...",
...
LI'
"U..il-.!..!.J
2
Press
[SRC]
(PWR:
Power).
3 Hold
down
[VOL]
(PUSH
SEL:
Select)
for
2 sec.
or
more
to
open
the
function
menu.
Pull
the
insulation
film
out
from
",----"
the
backsIde
of
the
remote
control'
~,.
'"
gently
__ '
"-
._-
""",--
,'.
-."
~~~
~
-
1
Set
your
car's
ignition
switch
to
the
ACC
or
ON
position.
la'Datum
..
IB·a;t:¥4eUill
The
demonstration
message appears
for
initial
use.
1
Set
your
car's
ignition
switch
to
the
ACC
or
ONposition.
~If
III-I;£("!IIII
13'Oif:f4ueiil
C
>o.!:!
...
-
Q)~
--
--
~~
=C;;
C
-C
ClCl
C·-
Cl~
.-
...
--
~Cf.l
=C
Q)Cl
us:
CQ)
~C
Power
On/Off
Volume
Adjustment
(Setting
Range:
0
to
40,
Default:
18)
Turn
[VOL].
.USB
Connector
When an optional USB memory
is
connected:
When
loadinliMf3IWMAlAAC
data
1=='.'
When
an_tional
USB memory is not connected:
.e,.
..,.
Disc
Player
(-+Right)
)
Radio
(
...
Below)
«tu';£IIII,1I1
Note:
Select
USB
Connector
mode
to
operate
the
iPod
series
connected
with
USB
connector.
(-+
System
Upgrade
Guidebook)
Press
[SRC]
to
change
the
source.
Set
your
car's
ignition
switch
to
the
ACC
or
ON
position.
Power on:
Press
[SRC]
(PWR).
Power off:
Hold
down
[SRC]
(PWR)
for
more
than
1
second,
(-Continued
below)
Source
Selection
L-
__
---l~1
AUX
l'
I
~
L-
__
---l
Minute
entered
Completed
Clock
display
(Default)
fJ
,.~
LT'I_I
D:S
o:s
[~]:
sets
the
minute
ahead.
[f<l<IIl]:
sets
the
minute
back.
6
Press
[DISPj.
Clock
Display
at
Power
Off
5
Adjust
the
minute.
Notes:
,
"ADJUST"
is
displayed
before
adjusting
the
clock.
,
Hold
down
[f<l"')
or
[~~]
to
change
numbers
rapidly.
,
When
"NO
DISC"
is
displayed.
the
clock
cannot
be
adjusted.
Press
[DISP]
to
change
the
display.
•••••••••
Display
off
Minute
blinks
Hour
entered
0"'''''
L
ILJ
_
.-:J·O"
,--"fL'
=12RO
I."
",,-r
.--'....!...'_.L'~'.
[~]:
sets
the
hour
ahead.
[f<l"']:
sets
the
hour
back.
4
Press
[DISP].
3
Adjust
the
hour.
(clock
display)
2
Hold
down
[DISP]
for
more
than
2
seconds.
Hour
blinks
The
12-hour
system
is
used
for
the
clock.
1
Press
[DISPj.
OR
,
'When an expansion module is connected:
:
The
devices
connected
to
the
ports
1
to
4
are
activated
in
:
sequence
after
shifting
to
AUX2
(device
connected
to
the
:
AUX
terminal
of
the
expansion
module).
.System-up
Connector
'3·e;t:§uulil
'a.OiEf4tl"'1
,
,
When
connectin,
Bluetooth'"
Unit
:
""".
.,".
:When
an
optional device Is connected:
:
Shift
to
connected
device
:
When
connecti,/D
Cha:Uer
:
••
1",
,,,,i
,
,
When
connectinCd
:
4It1fJ
I
i
When
connecting.i,
ver
I
,
When
connectinlius
Receiver
:
-jr
••
I'"
IV
'h"
"'Ll'"
-.!..."'I'
__
R_ad_io
__
1
~
I
Disc
Player I
~
I
__
A_U_X._....J
System·up
Connector
I
~
1
A_U_X_1_'
_
(-+Right)
.AUX1
Connector
AUX
IN':
'9-0;£1
..
11111
1'«'0;£111111'
____
R_ad_i_O
__
--JI
~
1
O_iS_c_p_la_y_er
__
Cf.l
C
Cl
:0::
~
...
Q)
a.
o
[VOL)
(volume)
adjusts
the
volume,
and
selects
the
value
in
the
audio
menu,
etc.
[DISP)
(Display)
switches
the
information
on
display.
and
exits
the
audio
menu.
r
:::==IIEt---[MUTE)
toggles
mute
on/off.
(Only
for
remote
control
unit)
Note:
You
can
select
mute
or
attenuation.
(-+
"Function
Settings")
[BAND) (SET)
selects
a
band
in
the
tuner
source,
toggles
pause/play
in
player
source,
executes
the
APM
(Auto
Preset
Memory)
in
tuner
source
(Hold
it
down
for
more
than
2
seconds).
[MENU) (SEL:
Select)
selects
the
items
in
the
audio
menu.
Direct
Access
[0) to [9)
selects
a
preset
station
(1
to
6).
presets
the
current
station
(Hold
it
down
for
more
than
2
seconds.).
inputs
the
number
in
direct
selection.
[#] (NUMBER)
executes
the
direct
selection.
[RANDOM) [SCAN) [REPEAT)
toggles
on/off
each
play
mode
[<)[»)
down/up
the
frequency
(Hold
it
down
for
more
than
0.5
seconds
and
release
it
for
seek
tuning.)
[V)[A)
skip
to
the
previous/next
folder
in
player
mode.
[f<l<IIl)[~]
skip
to
the
previous/next
track/file
in
player
mode.
Hold
it
down
for
fast
reverse/fast
forward.
Remote
Control
Unit
Notes:
,
This
instruction
manual
explains
operations
for
use
with
the
buttons
on
the
main
unit.
(Different
operations
excluded)
,
Aim
the
remote
control
at
the
remote
sensor
and
operate
it.
A
track
(CO
mode).
file.
folder
(MP3IWMAlAAC
mode)
can
be
directly
selected.
Example:
Track
number
5
1
Press
[#]
(NUMBER).
2
Press
[5].
3
Press
[BAND]
(SET).
f)
Put
a
battery
in
the
case
with
(+)
side
facing
up.
E)
Put
the
case
back.
Note:
The
connector
is
labeled
"AUX1",
but
it
appears
on
the
display
as
"<AUX
IN>".
Note:
For
information
about
connectable
devices.
refer
to
the
System
Upgrade
Guidebook
or
the
instruction
manual
for
each
device.
,
Scroll
,
Tag
on/off
Battery
Replacement
Functions
only
on
Main
unit
A
Warning
Keep
batteries
and
Insulation
film
out
01
reach
of
Infants,
Batteries
and
insulation
film
can
be
ingested,
so
keep
them
out
01
the
reach
of
infants.
"
an
infant
ingests
a
battery
or
insulation
film,
please
seek
immediate
medical
attention.
6
Caution
'Remove
and
dispose
of
an
old
battery
immediately.
'Do
not
disassemble,
heat
or
short
a
battery.
Do
not
throw
a
battery
into
a
fire
or
water.
'Follow
local
regulations
when
disposing
of
a
battery.
'Improper
use
of
batteries
may
cause
overheating.
an
explosion
or
ignition.
resulting
in
injury
or
a
fire.
Notice
This
product
contains
a
CR
Coin
Cell
Lithium
Battery
which
contains
Perchlorate
Material·
special
handling
may
apply.
See
www.dtsc.ca.gov/hazardouswaste/perchlorate.
Tough
pointed
object
Notes:
Battery
Information:
Back
side
Battery
Type:
Panasonic
lithium
battery
(CR2025)
(Included
in
the
remote
control)
Battery
Life:
Approximately
6
months
under
normal
use
(at
room
temperature)
o
Remove
the
battery
holder
with
the
remote
control
Unit
placed
on
a
flat
surface.
CD
Stick
your
thumbnail
into
the
groove.
and
push
the
holder
in
the
direction
of
the
arrow.
and
at
the
same
time.
@
Pull
it
out
in
the
direction
of
the
arrow
using
a
tough
pointed
object.
The
following
functions
are
not
available
on
remote
control
unit.
,
SO
selection
,
DISC
eject
Notes:
,
To
suspend
direct
selection,
press
[DISP).
,
For
folder
selection,
enter
a
number
after
pressing
[#)
(NUMBER)
twice.
Cf.l
C
Cl
-
U
C
=
LL.

Other manuals for Panasonic CQ-RX400U

Related product manuals