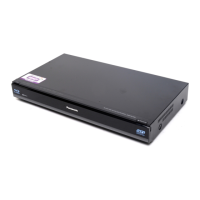
Main unit
1 Standby/on switch (
8
) (➡ 18)
Press to switch the unit from on to standby mode or vice versa. In
standby mode, the unit is still consuming a small amount of
power.
2 Disc tray (➡ 15)
3 SD Card LED
It is possible to set the LED to turn on/off. (➡ 90)
4 Display (➡ 12)
5 Recording indicator
6 Remote control signal sensor
7 Open/close disc tray (➡ 15)
8 Connection for digital video (DV) camcorder (➡ 56)
9 SD card slot (➡ 15)
bk USB port (➡ 15)
bl Channel select (➡ 19)
bm Start recording/Specify a time to stop recording (➡ 22)
bn Stop (➡ 22, 36)
bo Start play
bp Connection for VCR, Panasonic’s video camera, etc. (➡ 55, 56)
Rear panel terminals (➡ 16, 17, 98–102)
Easy access to various functions—FUNCTION MENU Display
You can access the main function quickly and easily.
1 Playback
The DIRECT NAVIGATOR
screen or menu screen etc. for
the selected drive or inserted
media will be displayed.
2 Recording (➡ 23, 34)
You can start programming
timer recording or reconfi rm and
change the timer recording
settings.
3 Delete (➡ 24, 66, 73)
The DELETE Navigator screen
will be displayed.
4 Copy (➡ 52, 64)
The Copy screen appears.
5 TV Guide (➡ 19, 32)
You can easily fi nd programmes
you want to watch and set them
for timer recording.
6 Others
Select and execute a function
other than those above, such as
recording or setting.
Flexible Recording via AV
input (➡ 57)
Playlists (➡ 39)
DV Automatic Recording
(➡ 56)
Recording via AV2 input
(➡ 57)
Copy New Pictures (➡ 64)
Copy Video (AVCHD)
(➡ 58)
Network (➡ 75)
USB device (➡ 40, 58, 59,
60, 64, 67, 72)
Blu-ray Disc Management
(➡ 82)
DVD Management (➡ 82)
Card Management (➡ 82)
Setup (➡ 85)
Press [FUNCTION MENU].
 Loading...