To remove the adapter from the tripod, turn the knob at the very top of the tripod
to the left to loosen. Then press the knob down towards the ground and slide the adapter
out of the tripod at the same time. Return the adapter to the camera case.
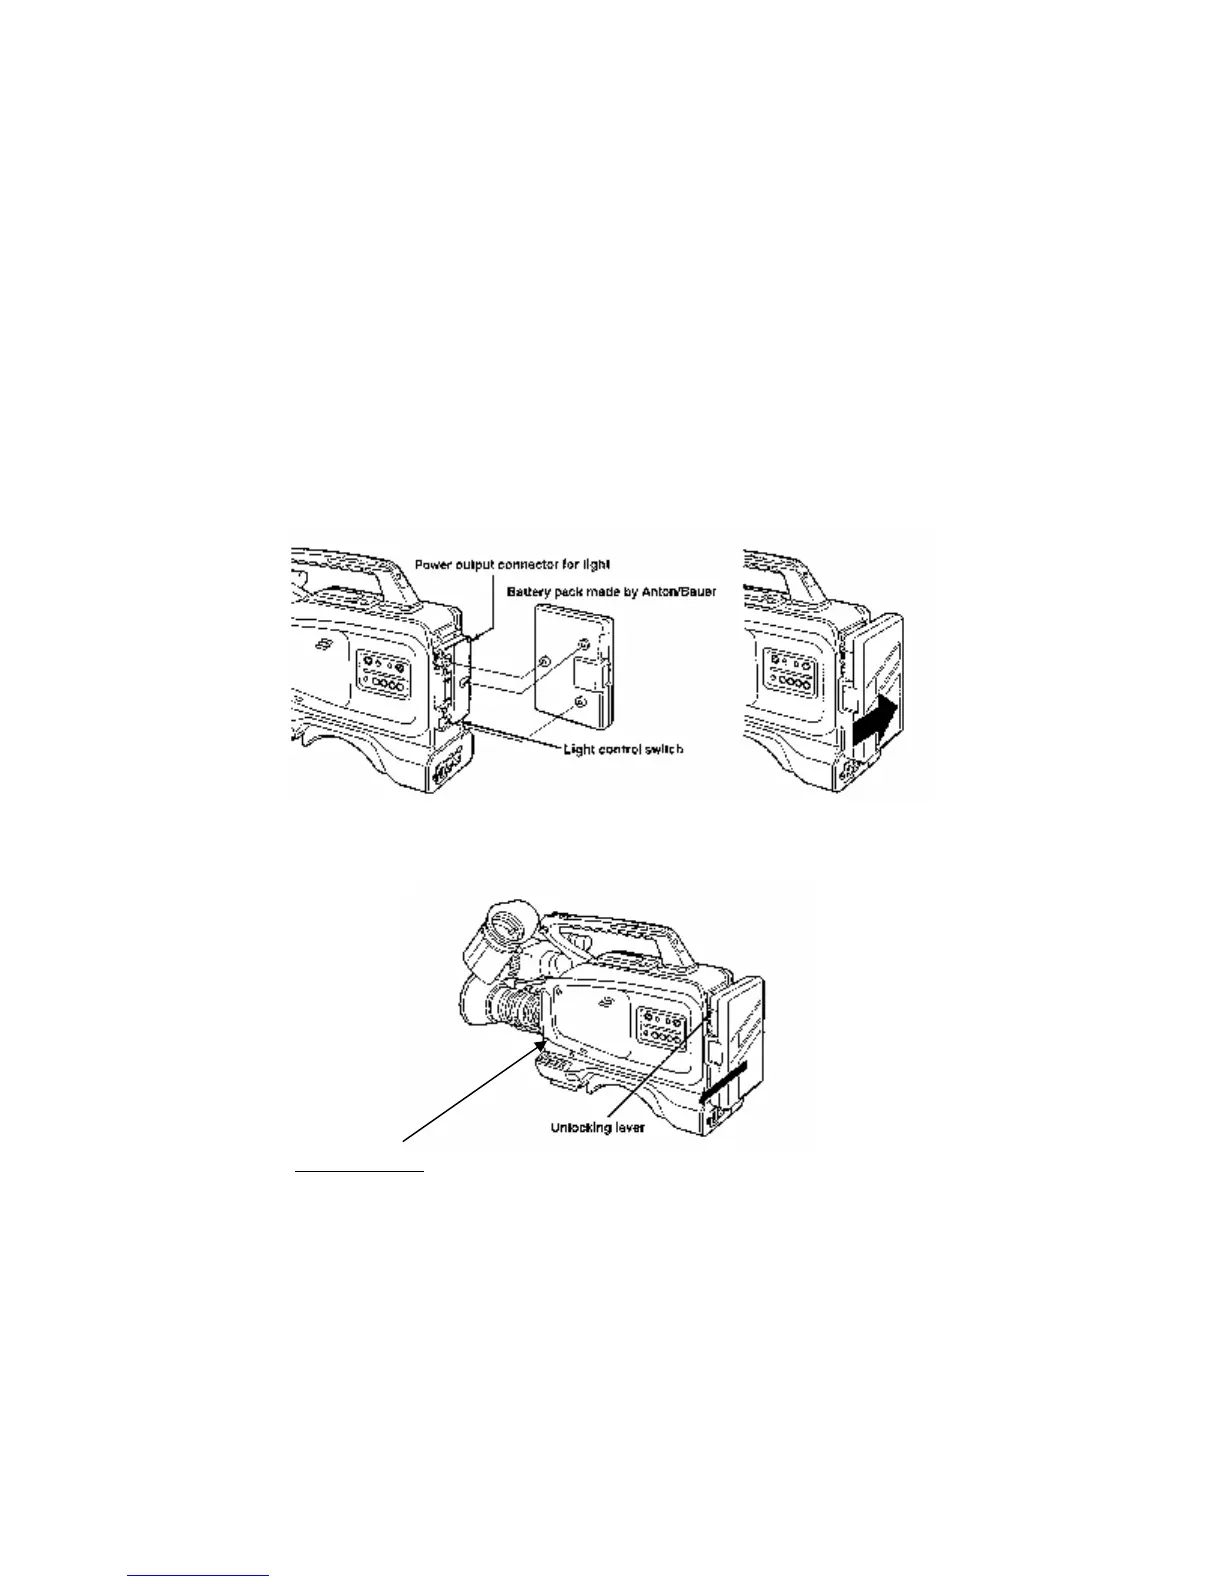
Power
The battery is placed on the very back of the camera by aligning the three copper
screws on the battery with the three holes on the camera. Place the screws in the holes
and push the battery to the right until it clicks into place. Check to make sure the battery
is securely fastened.
To release the battery, push down on the gray lever to the left of the battery pull
battery out to the left.
The power switch is on the bottom left-hand side of the camera. Push the switch
to the ON (right) position to power up the camera.
Default Settings
After you have powered up the camera, make sure the following buttons are in the
following positions: There are four switches just above the power switch. Make sure the
Gain is at 0; the AWB is at MEMO; the Output is on CAM; and the Shutter is OFF.