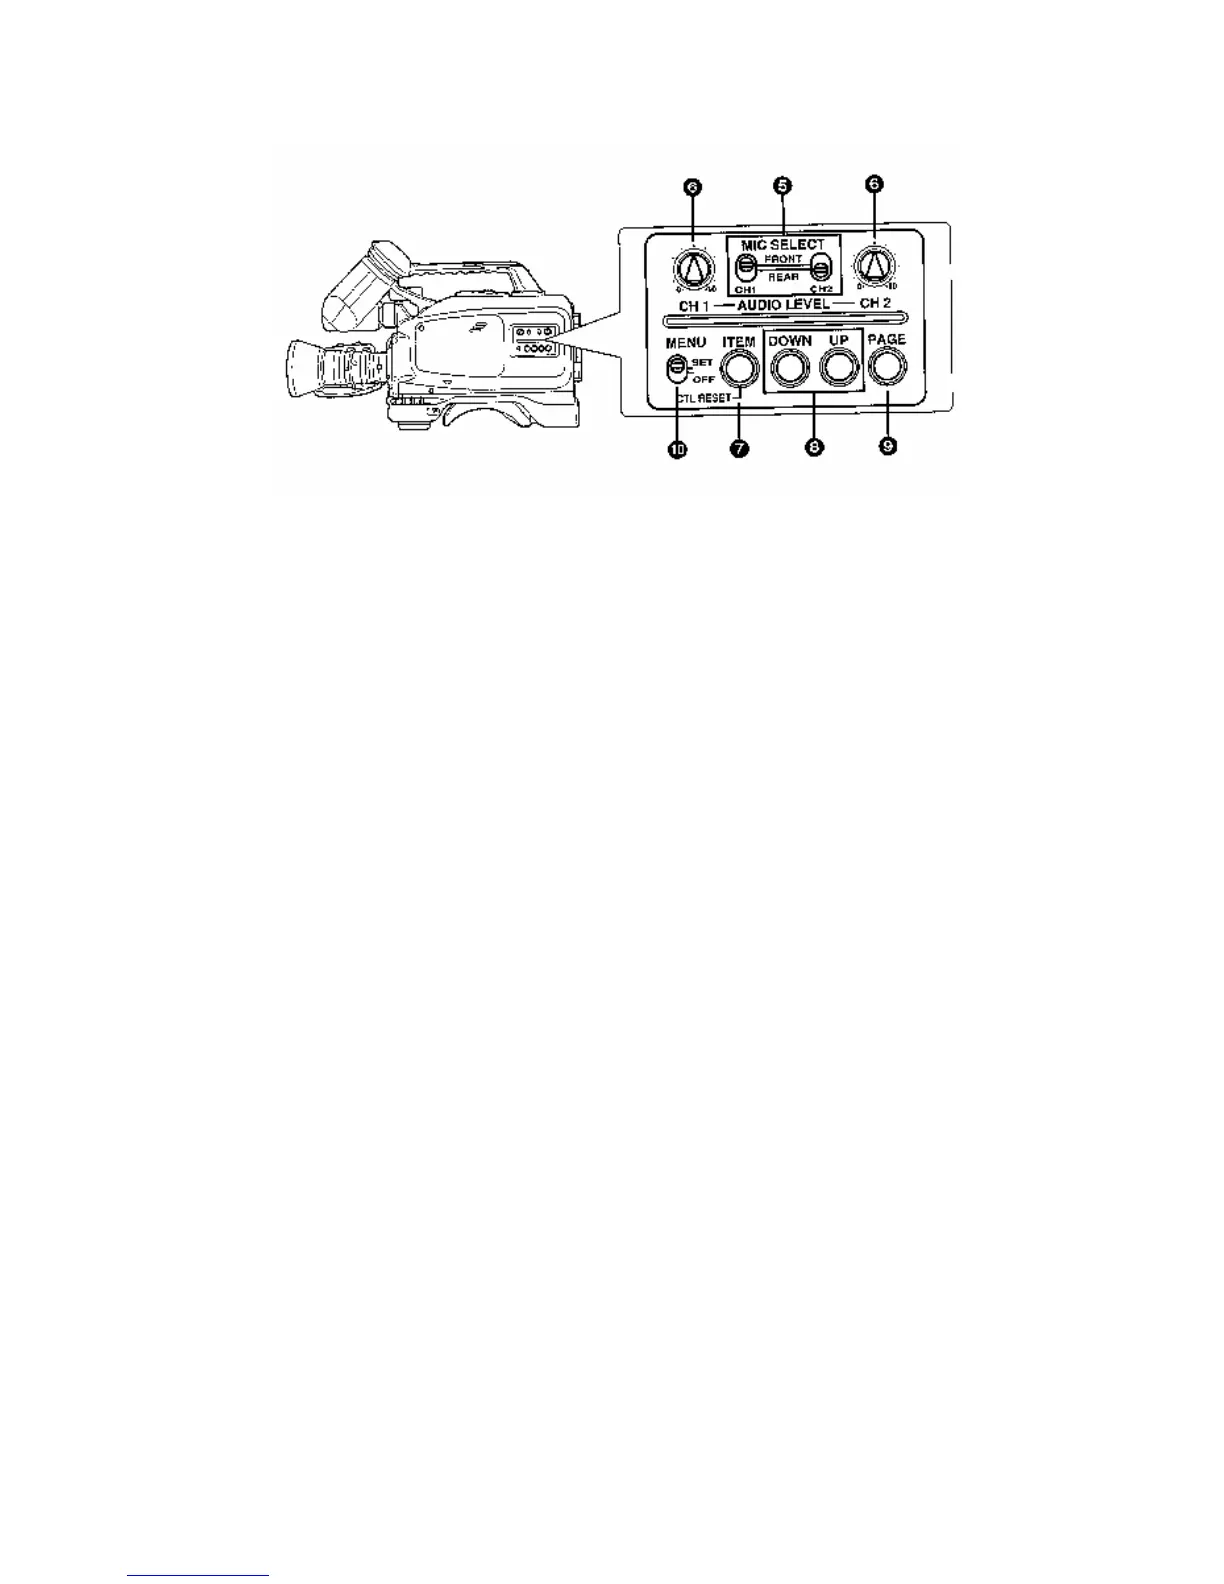
On the audio panel you can also adjust the level at which your sound is coming in.
Each channel has a dial that adjusts the level of sound. You can monitor your sound level
by looking into your viewfinder at the series of minuses and pluses in the upper left-hand
corner. If the levels are going into the pluses, it's too loud, and should be reduced by
adjusting the audio dial for the appropriate audio channel.
To make sure you're getting your sound while you are shooting (which you should
always do), you can plug headphones into the phones jack on the bottom rear of the
camera next to the mic jacks. There is also a small monitoring speaker on the left side of
the camera, the level of which can be adjusted by a small monitoring dial on the bottom
left of the camera.
Recording
To record, press the VTR button on the camera grip with your right thumb. To
stop recording, press the same button again. (There is another VTR button that does the
same thing on the bottom front of the camera next to the white balance switch.)
Playback
You can play back what you just recorded once you have stopped recording by
hitting the button marked RET which is next to the zoom switcher to the right of the lens.
If you hold this button down it will rewind the tape until you let go. It will then play the
tape in the viewfinder up to the point where you stopped recording.
You can also play back a tape in the camera by using the VCR controls on the top
of the camera. The controls are hidden beneath a black cover next to the eject button.
Flip up the cover to expose the controls. You can view the tape in the viewfinder and
listen to the sound through the headphones or the small speaker.