EN13
How to Use
(continued)
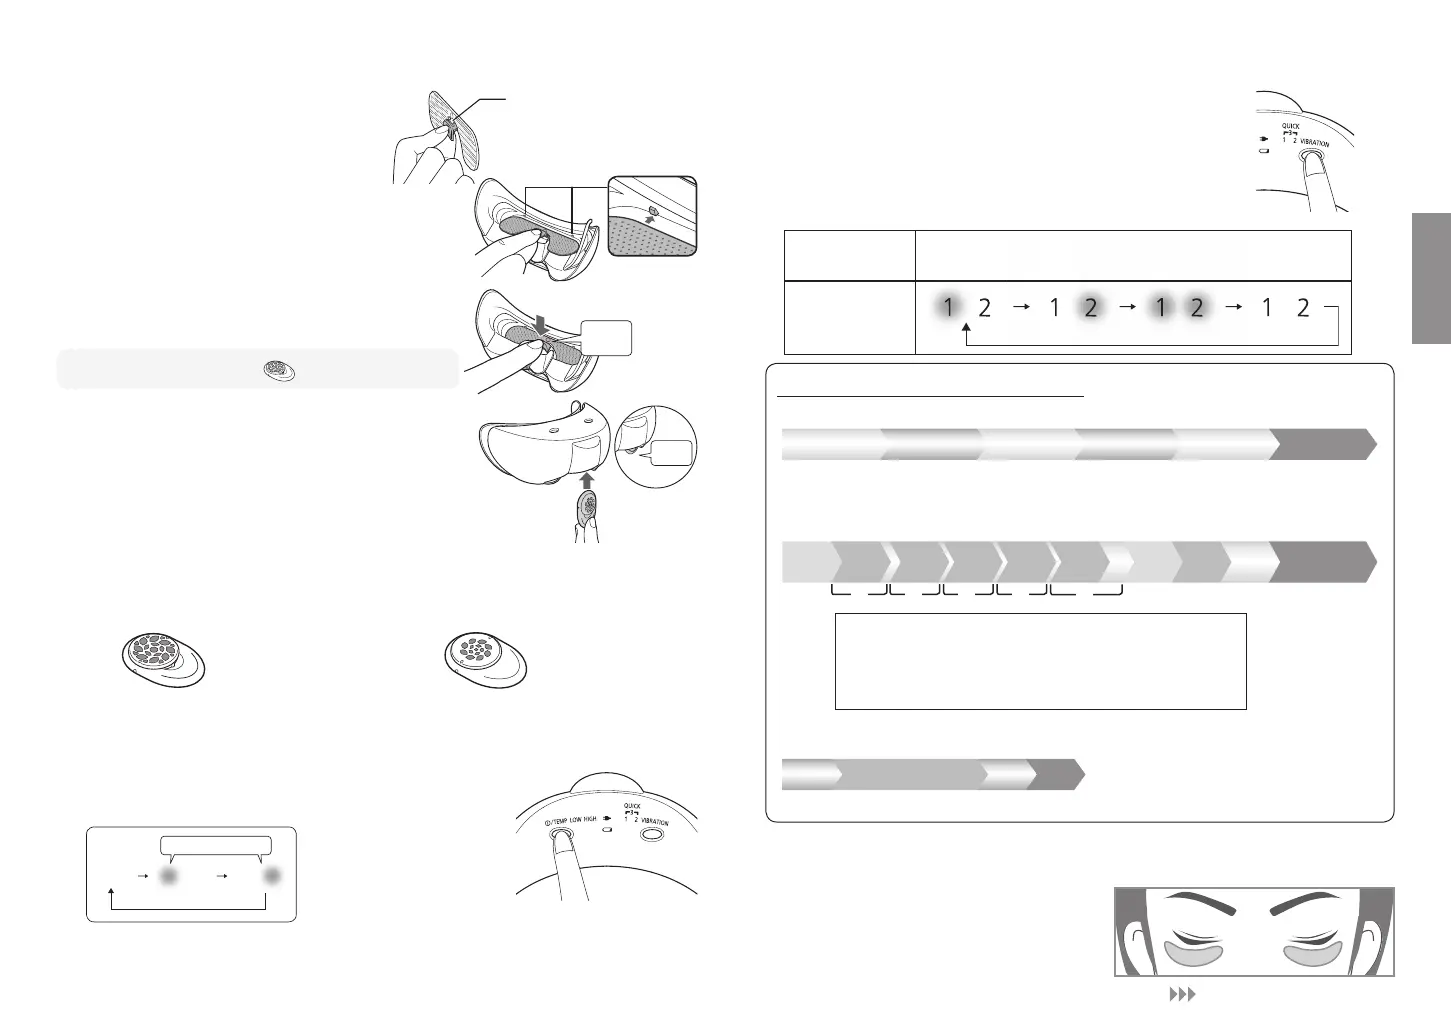
Click
Attach the water supply
plate to the main unit.
3
# Hold so that the protruding part of the
knob is facing upward.
$ Set the water supply plate under the
water supply plate attachment clasps
(2 pc) on the main unit.
% Push the knob in from above until you
hear it click into place.
If there is a lot of water on the water
supply plate, water drops may splash
when attached.
When not using the , skip to step 5.
#
$
%
Set the aroma tablet in the
aroma holder.
As shown in the illustrations, hold the aroma
tablet by the grip and insert it into the aroma
holder from below.
• Push it in all the way.
4
With the aroma tablet, the strength of the scent can be selected according to
whether the tablet is set with the front or back facing up.
• For a stronger aroma, insert it into the aroma holder with the front side facing your
nose.
Stop using the aroma tablet if its scent make you feel queasy or you should sense
something wrong.
Front (scent strength: strong) Back (weak)
Glows blue
Power
OFF
LOW HIGH LOW HIGH
Press the power/temperature switch and select a temperature.
5
Temperature of the temperature sensitive area :
LOW: Approx. 38 °C
HIGH: Approx. 40 °C
Every time the power is turned on, it starts at the LOW mode.
The temperature may change accordingly to the environment temperature.
(When the room temperature is 25 °C, it will take about two minutes for you to feel heat.)
Protruding
part
Clasp
EH-TSW5E中国語.indb13 2015/09/0710:30:59
EN14
English
Continued on P. EN15
Press the vibration switch and select
the desired vibration.
6
The massager can be used without vibration when only
heat and not vibration is desired.
Even if vibration is switched on during use, it switches off
automatically after about 6 or 12 minutes.
The main unit makes a small sound (a clicking sound) when in the vibration operation.
This does not indicate a problem.
Monotonous
vibration
◆Vibration 1: A loose and weak vibration (approximately 12 minutes)
Approximately
2 minutes
Approximately
2 minutes
Approximately
2 minutes
Approximately
2 minutes
Approximately
2 minutes
Approximately
2 minutes
Approximately
1 minute
Approximately
1 minute
Approximately
1 minute
Approximately
1 minute
Approximately
1 minute
Approximately
2 minutes
Approximately
1 minute
Approximately
1 minute
Approximately
3 minutes
SlowVery slowSlow
◆Vibration 2: Vibration switching frequently between strong and weak
(approximately 12 minutes)
Very slow
%$ $ $#
# Large difference between strong and weak:
approximately 1 minute
⇒
slow: approximately 12 seconds
$ Large difference between strong and weak:
approximately 1 minute
⇒
slow: approximately 6 seconds
% Large difference between strong and weak:
approximately 1 minute
⇒
slow: approximately 30 seconds
Very slow
Monotonous
vibration
◆Vibration 3 (QUICK) : Some variation between strong and weak
(approximately 6 minutes)
Large difference
between strong and weak
Slow Slow
Explanation of vibration settings
Vibration
indicator lamp
Vibration
OFF
Vibration 3
(QUICK)
Vibration 2Vibration 1
Monotonous
vibration
Large
difference
between strong
and weak
Small
difference
between strong
and weak
Slow
Small
difference
between strong
and weak
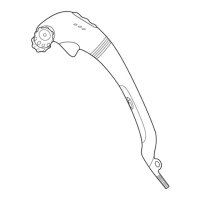
Attach the main unit.
7
Close your eyes.
Place the appliance so that the
temperature sensitive area (P. EN7) is at
the position shown in the illustration.
EH-TSW5E中国語.indb14 2015/09/0710:31:00