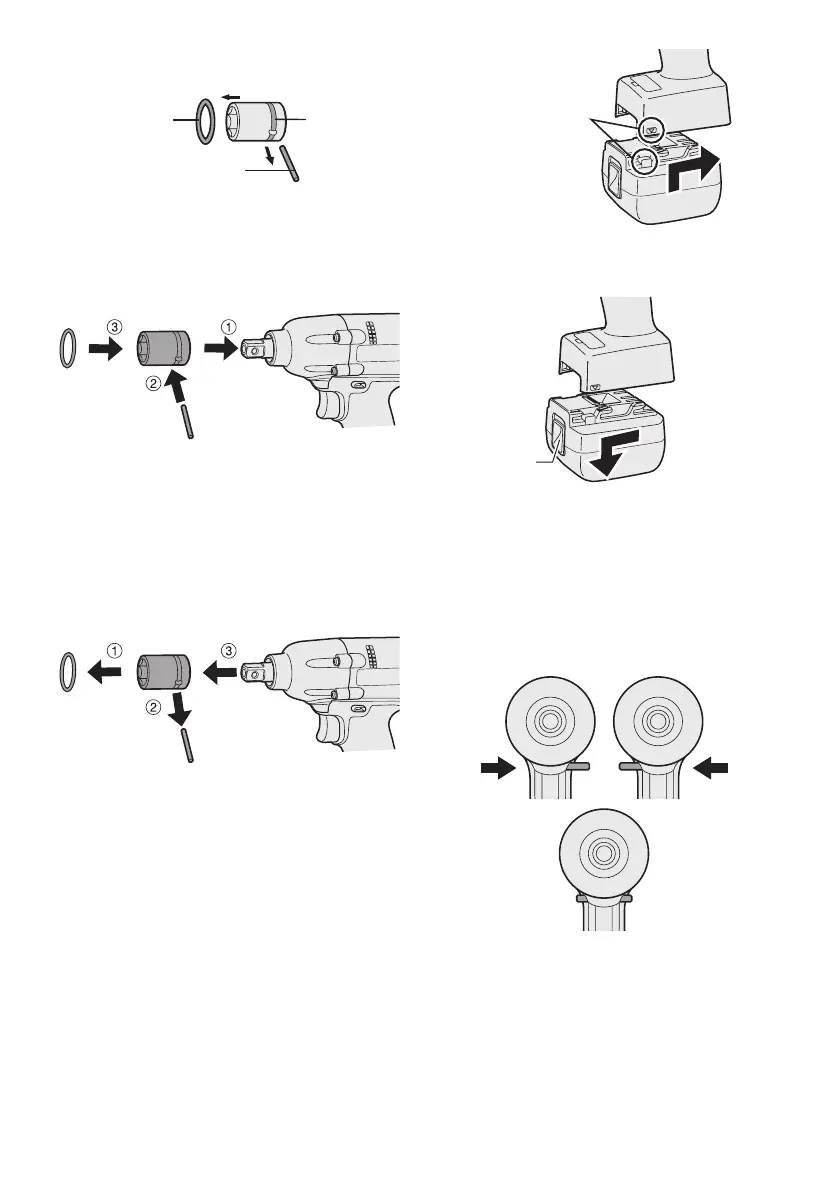
Attaching Socket
• Remove the socket’s rubber ring and pin.
rubber
ring
pin
groove
1 Attach the socket to the tool.
2 Insert the pin. (Taking care to align the pin
holes on the socket and tool.)
3 Attach the rubber ring by sliding it into place
over the groove.
NOTE:
Be sure to attach the rubber ring to prevent
the pin from falling out.
Removing Socket
1 Remove the rubber ring.
2 Remove the pin.
3 Remove the socket from the tool.
NOTE:
Keep the temperature of the tool above
the freezing point (0°C/32°F) when
attaching sockets to or detaching them
from the square drive on the tool. Do not
use excessive force when attaching or
detaching sockets.
Attaching or Removing Bat-
tery Pack
1. To connect the battery pack:
Line up the alignment marks and attach
the battery pack.
•
Slide the battery pack until it locks into
position.
Alignment
marks
2. To remove the battery pack:
Push up on the button from the front to re-
lease the battery pack.
Button
IV
. OPERATION
[Main Body]
Switch and Forward/Reverse
Lever Operation
Forward Reverse
Switch lock
CAUTION:
To prevent damage, do not operate
Forward/Reverse lever until the bit comes
to a complete stop.