5
Remove junction box cover and secure conduit to
junction box knockout hole.(7/8 inch)
Refer to wiring diagram.
Using wire nuts, connect house power wires to ventilating
fan wires:
black to blacks; white to whites; green to greens.
Replace junction box cover.
Remove adapter from body and fix to ceiling joists
using long screws (M4X30). Slide the installation bracket
* into slot next to the junction box. If longer extension
is needed, assemble brackets * and * as shown below.
Secure the angular end of the bracket to the ceiling
joist. (See Fig.2.) Make sure the adapter is level and
square (perpendicular) with the joists.
Keep the distance B (21.6mm,0.85 inch) for the thickness
of ceiling board.
(Fig.2)
(Fig.3)
I
CAUTION:
Remove the bracket cover by loosening 4 (M4x6)
screws before installation
(Fig.1)
Fig. 1
Fig. 2
(Fig.3)
Fig. 3
Bracket cover
(Fig.1)
Disconnect plug connector from receptacle before
starting installation.
Lead wires
Conduit
B
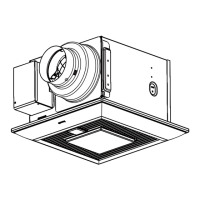
Installation (Joist mounting installation)
1.
2.
Installation bracket
II
Screw
I
Installation
bracket
I
3.
4.
(M4x6)
Screw
Plug connector
Screw driver
Receptacle
Junction box
Ceiling joist
Installation
bracket
Adapter
Long screw
Ceiling joist
Ceiling joist
Fan body
Duct
Junction box cover
Junction box
Wire nut
Green wires
Separate connection
Lump-sum connection