10
C1
C2
C3
C4
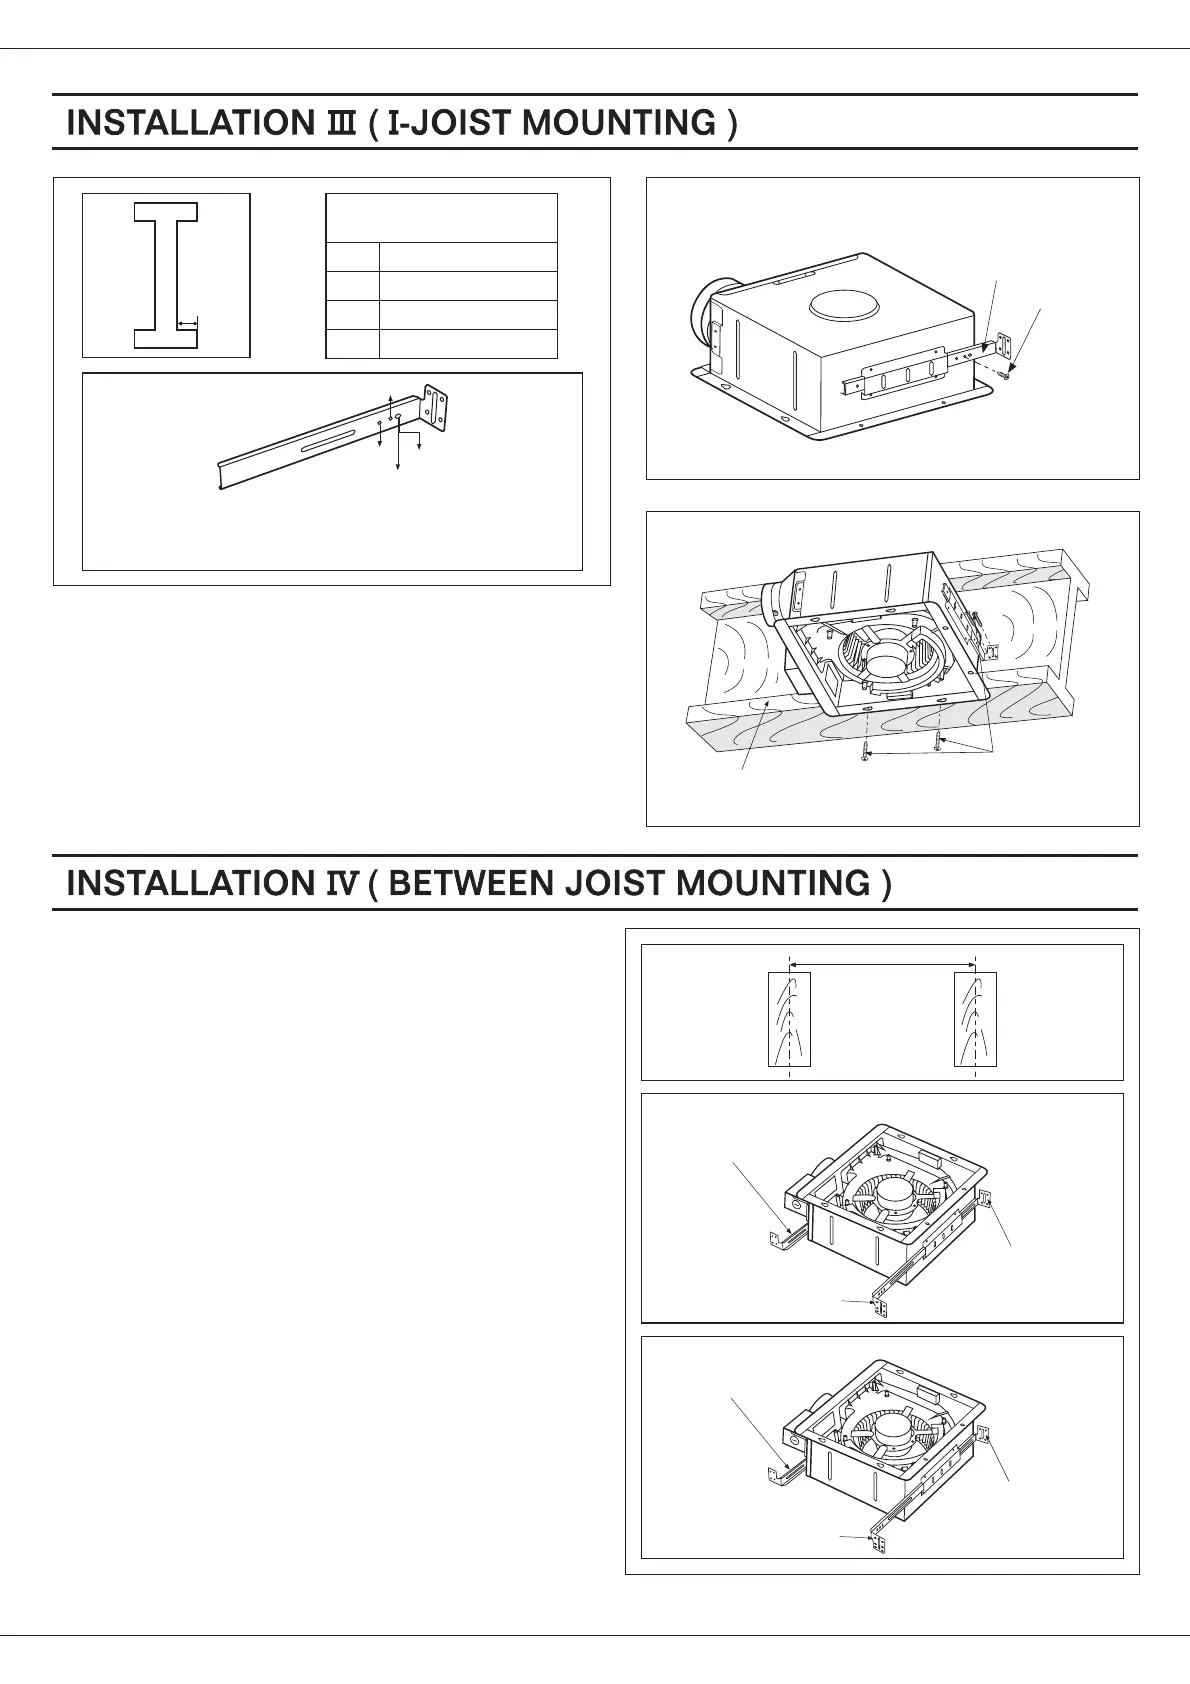
4 kinds of -joist
inches (mm)
I
9/16 ( )14.3
11/16 (17.5)
31/32 (24.6)
1 17/32 38.9()
Suspension bracket
The suspension can comply with
different kinds of -joist.
III
III
I
bracket
1. Before installation, Secure the fan body to adaptor by
using thumb screw. (Fig. 1 of page 6)
2. Connect the suspension to fan body. (Fig. 13)
(Select the hole by checking joist size fix the screw
to the frame hole.)
bracket III
I-
3. Connect the ventilating fan to the joist. (Fig. 14)I-
4. Follow step 5 to 9 of installation (page 7, page 8) to
complete the installation work.
I
2. Insert the suspension bracket into the bracket cover of
adaptor side and the back of the fan body. (Fig.15)
(select the suspension bracket according to spacing A
as shown below)
1. Before installation, Secure the fan body to adaptor by
using thumb screw. (Fig.1 of page 6)
Fig. 13
Fig. 14
C
C3
C4
C1
C2
Screw (M4X10)II
Suspension
bracket III
4 Long screws
(M4X30)
I-joist
16 inches and 19.2
inches horizontal joist
and
19.2 inches vertical joist
A
Suspension bracket I
Suspension bracket III
Suspension bracket II
A = 16 inches and 19.2 inches horizontal joist
Fig.15-1
Suspension bracket III
A = 19.2 inches vertical joist
Suspension bracket II
Suspension bracket I
Fig.15-2