6
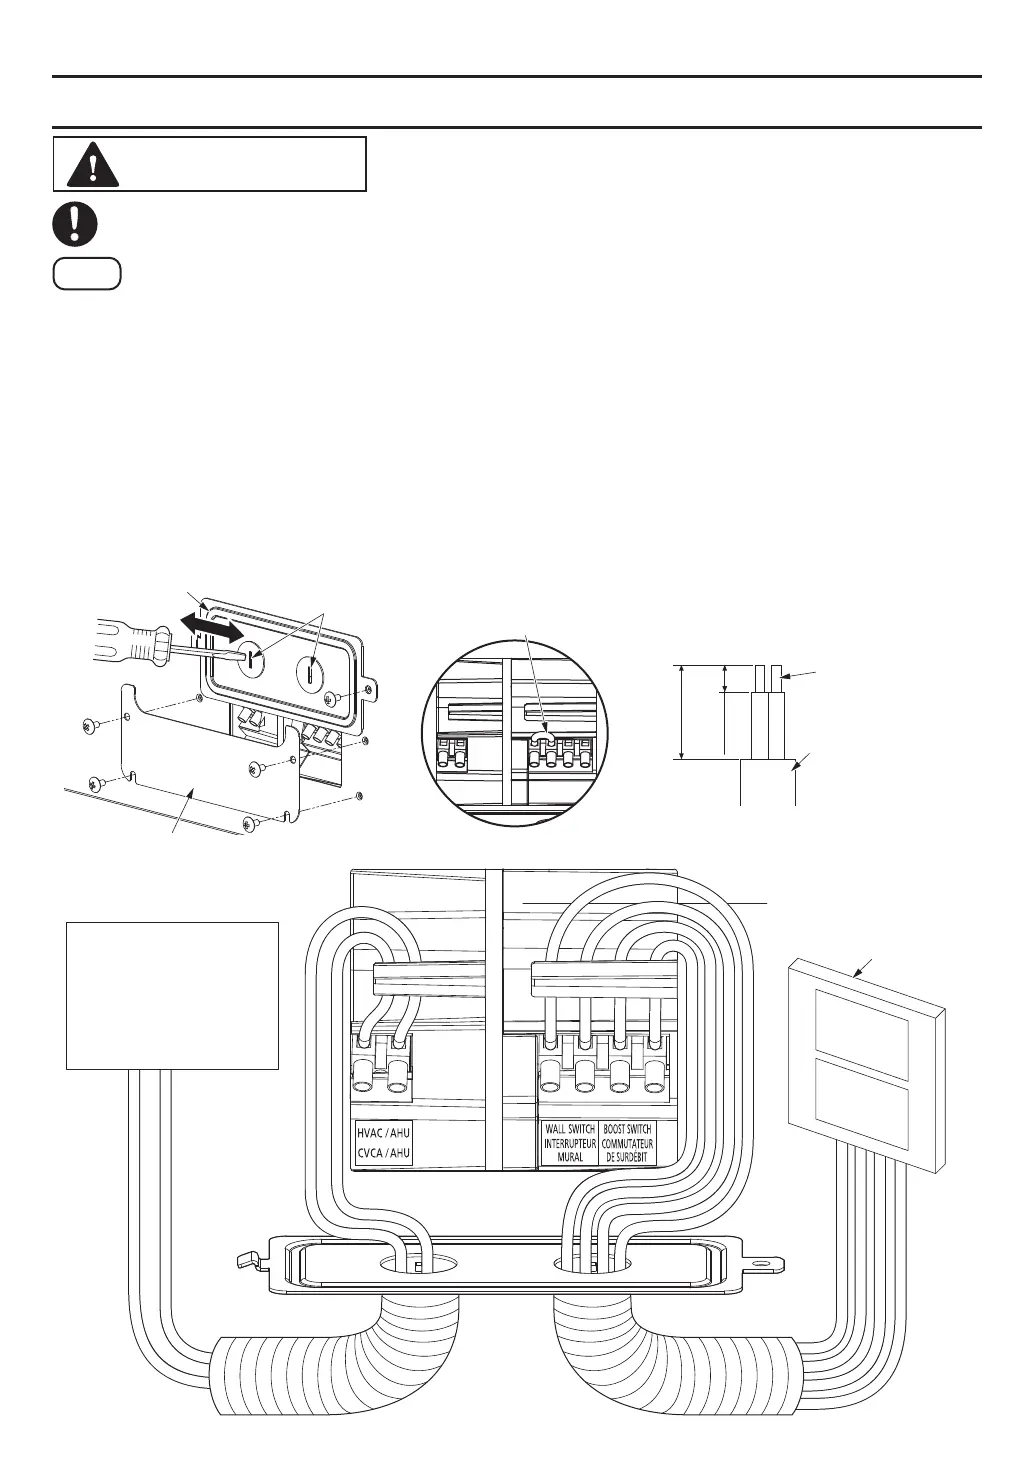
WIRING
METHOD
HVAC/AHU signal
Wall Switches
(1)The terminal of wall switch has been connected by jumper cable as factory default.
If connecting with wall switch, please remove the jumper cable.
Note
(2)The HVAC/AHU signal cord is optional, please connect it when you want to control
the HVAC/AHU.
If connecting with HVAC/AHU, the HVAC/AHU will turn on while ERV turns on.
(3)If you are not connecting to the HVAC/AHU, please open knock-out holes for wall
switch and boost switch connection only.
(4)Insert wires into the corresponding terminals deeply through the ribs.
Make sure the screw of terminal securely fastens the copper wire and the copper
wire is not exposed.
(5)Reinstall the wiring cover and maintenance plate.
Open knock out holes
Maintenance plate
Wiring cover
Jumper cable
Unit: inches (mm)
Wall switch cord/
HVAC/AHU signal
cord/Boost switch
cord
Copper wire
1/4 (7)
3 1/2
~
4
(90
~
100)
CAUTION
The capacity of wall switch, boost switch should be more than 120 V
~
3 A to control
the power of the product.