15
• Step 5. Cancel “Strict” mode:
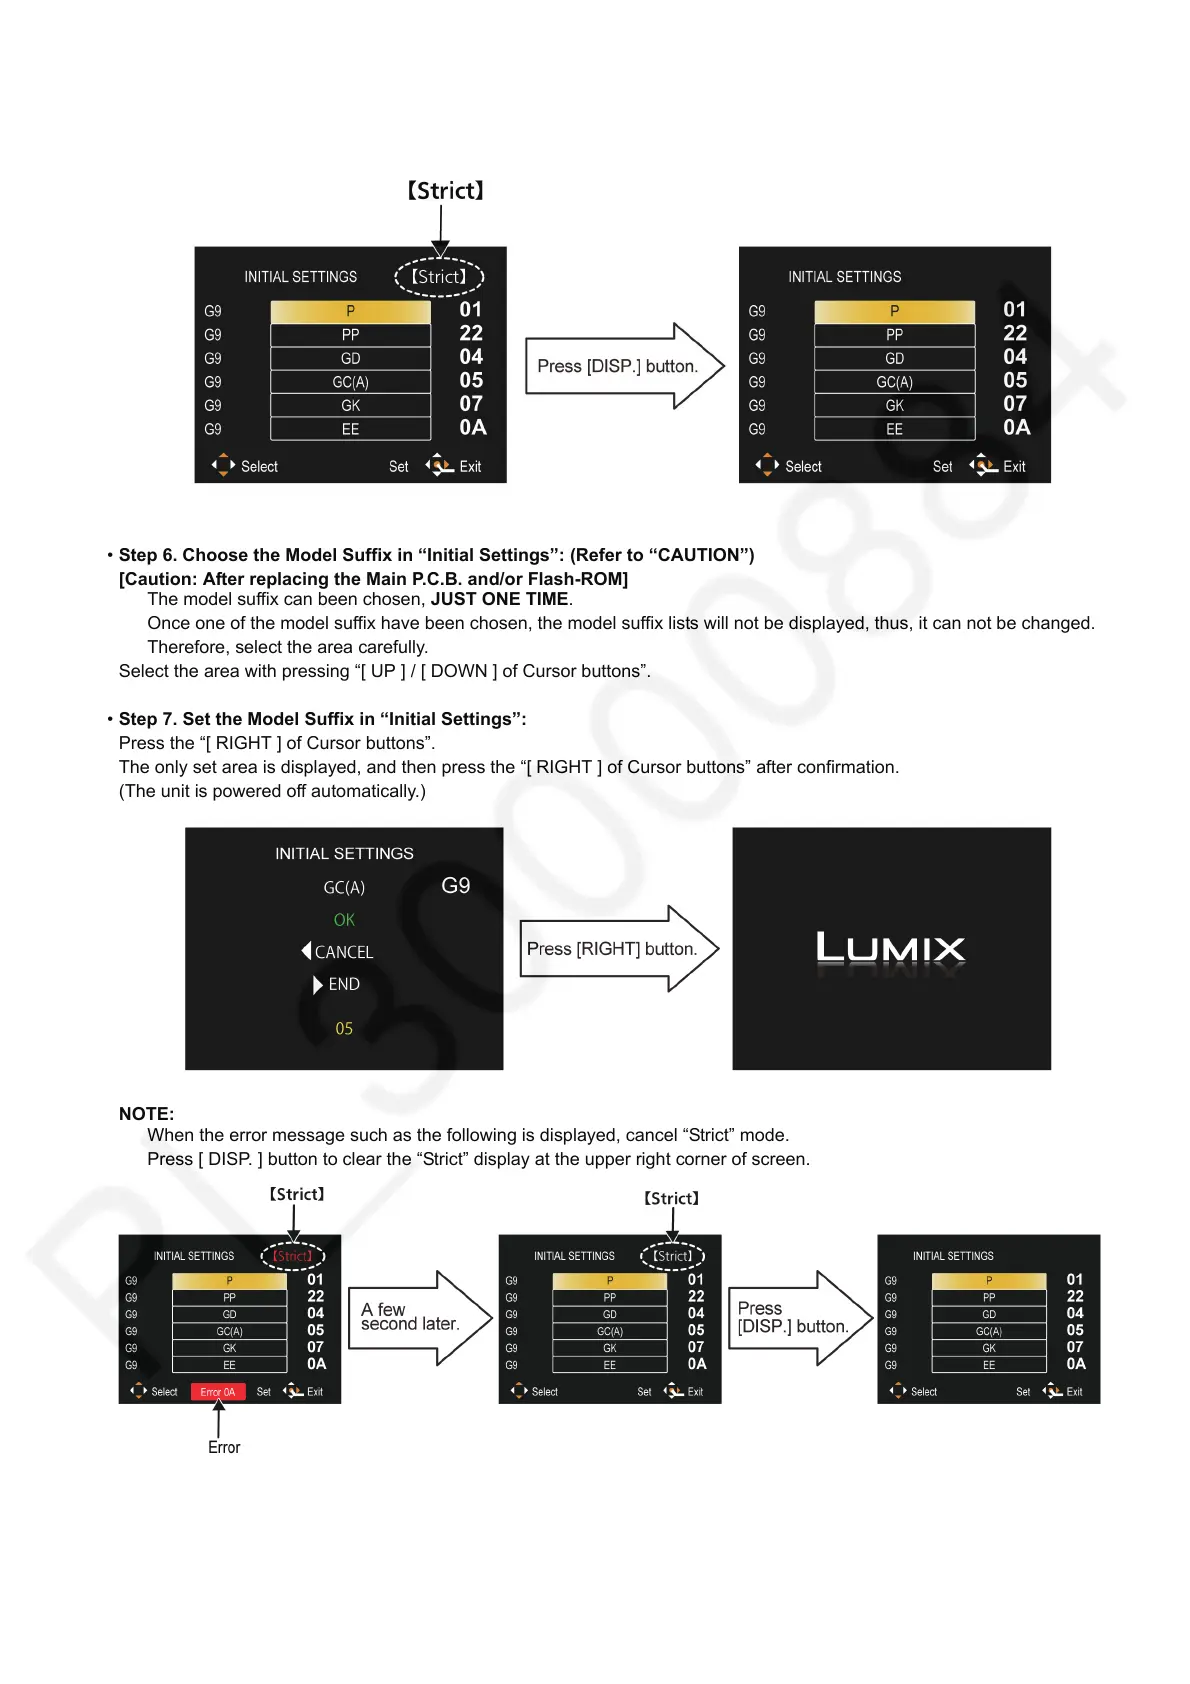
Press the [ DISP. ] button to cancel “Strict” mode. (Confirm the “Strict” is disappeared.)
• Step 6. Choose the Model Suffix in “Initial Settings”: (Refer to “CAUTION”)
[Caution: After replacing the Main P.C.B. and/or Flash-ROM]
The model suffix can been chosen, JUST ONE TIME.
Once one of the model suffix have been chosen, the model suffix lists will not be displayed, thus, it can not be changed.
Therefore, select the area carefully.
Select the area with pressing “[ UP ] / [ DOWN ] of Cursor buttons”.
• Step 7. Set the Model Suffix in “Initial Settings”:
Press the “[ RIGHT ] of Cursor buttons”.
The only set area is displayed, and then press the “[ RIGHT ] of Cursor buttons” after confirmation.
(The unit is powered off automatically.)
NOTE:
When the error message such as the following is displayed, cancel “Strict” mode.
Press [ DISP. ] button to clear the “Strict” display at the upper right corner of screen.

 Loading...