52
DVQX1391 (ENG)
Playback
Viewing your pictures
1
Press [ ] (Playback) button
2
Press to select a picture to be displayed
• When you press and hold , the pictures are displayed one after another.
■
Ending Playback
Press [ ] (Playback) button again or press the shutter button halfway.
●
The playback screen appears if the camera is turned on while pressing [ ]
(Playback) button.
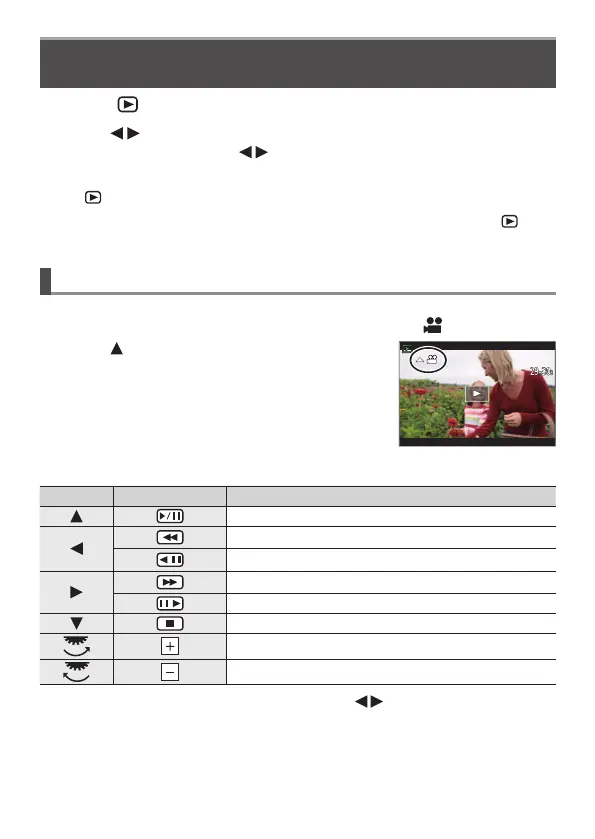
Viewing motion pictures
This unit was designed to play motion pictures using the AVCHD and MP4 formats.
• Motion pictures are displayed with the motion picture icon ([
]).
1
Press to start playback
• If you press [MENU/SET] during a pause, you
can create a picture from a motion picture.
■
Operations during motion picture playback
Operation Touch operation Description
Play / pause
Fast rewind
1
Single-frame rewind
2
(while paused)
Fast forward
1
Single-frame forward (while paused)
Stop
Volume up
Volume down
1
The fast forward or rewind speed increases if you press again.
2
Motion pictures recorded in [AVCHD] are rewound frame by frame approximately every
0.5 seconds.
 Loading...