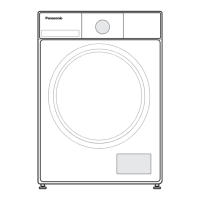
Leveller
To raise
Knob
To lower
Adjustable feet
Water tap adaptor and water supply hose
Mains water pressure and water fl ow
Water pressure: 0.03-1.0 MPa
If the water pressure exceeds this value, attach a
pressure reducing valve.
Water fl ow from tap: 5 L/min. or more
Connecting the water supply hose
CAUTION
Do NOT twist, squash, modify or cut the hose.
Tighten the nut fi rmly.
1
Connect the water tap adaptor
to the water faucet.
1 Turn part A to the left until approx. 4 mm of
the thread becomes visible.
2 Loosen the 4 screws.
3 Connect to the faucet and tighten the
screws.
4 Turn part A to the right and tighten securely.
(To prevent water leakage)
2
Connect the water supply hose
to the water tap adaptor.
Insert the hose into the adaptor while pushing
down the lever, and hook the claw of the lever
on the fl ange of the adaptor.
3
Connect the water supply hose
to the water inlet.
Attach the end of the hose to the water inlet of
the appliance and tighten the nut.
Water inlet
Water supply
hose
Drain hose
Draining to a sink or wash basin
CAUTION
Secure the drain hose with an elbow so that it does
not come off due to water pressure during drainage.
Elbow
(supplied)
Draining to a stand pipe
Stand pipe
Draining to a drain outlet
Note
Do not twist, pull out or bend the drain hose.
Do not put the hose tip under water.
Installation
(continued)
5. Levelling the appliance
Look at the leveller. Adjust the tilt.
How to adjust the tilt
Horizontal
No adjustment
needed.
Right side
higher
Left side
higher
Raise the front
side.
(2 locations)
Rear side
higher
To prevent
abnormal
vibration
Lower the right
side or raise
the left side.
* 2 adjustable feet
are attached at
the front side.
Check the horizontal state.
How to check rattling
Push the diagonal corners alternately and
confi rm there is no rattling.
If the appliance rattles, adjust the height of
the legs and check the leveller.
Front side
higher
Lower the left
side or raise
the right side.
Lower the front
side.
(2 locations)
(1) Turn to
 Loading...
