4
ENGLISH
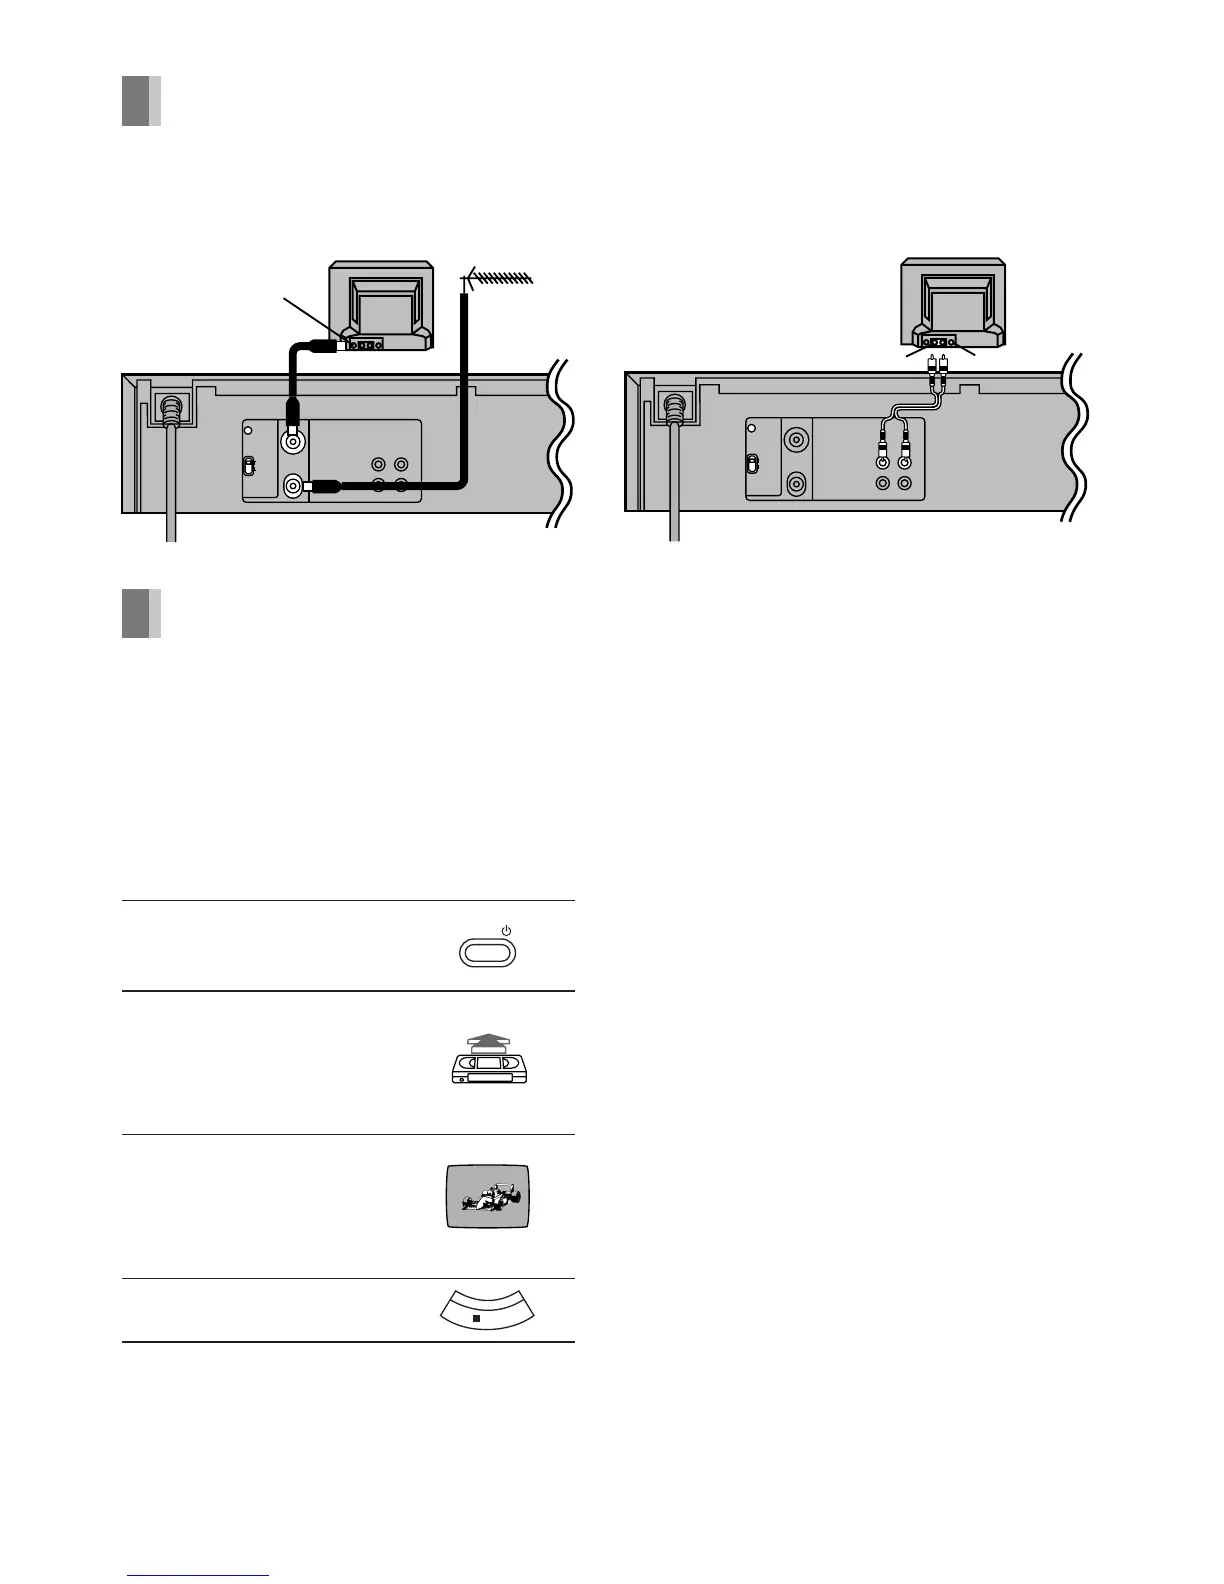
Connections
A: Basic Connections
B: Connection to a TV using
the Audio/Video Input Socket
Tuning the TV to your VCR (Line Recording)
It is possible to view the video picture on your
TV in the same way that you watch TV
broadcasts.
If you have connected the VCR (Line
Recording) to the TV through the Audio/
Video Input Sockets, then you do not need
to follow the procedure below.
Operations
1 Turn on the TV and VCR
(Line Recording).
2 Insert a recorded video
cassette tape.
– To start playback, see
page 6.
3 Select the TV channel on
which the playback picture is
viewed.
– UHF channel E38 (C25)
4 Stop playback.
The playback picture is transmitted on channel
E38 (C25) of the broadcasting channels. If you
are encountering interference from another
broadcast on the video channel, you may
readjust to a free channel by using [CH ADJ.]
screw. Note that if [CH ADJ.] screw is used,
then you will have to re-tune your TV to the
playback picture following steps 2–4.
RF SELECT
Use [RF SELECT] to select the colour TV
system used by the TV to be connected.
B.G.H: PAL B.G.H./SECAM B.G.
D.K.K1: PAL D/SECAM D.K.K1
POWER
ÍÍ
ÍÍ
Í/I Button
Press to switch the VCR (Line Recording) from
on to the standby mode or vice versa. In the
standby mode, the VCR (Line Recording) is still
connected to the mains. When the VCR (Line
Recording) is turned off, the [STANDBY]
indicator (on the front panel) is lit. When the
VCR (Line Recording) is turned on, the [120]
indicator (on the front panel) is lit.