4
Press CH • Key to start
CHANNEL / CLOCK AUTO SET
operation. Settings are performed
automatically. If the setup is
completed, the following screen is
displayed.
2/7/2001WED12:00PM
DST:ON
SETTING : CH 10
AUTO CLOCK SET
COMPLETED
END : PRESS CH UP KEY
If AUTO CLOCK SET tS
INCOMPLETE screen appears, set
the clock using MANUAL CLOCK
SET _rocedure as below.
AUTO CLOCK SET
IS INCOMPLETE
PLEASE SET CLOCK BY
PRESSING ACTION KEY
POWER--
ACTION-
cb
C_ (Z) (:Z:)._
czz)(]D (3D
_OO_tT
_SWea _ea
e) (_3 e)
P_ ct_l_qo STOr* #,_tay
_-c!_O (3DOl
Auolo P_ OOetWTI__te_
--COMBO
SELECT/
--SET
A:CH UP
v:CH DOWN
I'+:VOL UP
:VOL DOWN
If AUTO CLOCK SET was incomplete,
manually set the clock as follows.
Press ACTION Key on the Remote
to display SET CLOCK Menu screen.
SET CLOCK
/IX DST:ON
SELECT:A •
SET :_
:ACTION
Press • • to select the month and
press II_ to set. In the same manner,
select and set the date, year, time,
and DST. (Daylight Saving Time)
3
SET CLOCK
DST :ON
END :ACTION
Press ACTION Key twice to ;tart
CLOCK and exit.
When moving unit to a new location, or if a
mistake was made in the Initial Setup
section.
• Make sure a tape is not inserted in the unit.
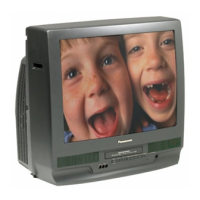
<Model PV-02061 unit shown>
[ I
! Turn the unit
Power on.
2 Press and hold both PLAY and
FF on the unit for more than 5
seconds.
• The power will shut off.
• Please ignore "NO CASSE-I-FE"
warning.
Do "Initial Setup" on page 8.
9
 Loading...