13
Getting Started
Using MENU Mode
Before you begin...
• Connect Camcorder to power source.
• Set POWER to CAMERA or VCR.
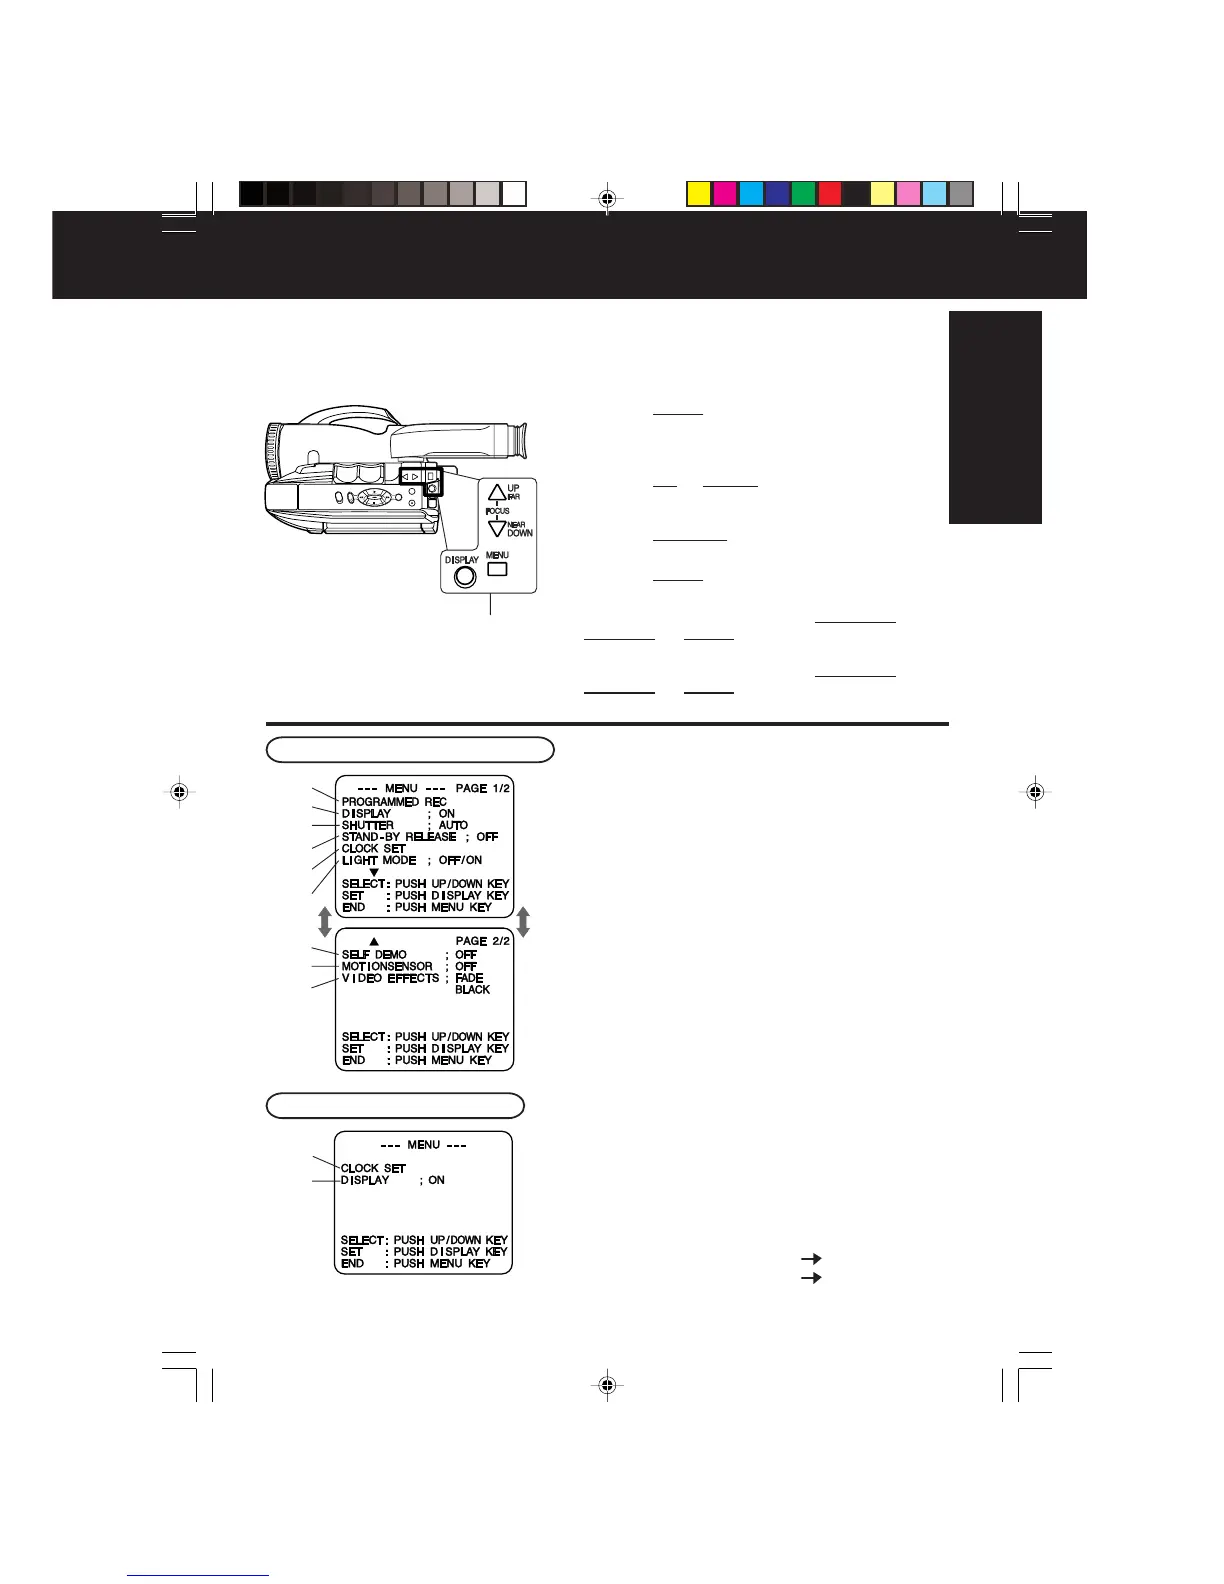
1 Press MENU for MENU mode.
The CAMERA or VCR MENU screen (see below
left) appears when Menu mode is entered.
2 Press UP or DOWN to highlight the
desired menu item.
3 Press DISPLAY to set selection.
4 Press MENU to exit.
Note:
• The Menu mode is canceled if UP/DOWN,
DISPLAY, or MENU are not pressed within
5 minutes when Self Demo mode is off.
• The Menu mode is canceled if UP/DOWN,
DISPLAY, or MENU are not pressed within
30 seconds when Self Demo mode is on.
1
2
3
4
5
6
7
8
9
MENU Mode (VCR) Screen
MENU Mode (CAMERA) Screen
1 PROGRAMMED REC (page 19).
Camcorder starts and stops recording at a
preset time.
2 DISPLAY (page 32).
ON : On-screen Display (OSD) screens are
displayed.
3 SHUTTER (page 26).
Select desired shutter speed.
4 STAND-BY RELEASE (page 18).
ON : Enables quick resumption of recording
from Stand-by mode.
5 CLOCK SET (pages 14, 15).
Select to set clock.
6 LIGHT MODE (page 16).
ON/OFF : Light can be set ON or OFF.
ON/OFF/AUTO : Light can be set ON, OFF, or AUTO.
7 SELF DEMO (page 7).
ON : SELF DEMO screen is displayed.
8 MOTIONSENSOR (page 31).
ON : Enables MotionSensor recording.
9 VIDEO EFFECTS (pages 27~28).
AUTO FADE : BLACK or WHITE
DIGITAL FADE : TYPE 7 types
COLOR
8 colors
5
2
1, 2, 3, 4
02.L352 Getting p09-16 01.12.10, 4:22 PM13