Table of Contents
Multi-Brand Control Feature ............................................ 2
Advanced Connections (Cable/DSS) .............................. 3
MTS Broadcast................................................................ 4
VHS Hi-Fi Stereo System................................................ 5
Tape Operation ............................................................ 6, 7
Copying Your Tapes (Dubbing) ...................................... 9
Special VCR Features .................................................. 10
On-Screen Displays (OSD) ........................................... 11
Before Requesting Service ........................................... 12
Before Requesting Service
- 12 -
On-Screen Displays (OSD)
VCR Status & Clock Displays
Function & Channel Displays
Blank Tape/
No Video Signal Indications
When blank tape is detected during play, or
the current channel has no signal (with Weak
Signal Display feature (p. 10) set to OFF), the
TV screen will turn solid blue.
When a function button is
pressed, e.g. PLAY, or you
change channels,
a 5 second display
appears.
To display or remove
overlay at right,
➛ press DISPLAY*.
On-Screen Displays (OSD)
These displays will alert you to a missed operation or
provide further instructions.
OSD
Caution
Page
PLEASE SET CLOCK BY
PRESSING ACTION KEY
If you attempt to set or review a Timer
Recording and the Clock is not set...
After a Timer Program has been set...
If you press REC on the remote
control or VCR, and a cassette is
inserted with no record tab...
If you press PLAY, FF, REW, or REC on
the remote control or VCR without a
cassette inserted...
CHECK CASSETTE
RECORD TAB
NO CASSETTE
TURN VCR OFF
FOR TIMER RECORDING
If you press POWER or STOP during
a Timer Recording...
(visible in VCR mode only)
TO CANCEL TIMER REC
PRESS POWER THEN
STOP KEY
VIDEO HEADS MAY
NEED CLEANING
PLEASE INSERT HEAD
CLEANING CASSETTE
OR REFER TO MANUAL
END :PLAY
VCR LOCK ACTIVATED
If head cleaning becomes necessary
while playing back a tape...
If you press a function button other
than STOP/EJECT or POWER while
the VCR is in VCR Lock mode...
Warning and Instruction Displays
See pages 6, 7 of
Basic Operations
book
See pages 6, 7 of
Basic Operations
book
See page 3 of Basic
Operations book
See page 5 of Basic
Operations book
See pages 6, 7 of
Basic Operations
book
See page 3 of Basic
Operations book
See page 10
- 11 -
Special VCR Features
- 10 -
Insert pre-recorded tape. Insert blank tape with record tab.
Press REC, then PAUSE/SLOW immediately to
enter REC/PAUSE mode.
Press INPUT* to set VCR Input mode to LINE1
for Video Input (Rear) or to LINE2 for Video Input
(Front). (See “Selecting the Input Mode” below.)
Press PLAY to start dubbing.
Playing VCR starts playback.
Press PAUSE/SLOW to start dubbing.
Recording VCR starts recording.
Press STOP to stop dubbing.
To Monitor Dubbing on Your TV
1 Turn your TV on and tune to the Recording
VCR channel (CH3 or CH4).
2 Set the VCR/ TV Selector on the Recording
VCR to “VCR.”
• Dubbing tapes protected with Copy
Guard will have poor quality results.
Selecting the Input Mode
Method 1:
Press INPUT repeatedly.
Channel Number
↔↔
↔↔
↔ LINE1
↔↔
↔↔
↔ LINE2
Method 2:
Press CH
/ .
Display will change as below.
•“L1” or “L2” lights on Multi-Function Display
(about 4 sec.) when LINE1 or LINE2 is
selected.
• LINE1: For rear audio/video connection.
LINE2: For front audio/video connection.
Press STOP to stop dubbing.
Press PLAY, then PAUSE/SLOW
immediately to enter PLAY/PAUSE mode.
Connection
Playing (Source) VCR Recording (Editing) VCR
1
2
3
4
5
Caution : Unauthorized exchanging and/or copying of copyrighted recordings may be
copyright infringement.
- 9 -
(Rear connection shown.)
Note
1
2
3
125
LINE1
(CABLE)
69
(TV)
or
LINE2
Copying Your Tapes (Dubbing)
- 8 -
1
2
Front of VCR
(Front Audio L/R Video IN jacks
are also provided)
Connect VIDEO OUT jack on Playing VCR to VIDEO IN jack on Recording VCR.
To monitor the dubbing, also connect a TV as shown.
Connect AUDIO L/R OUT jacks on Playing VCR to AUDIO L/R IN jacks on Recording VCR.
In place of a Playing VCR, you can use other equipment, such as a Camcorder.
Simply connect the unit’s Audio/Video outputs to the Recording VCR.
VIDEO IN 2 L-AUDIO IN2-R
• For more on VCR/TV selection, see “Record one
station, watch another” and “Select channels on
VCR” sections (p. 5 of Basic Operations book).
The VCR/TV selection can be set to auto or
manual.
Press
to select
“AUTO VCR/TV,”
and press
to set
“ON” or “OFF.”
1
Press ACTION to display MENU.
2
4
Press ACTION
to return to normal screen.
VCR/TV Selection Feature
SELECT :
EXIT
: ACTION
SET:
MENU
SET UP VCR
SET UP CLOCK
SET UP CHANNEL
IDIOMA/LANGUE : ENGLISH
VCR’S OUTPUT CH: 3
REPEAT
PLAY
:
O
FF
AUT
O
SHU
T
-
OFF
:
O
FF
FRONT DISPLAY :
ON
AUT
O
VCR/TV
:
ON
TAPE SELECT :
T-120
SELE
C
T
:
SET
:
EXIT
:
ACT
I
O
N
SET
UP V
CR
3
Press to select
“SET UP VCR,”
and press
.
• OFF(Manual): You select “VCR” or “TV” mode
using the VCR/TV button on the
remote.
• ON(Auto): “VCR” mode is automatically set
when VCR is turned on, or in Play
mode.
The power shuts off at a preset time.
SELECT :
EXIT
: ACTION
SET:
MENU
SET UP VCR
SET UP CLOCK
SET UP CHANNEL
IDIOMA/LANGUE : ENGLISH
VCR’S OUTPUT CH: 3
Press to select
“AUTO SHUT-OFF.”
Press
repeatedly to
change shutoff time as
shown below.
Auto Shut-Off Feature
1 Press ACTION to display MENU.
2
• The shut-off countdown will not
function during Play or Record.
Note
REPEAT
PLAY
:
O
FF
AUT
O
SHU
T
-
OFF
:
O
FF
FRONT DISPLAY :
ON
AUT
O
VCR/TV
:
ON
TAPE SELECT :
T-120
SELE
C
T
:
SET
:
EXIT
:
ACT
I
O
N
SET
UP V
CR
Press to select
“SET UP VCR,”
and press
.
4
Press ACTION
to return to normal screen.
3
Note
When set to “ON,” picture is displayed regardless
of signal strength.
• O N : Picture is displayed even if signal
is very weak but quality may be poor.
OFF : Screen turns solid blue when signal
is weak or non-existent.
• Selecting “ON” has no effect on connected
equipment with blue back feature.
Press
to select
WEAK SIGNAL
DISPLAY, and press
to set “ON” or “OFF.”
Weak Signal Display ON/OFF Feature
1
Press ACTION to display MENU.
2
4 Press ACTION
to return to normal screen.
SELE
C
T
:
SET
:
EXIT
:
ACT
I
O
N
ANT
ENN
A
:
C
ABLE
A
U
T
O
S
E
T
W
EA
K
S
I
GN
AL
D
I
SPLA
Y:
OFF
SET UP
CH
A
NNE
L
SELECT :
EXIT
: ACTION
SET:
MENU
SET UP VCR
SET UP CLOCK
SET UP CHANNEL
IDIOMA/LANGUE : ENGLISH
VCR’S OUTPUT CH: 3
3
Press to select
“SET UP CHANNEL,”
and press
.
Multi Function Display (Front Display) can be
set to ON/OFF.
• O N : When set to “ON,”
Multi Function Display is displayed
in Standby (OFF) mode.
OFF : When set to “OFF,”
Multi Function Display is not
displayed
in Standby (OFF) mode.
If a Timer Program is set,
Multi Function Display is displayed.
Press
to select
“FRONT DISPLAY,”
and press
to set
“ON” or “OFF.”
Multi Function Display
(Front Display) ON/OFF Feature
1
Press ACTION to display MENU.
3
4 Press ACTION
to return to normal screen.
REPEAT
PLAY
:
O
FF
AUT
O
SHU
T
-
OFF
:
O
FF
FRONT DISPLAY :
ON
AUT
O
VCR/TV
:
O
N
TAPE SELECT :
T-120
SELE
C
T
:
SET
:
EXIT
:
ACT
I
O
N
SET
UP V
CR
SELECT :
EXIT
: ACTION
SET:
MENU
SET UP VCR
SET UP CLOCK
SET UP CHANNEL
IDIOMA/LANGUE : ENGLISH
VCR’S OUTPUT CH: 3
2
Press to select
“SET UP VCR,”
and press
.
When set to ON, all operations are prohibited.
(Except for timer record, tape eject, channel
change, and power on/off.) Useful for households
with small children.
• VCR Lock cancels in 24 hours.
To turn on, hold down REC
on the VCR in Stop mode with
no tape inserted for 7 sec.
(Please ignore the NO
CASSETTE warning.)
To turn off, repeat above.
VCR Lock Feature
• Special VCR Features • Copy Your Tapes (Dubbing)
• Before Requesting Service • On-Screen Displays (OSD)
Video Cassette Recorder
Operating Instructions
(Advanced Operations)
For Basic operations, see the separate
“Basic Operations” instruction book.
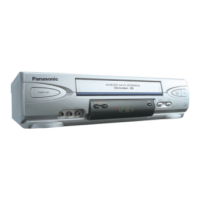
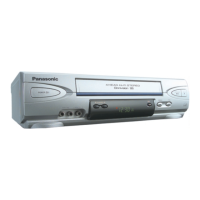
Model No. PV-V4535S-K
LSQT0927
A
The operation of steps 4 and 5 must be done on both playing
and recording VCRs at the same time.
REC
1
2
:
0
0
A
M
0
:
25
CH
02
-
0
:
1
2
:
3
4
SP
S
T
ER
EO
SAP
M
ONO
Function Status
Rec Time Remaining
(OTR mode only.
See p. 5 of Basic
Operations book.)
Current Time
Channel
Tape Speed
(See p. 3 of Basic
Operations book.)
Broadcast Audio
Being Received
Counter
*Important: If a remote control button does not work when pressed,
press the VCR button on the remote and try the button again.
Please read these instructions carefully before attempting to
connect, operate or adjust this product. Please save this manual.
For assistance, please call : 1-800-561-5505 or visit us at www.panasonic.ca
Power
No power…
Recording & Playback
TV program cannot be recorded...
Timer recording cannot be
performed…
There is no playback picture, or the
playback picture is noisy or contains
streaks...
Special effects playback picture
may contain some vertical jitter
when using a TV with an Automatic
Vertical Hold Control...
VCR cannot be controlled...
Check the following points once again if you are having trouble with your VCR.
(BO : refers to “Basic Operations” Instruction book.)
(AO : refers to “Advanced Operations” Instruction book.)
Correction
• Completely insert Power Plug into an AC outlet.
• Press POWER button on.
• Make sure power source is active.
Miscellaneous
Programs cannot be viewed on TV...
Video cassette cannot be inserted...
Video cassette cannot be removed...
Video cassette ejects when a
recording is started or the power is
turned off for timer recording...
In Stop mode, the motor
(CYLINDER) continues to rotate...
Remote Control
VCR cannot be remote controlled...
ACTION and PROG buttons do not
respond...
Correction
• Check connections between VCR, external antenna, and
TV.
• Check connections selection. (BO p. 4, AO p. 3)
• Make sure your antenna system (CABLE or TV) is correctly
set. (Channels [BO p. 11])
• Make sure cassette record tab is intact. (BO p. 3)
• Confirm that clock is set to current time and date.
• Make sure Cable/DSS box (if used) is left on and tuned to
channel to be recorded.
• Set recording start/stop times correctly. (BO p. 6, 7)
• Make sure VCR POWER button is pressed off. (BO p. 6, 7)
• Timer recording may not be performed or continued if a
power interruption occurs before or during a Timer
Recording, even after power is restored.
• Select channel 3 or 4 on TV to match VCR output channel
(3 or 4) (BO p. 4) or select LINE.
• Set VCR/TV selector to “VCR.”
• Adjust TRACKING control in either direction. (BO p. 3)
• Try Head Cleaning. (BO p. 3)
• Set TV’s Vertical Hold Control to MANUAL, then adjust.
• Make sure VCR power is on.
• Check Remote batteries.
• Make sure VCR LOCK is set to off. (AO p. 10)
• Make sure Timer Record is not in progress.
Correction
• Make sure VCR power is on.
• Make sure Remote is in VCR mode.
• Aim Remote Control directly at remote sensor on VCR.
(BO p. 10)
• Avoid any object blocking signal path.
• Check Remote batteries. (BO p. 3)
• Make sure VCR LOCK is set to off. (AO p. 10)
• Exposing VCR remote sensor to direct fluorescent or
outdoor light may cause signal interference.
• Check connections between VCR, external antenna, and
TV.
• Press VCR button for VCR mode. (AO p. 2)
• Check Remote batteries. (BO p. 3)
Correction
• Make sure TV power is on.
• Make sure TV is tuned to VCR's output channel (3 or 4).
• Check connections between VCR, external antenna, and
TV.
• Set VCR/TV selector to “TV.” (BO p. 5, AO p.10)
• Make sure proper signal source is selected.
• Insert the cassette with window side up; record tab facing
you.
• Check if a tape is already in the unit.
• Confirm Power Plug is fully inserted into an AC outlet.
• Make sure cassette record tab is intact. (BO p. 3)
• To enable Quick play mechanism, the cylinder will rotate for
about 5 minutes. This reduces response time from Stop to
Play mode and from Play to Rewind Search mode.
*Important:
If a remote control button does not work
when pressed, press the VCR button on
the remote and try the button again.
Montréal: 3075 Louis A. Amos, Lachine, Québec H8T 1C4 (514) 633-8684
Toronto: 5770 Ambler Drive, Mississauga, Ontario L4W 2T3 (905) 624-8447
Calgary: 6835-8
th
Street N.E., Calgary, Alberta T2E 7H7 (403) 295-3955
Vancouver: 12111 Riverside Way, Richmond, BC V6W 1K8 (604) 278-4211
Panasonic Canada Inc.
5770 Ambler Drive,
Mississauga, Ontario L4W 2T3
(905) 624-5010
www.panasonic.ca
Printed in Indonesia
LSQT0927 A
S1204-0
K
As an
E
NERGY
S
TAR
®
Participant, Panasonic has determined
that this product or product model meets the
E
NERGY
S
TAR
®
guidelines for energy efficiency.
REC
Multi Function Display
(Front Display)
L
R
L
R
VCR
(HiFi)
IN FROM ANT.
OUT TO TV
VIDEO OUT
AUDIO OUT
AUDIO IN
VIDEO IN
TV
VHF/UHF
R
L
VCR
(HiFi)
V4535S-K (E) Advanced-1 (041208).p65 2004/12/13, 9:591
LSQT0927A (Advanced Operation) - Front
 Loading...