This document describes the Panasonic RX-5150 FM-AM-FM Stereo Radio Cassette Recorder, providing detailed operating instructions, technical specifications, usage features, and maintenance guidelines.
Function Description:
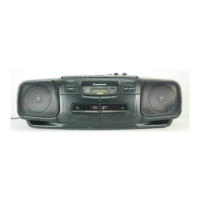
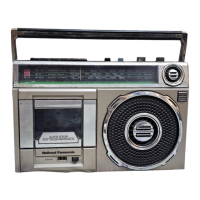
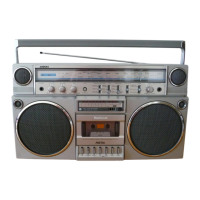
The Panasonic RX-5150 is a portable stereo radio cassette recorder capable of receiving FM, AM, and FM stereo radio broadcasts, playing back cassette tapes, and recording audio from various sources. It features an integrated cassette deck for recording and playback, a multi-band radio tuner, and built-in stereo speakers. The unit supports both battery and AC power operation, with an additional option for car battery power. It includes a range of controls for audio adjustment, such as volume, balance, bass, and treble, as well as specific controls for tape functions like record, playback, rewind, fast forward, stop, and pause. The device also incorporates a Tape Program Sensor (TPS) system for automatic track finding on recorded cassettes and a Full Auto Stop System to protect the tape and conserve power.
Important Technical Specifications:
- Power Source: Operates on 8 "D" size batteries (Panasonic UM-1 or equivalent), AC power (100-110V, 115-127V, 200-220V, 230-250V selectable via Voltage Selector), or 13.2V DC car battery (using Panasonic car adaptor RP-952).
- Radio Bands: FM, AM, FM Stereo.
- Cassette Types: Supports METAL, CrO2, and NORMAL tape types, with a Tape Selector to match the tape.
- Audio Output: Features Line Output Jacks, External Speaker Jacks (3-8Ω), and a Headphones Jack.
- Audio Input: Includes Line Input Jacks and Microphone Jacks (for external microphones). Built-in microphones are also present.
- Recording System: Automatic Level Control (ALC) for recording level adjustment.
- Special Features: Tape Program Sensor (TPS) system, Full Auto Stop System, Rewind/Automatic Playback, Beat-Proof Switch for AM recording, Ambience Sound System.
- Indicators: LED Meter (LEVEL), FM Stereo Indicator, Power Indicator, TPS Indicator.
Usage Features:
- Battery Operation: Requires 8 "D" size batteries. The unit automatically switches from battery to AC operation when the AC power cord is plugged in. Battery life is indicated by tape speed, sound distortion, and the Power Indicator dimming or going out.
- AC Power Operation: Features a Voltage Selector to match household AC voltage (100-110V, 115-127V, 200-220V, 230-250V). The AC power cord connects to the AC Socket on the unit and a household AC power outlet.
- Car Battery Operation: Utilizes a car battery adaptor cord (Panasonic RP-952) plugged into the DC Input Jack and the car's cigarette lighter socket.
- Radio Listening:
- Set Function Selector to "RADIO" and Band Selector to the desired band.
- Mode Selector can be set to "AMBIENCE," "STEREO," or "MONO." "AMBIENCE" enhances stereo imaging, while "STEREO" enables FM stereo reception (indicated by the FM Stereo Indicator). "MONO" reduces noise for poor stereo reception.
- Tuning Control is used to find stations.
- Volume, Balance, Bass, and Treble Controls adjust sound.
- Loudness Switch compensates for low tones at low volume.
- FM reception uses a pull-out Telescopic Antenna, adjustable for optimum reception.
- AM reception uses a sensitive ferrite core antenna; the unit should be turned for best results.
- FM AFC (Automatic Frequency Control) locks tuned stations for stability.
- Cassette Playback:
- Depress Stop Button before inserting a cassette. Open the Cassette Compartment by depressing the Eject Button, insert the tape face down, and close the compartment.
- Set Function Selector to "TAPE" and Tape Selector according to the tape type (METAL, CrO2, NORMAL).
- Mode Selector can be set to "AMBIENCE," "STEREO," or "MONO."
- Depress Playback Button to start.
- Volume, Balance, Bass, and Treble Controls adjust sound.
- Loudness Switch can be used at low volume.
- Depress Stop Button to stop playback. The unit automatically shuts off at the end of the tape due to the Full Auto Stop System.
- Fast Forward and Rewind buttons move the tape rapidly. Do not depress Playback during FF/REW.
- Tape Counter and Reset Button: Provides a numerical reference for finding specific parts of the tape. Reset Button returns digits to "000."
- Rewind/Automatic Playback: With TPS Switch "OFF," depressing Playback and Rewind buttons simultaneously rewinds the tape to the beginning and starts playback automatically.
- Tape Program Sensor (TPS) System: Set TPS Switch to "ON." Depress Fast Forward or Rewind while Playback is depressed to automatically find and play the next or previous program. This system works best with pre-recorded tapes and specific recording intervals.
- Recording:
- General: The unit features Automatic Level Control (ALC) and a one-touch recording mechanism (only Record Button needs to be pressed).
- Recording Radio Broadcasts: Tune to the desired station, insert cassette, set Tape Selector, depress Pause Button, then Record Button. Release Pause to start recording. Depress Stop to end.
- Pause Button: Temporarily stops tape movement during recording or playback. Depress and lock Pause, then Record. Release Pause to start. Not for long-term stops; use Stop Button to turn off power.
- Beat-Proof Switch: Reduces unwanted "beat" signals when recording AM broadcasts.
- Recording through Built-in Microphones: Set Function Selector to "TAPE," Mode Selector to "STEREO" or "MONO," then follow radio recording steps. Built-in microphones are omni-directional.
- Recording through External Microphones: Connect optional external microphones to Microphone Jacks. Built-in microphones are automatically disconnected. Use two microphones of the same specifications. If only one is used, connect an optional erase plug to the unused jack to prevent recording through the built-in microphone on that side.
- Recording from External Equipment: Connect output of external equipment to Microphone or Line Input Jacks. Set Function Selector to the corresponding source.
- Monitoring: Sound can be monitored through built-in speakers, headphones, or external speakers during recording. When recording via built-in microphones, monitoring through speakers/headphones is disabled to prevent feedback. Use headphones for external microphone recording.
- Timer Playback and Recording: Connect the unit to a timer. Set the timer's power switch to "ON." For playback, set the unit for playback, depress Stop, set timer for start time, then depress Playback. For recording, set the unit for recording, depress Stop (if Pause is active), set timer for start time, then depress Record. The timer will turn on the power at the preset time.
Maintenance Features:
- Tape Prevention Tabs (Knock-Out Tabs): Cassettes have plastic tabs to prevent accidental erasing. Breaking off a tab protects a recording. To record on a tab-removed track, cover the hole with adhesive tape.
- Tape Looseness: Can be corrected by inserting a pencil into a cassette reel and turning it to take up slack.
- Head Assembly, Capstan, and Pressure Roller Cleaning: These parts should be cleaned regularly (every 10 hours of use) to maintain sound quality.
- Depress Stop Button, then Eject Button to open the cassette compartment.
- Remove the cassette lid to facilitate cleaning.
- Depress Playback Button to expose the heads.
- Clean the Recording/Playback Head, Erase Head, Capstan, and Pressure Roller with a cotton swab or a soft cloth wound around a piece of wood.
- For extremely dirty heads, use a soft cloth dampened with alcohol.
- Avoid bringing metal or magnetic objects (like screwdrivers) near the head assembly.
- Cabinet Cleaning: Do not use benzine or thinner on the plastic cabinet. Clean with a solution of soap and water.
- Power Cord Disconnection: Disconnect the power cord from the AC power outlet when not in use for extended periods.
This comprehensive manual ensures users can effectively operate, maintain, and troubleshoot their Panasonic RX-5150 radio cassette recorder for optimal performance and longevity.