5 - 19
2. Detailed Settings Function
5
VRF SYSTEMS Indoor Unit
2. Detailed Settings Function
Selecting the DC fan motor tap (when setting from the PCB)
4-Way Cassette type
<Procedure> Stop the system before performing these steps.
Open the electrical component box cover, then check the indoor unit control PCB.
Setting No. (3) :
Setting No. (6) :
Connect the jumper connector (2P: yellow) which was supplied with the accessory to the correct connector pin
on the indoor unit control PCB according to the setting number which was confirmed in Table for DC Fan Motor
Tap Settings.
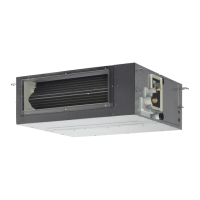
Ceiling type
<Procedure> Stop the system before performing these steps.
Open the electrical component box cover, then check the indoor unit control PCB. (Fig. 7)
Connect the jumper connector (2P: yellow) which was supplied with the accessory to the correct connector pin on
the indoor unit control PCB according to the setting number which was confirmed in Table 2 (Table of DC Fan
Motor Tap Settings).
If the setting No. is (1), then connect the jumper connector to the connector pin TP1 (2P: red) on the indoor unit con-
trol PCB.
If the setting No. is (3), then connect the jumper connector to the connector pin TP3 (2P: yellow) on the indoor unit
control PCB.
Then connect the jumper connector to the connector pin TP3 (2P: yellow) on the indoor unit control PCB.
Then connect the jumper connector to the connector pin TP6 (2P: white) on the indoor unit control PCB.
Fig. 6
Fig. 7
FAN-TAP
TP6
TP3
TP1
(WHT)
YEL
RED
FAN-TAP
TP6
TP3
TP1
(WHT)
YEL
RED
SM830232-00欧州向けVRFIndoor201404.indb19SM830232-00欧州向けVRFIndoor201404.indb19 2014/04/2511:11:142014/04/2511:11:14

 Loading...


