8-16
8
8-15. CZ-RWSU2
1. Accessories
2. Installing the Receiver
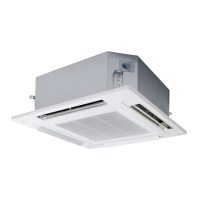
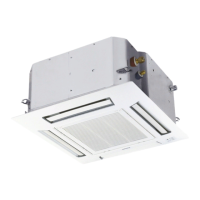
Receiver
Remote Control
Remote Control Holder
The receiver can only be installed on the corner indicated in Fig. 8-1, so consider how the panel will face when it is installed
on the indoor unit.
(1) Remove the air inlet grill.
(2) Remove the screw holding the adjustable corner cap, slide the cap to the side and remove it. (Fig. 8-2)
(3) To pass the wire through the panel, bend back the clip on the hexagonal hole (diagonal line) and then pass wire protruding
from the wireless receiver through the grill. (Fig. 8-3)
(4) After wiring according to the directions in Wiring the Receiver Unit below, leave enough wiring so the receiver’s adjustable
corner cap can be removed and fasten the cable clamp with its screw. (Fig. 8-3)
(5) Hang the string on the corner cover onto the pin on the ceiling panel as shown in the diagram. Then slide the corner
cover onto the ceiling panel until the three clips are correctly located, and then fix it in place with the screws. (Fig. 8-4)
(1) If the wiring for the receiver is bundled with other wires, such as the incoming line, it may cause a malfunction,
so avoid putting them together.
(2) If something causes the unit’s power source to make noise it will be necessary to resolve the problem, such as by
installing a noise filter.
For more information about wiring or test operation, refer to Wiring the Receiver and Test Run.
Refer to the installation instructions supplied with the panel.
NOTE
Fig. 8-1
Fig.
8-2
Fig. 8-3 Fig. 8-4
No. Accessories Quantity
No. Accessories Quantity
1
1
2
1
1
3
4
2Dry-cell Batteries
5
1Users Manual
6
Truss Self-Tapping Screws
4 X 16
2
7
1
Cable clamp
Make sure the wire is not caught.
Box with Indoor
Unit’s Electrical
Parts
Bend back the clip (diagonal
line) with a screwdriver or
similar implement to allow the
wire to pass through.
Fix it in place with
the cable clamp.
Pin
Screw
fixed
Make sure the three clips on the corner cover are
located over the holes on the ceiling panel, and then
fix it in place with the screws supplied.
Receiver installation Location
Adjustable Corner Cap
Ceiling Panel
Adjustable Corner Cap
Screw
Sec8.indd16 2012/02/2816:14:01
SM830231-02Single欧州.indb16SM830231-02Single欧州.indb16 2014/09/0921:22:222014/09/0921:22:22

 Loading...