1-1711-170
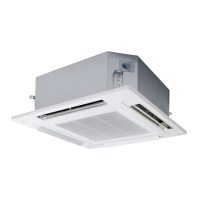
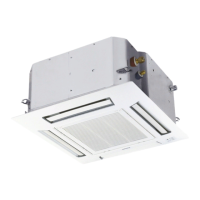
Ceiling (Type T2)
6-55. Selecting the Installation Site
AVOID:
areas where leakage of flammable gas may be expected.
places where large amounts of oil mist exist.
direct sunlight.
locations near heat sources which may affect the
performance of the unit.
locations where external air may enter the room directly.
This may cause “condensation” on the air discharge ports,
causing them to spray or drip water.
locations where the remote controller will be splashed with
water or affected by dampness or humidity.
installing the remote controller behind curtains or furniture.
locations where high-frequency emissions are generated.
DO:
select an appropriate position from which every corner of the
room can be uniformly cooled.
select a location where the ceiling is strong enough to
support the weight of the unit.
select a location where tubing and drain pipe have the
shortest run to the outdoor unit.
allow room for operation and maintenance as well as
unrestricted air flow around the unit.
install the unit within the maximum elevation difference
above or below the outdoor unit and within a total tubing
length (L) from the outdoor unit as detailed in the Installation
I
nstructions packed with the outdoor unit.
allow room for mounting the remote controller about 3.3ft. (1 m)
off the floor, in an area that is not in direct sunlight or in the flow
of cool air from the indoor unit.
Ceiling
Ceiling
Wall
Front view
min. 0.83ft. (250mm)
min. 0.83ft. (250mm)
NOTE
The rear of the indoor unit can be installed flush against
the wall.
Air intake
Air
discharge
min.
1.64ft. (500mm)
Side view
max.
0.83ft.
(250mm)
Obstacle
Fig. 1-180
00_271726_Eng.indb 6 2015-8-5 9:58:46
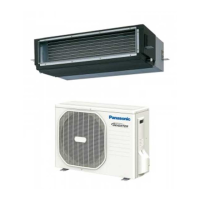
Indoor Unit
(2) Refrigerant tubing • drain hose position
(3) Unit opening position (Refrigerant tubing • drain hose • power inlet port • remote control wiring inlet port)
6-56. Required Minimum Space for Installation and
Service
(1) Dimensions of suspension bolt pitch and unit
Length
Type
ABC
26
inch 48-17/64 50-13/64 9-1/4
mm 1226 1275 235
36, 42
inch 62-43/64 62-19/32 9-1/4
mm 1541 1590 235
Fig. 1-181
Air intake
Air discharge
(Suspension bolt pitch)
(Suspension
bolt pitch)
Unit: inch (mm)
Unit: inch (mm)
Unit: inch (mm)
Fig. 1-182
Rear (Figure shows view from front)Left side
Left drain position
Closed with rubber stopper
at time of shipment.
Left drain position
Gas tubing
Liquid tubing
Right drain position
(Liquid tubing •
Gas tubing)
Right side
Right drain position
Left-side drain hose
outlet port
Top outlet port
Right-side drain
hose outlet port
Side cover
Outside air intake duct
connection port
(ø3-15/16 (100), cutout)
Rear outlet port (Figure shows view from front)
Remote control wiring
and inter-unit wiring inlet port
Left-rear side drain
hose outlet port
(cutout)
Cover of tubing hole
Power Supply inlet
*1 Use a compass saw, jig saw or similar tool and cut along
the indented portion of the side cover and make a hole
inside the cover.
*2 When pulling the refrigerant tubing from the upper side,
cut along the indented portion and pass the tubing
through the hole.
NOTE
Be sure to use sealing putty to seal off the opening to
prevent dust.
Fig. 1-183
00_271726_Eng.indb 7 2015-8-5 9:58:49
1
SM830203-04.indb 170 15/10/16 10:45:15
 Loading...