Getting started
9
VQT2W23
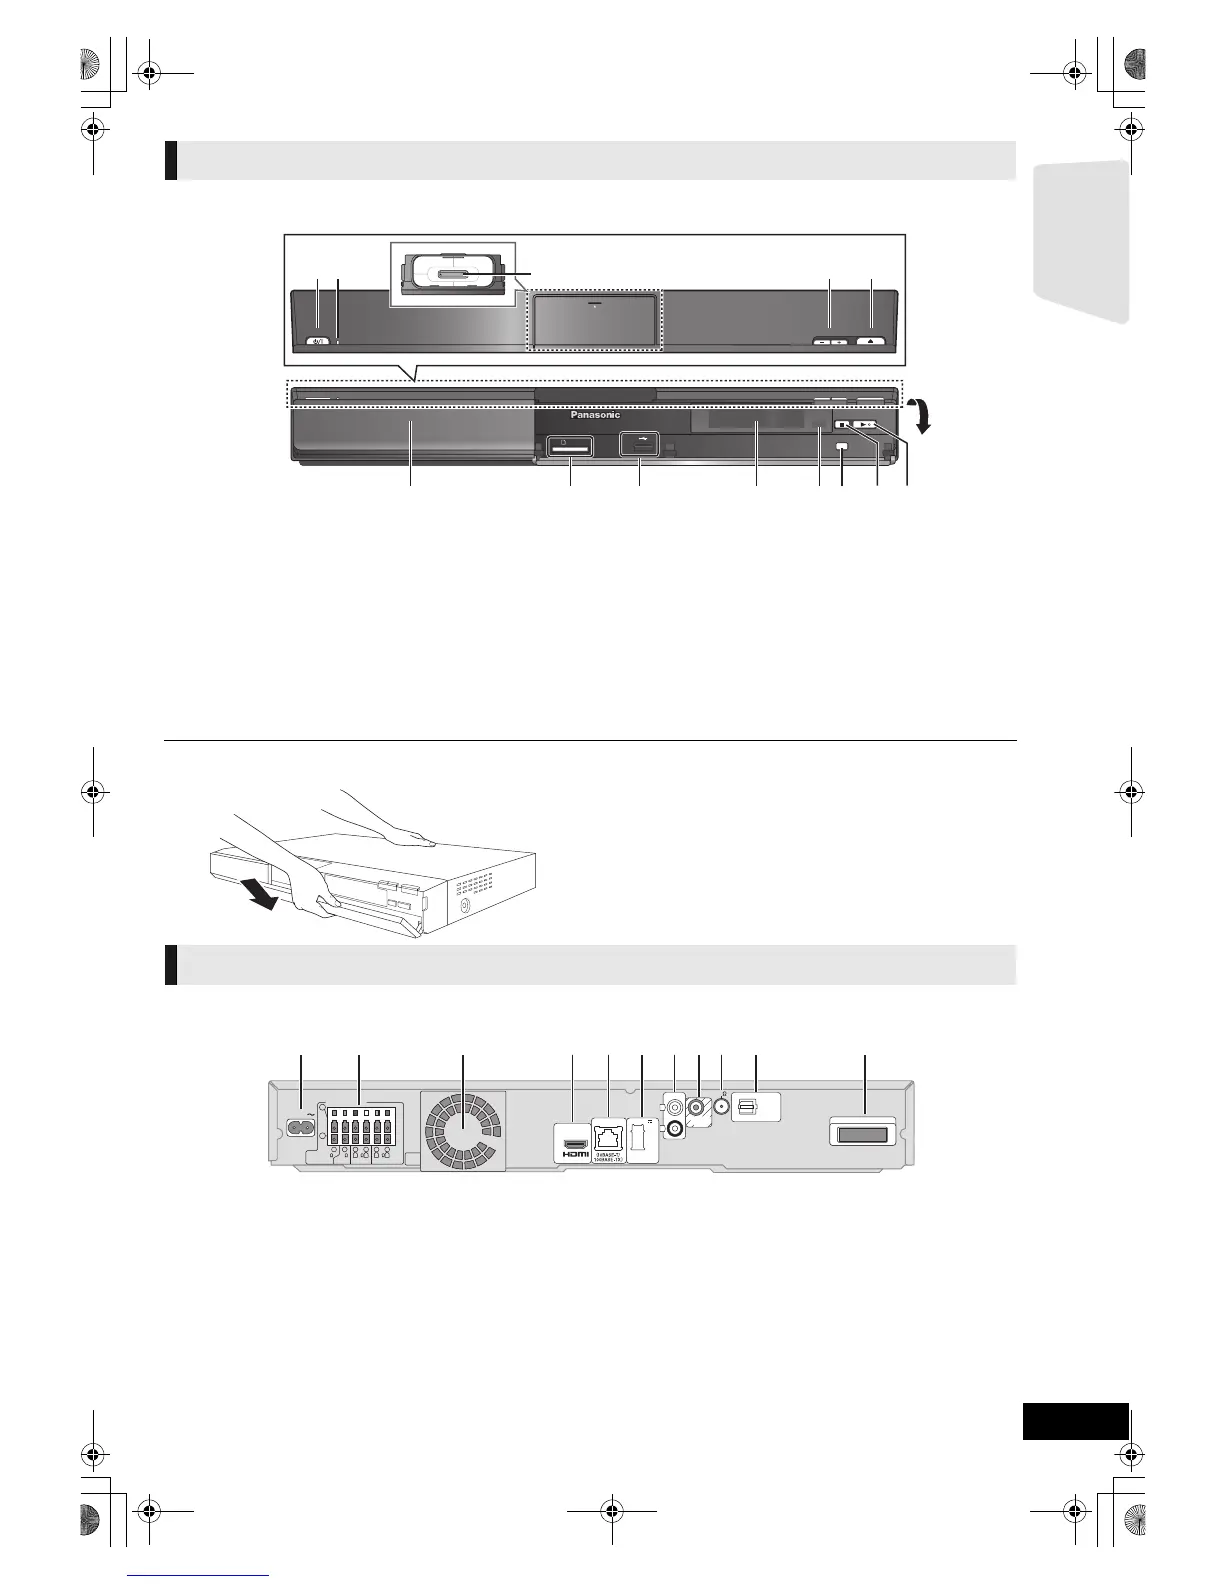
1 Standby/on switch (Í/I) (> 21)
Press to switch the unit from on to standby mode or vice
versa. In standby mode, the unit is still consuming a small
amount of power.
2 Power indicator
The indicator lights when this unit is turned on.
3 Connect iPod/iPhone (> 34)
4 Adjust the volume of the main unit
5 Open or close the disc tray (> 24)
6 Disc tray
7 SD card slot (> 24)
8 USB port (> 24)
9 Display (FL display)
≥ “SRD” (SURROUND) lights when sound is output to the
surround speakers.
10 Remote control signal sensor
Distance: within approx. 7 m.
Angle: Approx. 20e up and down, 30e left and right
11 Select the source (> 25)
12 Stop (> 27)
13 Start play (> 27)
∫ If the front cover comes off
1 Hold rear side of main unit by one hand and match up left
or right side protruding hook on the cover first with the
corresponding slot on the unit.
2 Push the hook firmly towards the unit until it clicks into
place. Then push the succeeding hooks one by one until
all have clicked into place.
3 Check that the cover now moves correctly.
≥ If it does not, remove it and repeat the above procedure.
1 AC IN terminal (> 20)
2 Speaker terminals (> 15)
3 Cooling fan
4 HDMI AV OUT terminal (> 17)
5 LAN port (> 19)
6 USB port for optional wireless adaptor (> 19)
7 AUX terminal (> 16)
8 VIDEO OUT terminal (> 16)
9 FM radio antenna terminal (> 18)
10 DIGITAL AUDIO IN terminals (> 16 , 17)
11 Digital transmitter dock (> 14)
Connect a digital transmitter when using an optional
wireless system.
Main unit (Front)



 To Next Page