Do you have a question about the Panasonic SC-HC297 and is the answer not in the manual?
Safety warnings for the unit, including fire, electric shock, and damage risks.
Precautions for unit placement, ventilation, and flames.
Safety advice for AC mains lead, battery handling, and regional use.
Safety advice regarding the AC mains plug and its disconnection.
Step-by-step guide on how to safely replace the fuse in the AC mains plug.
Lists all accessories provided with the system, categorized by region.
Instructions for connecting DAB, FM, and AM antennas based on region.
Guidance on connecting the AC mains lead and installing remote batteries.
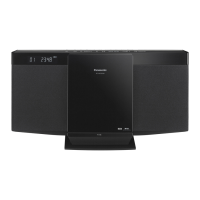
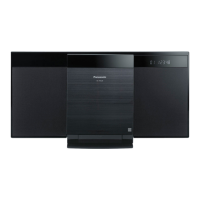
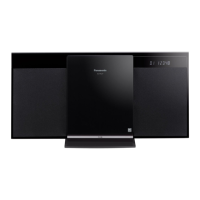
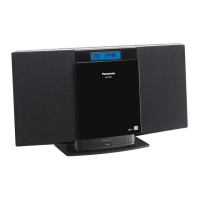
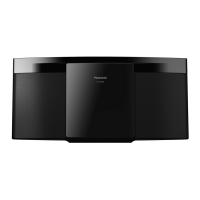
Explanation of buttons and indicators on the main unit.
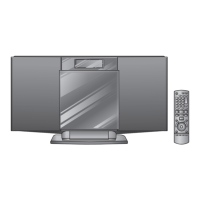
Detailed description of each button function on the remote control.
Identifies and explains the purpose of various terminals and the NFC area.
Instructions for inserting and using discs and USB devices.
Step-by-step process for pairing Bluetooth devices with the system.
How to connect and disconnect previously paired Bluetooth devices.
Guide to connecting NFC-enabled devices via touch.
Important considerations and troubleshooting for NFC setup.
Details on play, stop, pause, skip, and search functions for media.
How to view track and album information on the display panel.
Customizing playback modes like single track, album, random, and repeat.
Adjusting Bluetooth sensitivity and link modes for connectivity or quality.
Information on supported disc formats and USB device compatibility.
Guidelines for MP3 file structure, naming, and limitations.
Steps for manual tuning, automatic scanning, and saving radio stations.
Improving FM audio quality and checking signal status.
Adjusting AM frequency steps for better reception in specific regions.
Guide to manual scan, auto scan, and preset tuning for DAB/DAB+ stations.
How to access and switch between primary and secondary DAB services.
Checking signal quality and automatic clock synchronization for DAB.
How to set, view, and maintain the 24-hour clock.
Instructions for using the sleep timer and setting the play timer.
Choosing sound effects and saving custom audio profiles.
Steps to connect external devices via AUX input for playback.
Fine-tuning the audio input level for connected devices.
Explains automatic power-off and Bluetooth standby functions.
How to use the USB port to charge external devices.
Verifying software version and instructions for cleaning the system.
Solutions for the unit not turning on or responding to controls.
Troubleshooting distorted sound, humming, or noise during playback.
Diagnosing problems with disc, USB, and Bluetooth playback.
Addressing sound distortion or poor reception for Radio and DAB/DAB+.
Interpreting common error and status messages displayed on the unit.
Explanations for various error codes and their potential causes.
How to change remote codes and reset system memory.
Details on output power, PMPO, and power supply.
Information on USB standard, file support, and Bluetooth version/profiles.
Frequency ranges, speaker impedance, dimensions, and operating conditions.
Details on supported disc types and pickup wavelength.
Steps before starting wall installation, including safety and accessory checks.
Detailed, step-by-step guide for securely attaching the unit to a wall.
Details on frequency band, certification, usage restrictions, and range.
Information on interference, intended use, and licensing.
Contact details for customer service and accessory orders.
Statement of product compliance with EU directives.
Details on the 12-month warranty, coverage, and exclusions for Australian customers.
Instructions on how to contact Panasonic and present proof of purchase for warranty claims.
Instructions for disposing of old equipment and batteries in the EU.
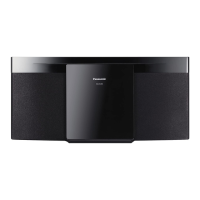
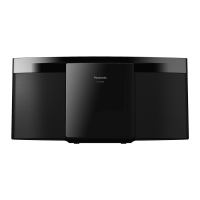
This document provides operating instructions for the Panasonic Compact Stereo System models SC-HC297 and SC-HC295. It covers safety precautions, setup, media playback, radio functions, clock and timers, sound effects, external equipment connection, and maintenance.
The manual begins with crucial safety information, warning users about potential hazards such as fire, electric shock, and product damage. It advises against exposing the unit to rain or moisture, placing liquid-filled objects on it, and obstructing ventilation. Users are instructed to use only recommended accessories, avoid removing covers, and refer servicing to qualified personnel. For the United Kingdom and Ireland, specific instructions are given for securely attaching the apparatus to a wall. Caution is also provided regarding the AC mains lead, detailing how to replace the fuse in a three-pin plug. The unit is designed for use in tropical climates (Asia and Middle East) or moderate climates (others). It warns about potential radio interference from mobile phones and the laser utilized by the unit. Battery safety is also emphasized, including proper replacement, disposal, and storage.
The system comes with various supplied accessories, including an AC mains lead, AM loop antenna (for Australia and New Zealand), DAB antenna (for UK and Ireland), FM indoor antenna (for others), a remote control with battery, and a wall mount kit (for UK and Ireland).
Making connections involves connecting the DAB antenna (for UK and Ireland), AM loop antenna (for Australia and New Zealand), or FM indoor antenna (for others). The AC mains lead should be connected last. The manual highlights power conservation, noting that the system consumes a small amount of power in standby mode and advises disconnecting the power supply if not in use, though some settings may be lost. It also cautions about speaker placement near TVs or PCs due to lack of magnetic shielding and suggests taping antennas to a wall for better reception.
The remote control requires an alkaline or manganese battery, installed with correct polarity.
The system features controls on both the main unit and the remote control. Key functions include:
The system supports playback from various media:
Pairing a Bluetooth® device:
Connecting a Bluetooth® device:
Disconnecting a Bluetooth® device:
One-Touch Connection (NFC): For NFC-compatible Android™ devices (version 4.1 or higher), simply touching the device to the NFC touch area on the main unit can establish a Bluetooth® connection. For older Android™ versions, the "Panasonic Music Streaming" app is required.
Basic playback controls (for CD, USB, Bluetooth®):
Viewing available information: Press [DISPLAY] to view information on the display panel. Maximum characters vary by source (32 for CD/USB, 16 for Bluetooth®).
Play menu: Allows users to select playback modes like "PLAYMODE" (Off, 1-TRACK, 1-ALBUM, RANDOM, 1-ALBUM RANDOM) and "REPEAT" (Off, On). Settings are cancelled when the sliding door is opened or a USB device is disconnected.
Input level (Bluetooth®): Users can adjust the input level (LEVEL 0, +1, +2) if the sound input from Bluetooth® is too low. "LEVEL 0" is the default and recommended if sound is distorted.
Link mode (Bluetooth®): Allows changing the link mode to prioritize connectivity ("MODE 1") or sound quality ("MODE 2" - default). "MODE 1" is suggested if sound is interrupted or playback image/sound is out of sync.
The system supports FM radio, and for Australia and New Zealand, AM radio. For the United Kingdom and Ireland, DAB/DAB+ radio is supported.
FM/AM Radio:
DAB/DAB+ Radio (United Kingdom and Ireland):
Users can customize the sound output:
Saving sound settings: Up to 3 combinations of current sound effects can be saved.
The system can play music from portable audio equipment via the AUX IN terminal.
To clean the system, wipe it with a soft, dry cloth. Avoid alcohol, paint thinner, or benzine. If using chemically treated cloth, follow its instructions.
The manual provides solutions for common issues:
Remote control code: If other Panasonic equipment responds, change the remote control code to "REMOTE 2" or "REMOTE 1" by pressing and holding specific buttons on the main unit and remote.
System memory reset: Disconnect AC mains, then press and hold [0/1] on the main unit while reconnecting AC mains until "---" is shown. Release [0/1]. This resets all settings to factory preset.
For the United Kingdom and Ireland, a wall mount kit is supplied.
The manual includes information about Bluetooth® (frequency band, certification, restrictions of use, range, interference, intended usage) and licenses for MPEG Layer-3 audio coding technology and Bluetooth® trademarks. Google Play and Android are trademarks of Google Inc.
Contact details for Panasonic Customer Communications Centre in the UK and Ireland are provided, along with information on direct sales for accessories and finished products via phone and website. A Declaration of Conformity (DoC) for European Union countries is included.
The product is warranted for 12 months from the date of purchase. The warranty covers necessary service for faulty products under normal use and reasonable care, provided valid proof of purchase is presented. It does not cover damage from incorrect voltages, installation, misuse, neglect, or commercial use. Specific exclusions include cabinet parts, video/audio tapes, SD cards/USB devices, user-replaceable batteries, and DTV reception issues. Ethernet connection hardware issues are also limited. Instructions for claiming warranty service are provided, including contacting the Customer Care Centre and sending/taking the product to an Authorised Service Centre. The warranty does not cover installation/de-installation costs. Panasonic products come with consumer guarantees under Australian Consumer Law.
| Power Output | 20 W |
|---|---|
| Speaker Configuration | 2.0 |
| Bluetooth | Yes |
| CD Player | Yes |
| FM Radio | Yes |
| USB Port | Yes |
| Tuner | FM |
| Preset Stations | 30 |
| Audio Input | 3.5 mm Aux |
| Headphone Jack | Yes |
| Wall Mountable | Yes |
| Playable Media | CD, USB |
| Playback Formats | MP3 |
| Speakers | 2 |