10
RQTX0089
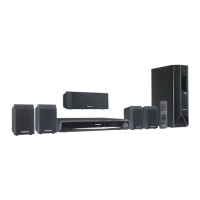
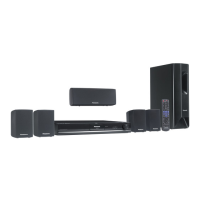
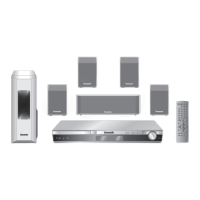
Basic setup example
§
This connection will also enable you to play TV audio through your home theater system (➜ 33, Enjoying TV
audio). Select the appropriate audio out (e.g. Monitor) on the TV.
≥When both the HDMI cable and scart cable are connected, there will be no RGB output from the SCART (AV)
terminal.
[Note]
≥Do not make the video connections through the video cassette recorder.
Due to copy guard protection, the picture may not be displayed properly.
≥Only one video connection is required. Choose one of the video connections above depending on your TV.
step
3
Cable connections
3
Audio and video connections
Other video connections for improved picture quality
TV terminal
Cable required
(not included)
This unit terminal Features
HDMI cable
[Note]
≥Non-HDMI-compliant
cables cannot be utilized.
≥It is recommended that
you use Panasonic’s HDMI
cable. Recommended part
number:
RP-CDHG15 (1.5 m),
RP-CDHG30 (3.0 m),
RP-CDHG50 (5.0 m), etc.
[\\\\\\\\\\HDMI\\\\\\\\\\] This connection provides the best picture
quality.
≥
Set “
VIDEO PRIORITY
” to “ON” (
➜ 26,
“HDMI” menu
).
≥Set “VIDEO FORMAT” in Menu 4 (HDMI)
(➜ 22).
VIERA Link “HDAVI Control”
If your Panasonic TV is
VIERA Link
compatible, you can operate it
synchronising with home theater
operations or vice versa (➜ 28, Using the
VIERA Link “HDAVI Control
TM
”).
≥Make the extra audio connection (➜ 11)
when you use
VIERA Link “
HDAVI
Control
”
function.
OPTICAL
IN
AV
3
AUX
L
R
This unit
AV1
AV2
AV OUT
AV
AV
PT467
PT460
This unit
Scart cable
§
(not included)
TV
(not included)
Scart cable
(not included)
Set top box or video
cassette recorder
(not included)
AV IN
QUICK START GUIDE
QUICK START GUIDE
step 3
SC-PT460-467EB-RQTX0089-2B.book Page 10 Wednesday, December 26, 2007 3:15 PM
 Loading...