2
When charging, use only the following
Panasonic Nickel-metal hydride
rechargeable batteries.
Europe: HHR-4AGE/2B (set of 2)
Other areas: HHR-4AGT/2B (set of 2)
4
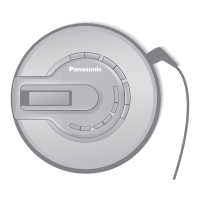
To CD or AUX
terminals
Audio system
Audio cable (not included)
Main unit
Turn off this unit and the other equipment before connection.
Insert each plug fully. (Plug type: 3.5 mm stereo)
When the unit is connected to other equipment, adjust the volume on
the connected equipment.
The illustration shows
.
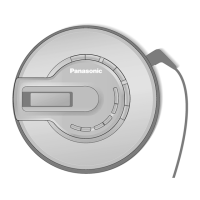
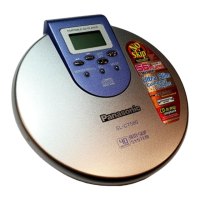
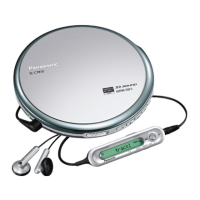
SL-CT582V
Connections
≥Set the unit’s volume to 10-15.
≥Use the buttons on the main unit to avoid the
beep sounds from the remote control buttons
( ONLY).
SL-CT582V
Playing MP3
MP3: A method of compressing data with little loss to the original
sound quality.
∫When creating MP3 files to play on this unit
Disc formats: ISO9660 level 1 and level 2 (except for extended formats)
∫Unit limitations
≥This unit is compatible with multi-session discs but if there are a lot
of sessions it takes more time for play to start. Keep the number of
sessions to a minimum to avoid this.
≥This unit cannot play files recorded using packet write.
≥Depending on how you create MP3 files, they may not play in the
order you numbered them or may not play at all.
If you create an album like this, the
files may not play in the order you
numbered them.
The albums would play in the
order 1, 2, 3, 4.
(CD-DA/MP3 only)
For CD-DA format, use a music disc and finalize
§
it after recording.
The unit may not be able to play some discs due to the condition of the
recording.
§A process performed after recording that enables CD-R/CD-RW players to play
audio CD-R and CD-RW.
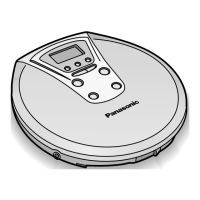
Up to 32 characters
Power Supply
Long
cord to
the right
Note on CD-R and CD-RW
3
DC IN
AC adaptor
4
1
2
3
Rechargeable batteries
(included for Australia and N.Z. only) Charge before initial use.
Dry cell batteries (not included)
≥The configuration of the AC adaptor differs according to the area.
≥Lift up the + end when removing.
≥
The battery indicator “” scrolls while charging and disappears when finished.
≥You can charge the batteries before they are fully discharged.
≥Fit the battery lid so it is secure and flush with the battery
compartment. If it comes loose, it may scratch your discs.
Press.
“LR6, AA, UM-3”
alkaline batteries
EXT BATT
The battery indicator
This indicator appears when the unit is on.
The unit switches off
shortly after the indicator
starts flashing.
≥Before play starts the battery indicator level may temporarily go down or flash
although the batteries are not drained. It appears correctly once you start play.
≥
The battery indicator level may differ when listening to a CD or the radio.
≥The battery indicator level may briefly go down when changing from CD to radio
or vice versa. It appears correctly immediately afterwards.
As a safety precaution this unit is constructed so it is not possible to
charge ordinary batteries. For details, check with your dealer.
To household
mains socket
You cannot charge any other
battery types.
1
Turn the unit off (➪page 5, 6) before charging.
Close lid securely.
∫External battery case
You can get longer play time by also attaching this case. (The unit will also work
when batteries are in the case only.)
AC adaptor
The unit will also work when using the AC adaptor only.
Connect the AC adaptor (
➪
left).
(Except Europe, Australia and N.Z.)
Be sure to set the AC adaptor
’
s VOLTAGE ADJUSTOR to match the local power
voltage before use (
➪
left).
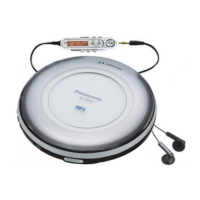
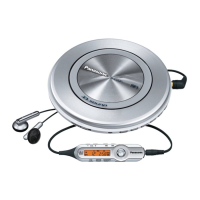
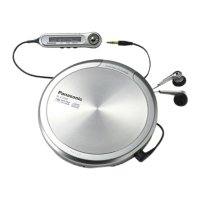
Remote control
( ONLY)
SL-CT582V
Connect the
remote control to
the main unit first.
∫To headphone jack
[
( ONLY)
through remote control
]
SL-CT582V
Earphones (included)
References to the remote control apply
only to .
SL-CT582V
MPEG Layer-3 audio decoding technology licensed from Fraunhofer IIS and
Thomson multimedia.
∫Main unit
After disconnecting the AC adaptor, insert two “LR03, AAA, UM-4”
alkaline batteries.
Insert in the same way as the rechargeable batteries (
➪
left).
The unit is in the standby condition when the AC adaptor is
connected. The primary circuit is always “live” as long as the AC
adaptor is connected to an electrical outlet.
(Except Europe, Australia and
N.Z.)
Be sure to set the
proper voltage for
your area before
use.
Screw driver
≥Recharging/Play time
➪page 2, Specifications
≥To save power when the unit is not to be used for a long time, unplug the AC adaptor from the household mains socket.
RQT7861-B.qxd04.12.276:15PMページ4
 Loading...