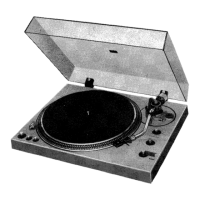
H
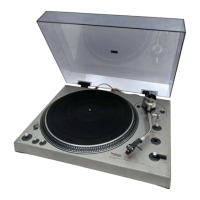
Adjustments
Adjustment of the arm lift height
(See Figs.
4
and
5)
The arm lift height (distance between the stylus tip
and record surface when cueing lever is raised) has
been adjusted at the factory before shipping to ap
-
proximately
5
to
10
mm
(311
6
"
to
25/64").
If the clearance becomes too narrow or too wide be
-
cause of the physical size of the different cartridges
on the market turn
.the adjustment screw clockwise or
counterclockwise, at the same time pushing the arm
lift down.
Clockwise ratation
-
distance between the record and stylus tip is reduc
-
ed.
Counterclockwise rotation
-
distance between the record and stylus tip increases.
Note:
As the adjusting screw has a hexagon head, be sure to
make the adjustment while depressing the arm lift.
Adjustments for automatic start and automatic return
positions (See Fig.
6)
Should the tonearm not function correctly, make
adjustments according to the follwing procedures.
Adjustment for automatic start position
(Remove the rubber cap.)
In cases where the
styl~s tip descends outside of the
record.
-
Move
C~OCKW~S~.
In cases where the styus tip descends onto halfway of
a recorded piece.
-
Move counterclockwise
Adjustment for automatic return posittion
(Remove l~rntable sheet.)
n cases where the tonearm tends to
retclrn befor the
playing has finished.
-
Move clockwise.
In cases where the tonearm fails to return after the
last groove of the record.
-
Move counterclockwise.
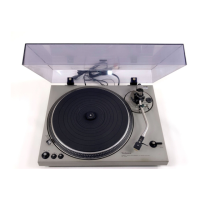
Speed adjustment (with pitch control knobs)
(See
Figs. 7.8 and
9)
Strobe dots are set on the tapered rim of the turn
-
table platter according to the power frequency and
the number of revolutions of the records. Make
adjustment, referring to strobe dot indication. (See
Fig. 7)
1.
Set the speed selector to the number of revolutions to
be adjusted. (See Fig.
8)
2.
Release the arm clamp and raise the cueing lever
3.
Move the tonearm to a slight extent towards the
turntable platter.
The strobe
illuminator/pilot lamp will be lit for it
-
luminating the strobe dots.
4.
While turning the pitch control knobs either to
"+"
side or
"-"
side, adjust to such an extent that the
strobe dots of the turntable look as if they were
stationary.
 Loading...