7
HOW TO FIX INSTALLATION
PLATE
2
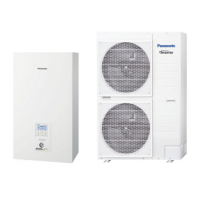
INDOOR UNIT INSTALLATION
4
SELECT THE BEST LOCATION
1
The mounting wall is strong and solid enough to prevent it from vibration
(Unit in mm)
55
200
756
07061
Indoor Unit
body
≥1956 from
ground
Installation
plate
1
Installation plate
4
Bolt -
size M8
Wall
Wall
More than 375 More than 375
The centre of installation plate should be at more than 375 mm at right and
left of the wall.
The distance from installation plate edge to ground should more than
1956 mm.
• Always mount the installation plate horizontally plate by aligning the marking
thread and using a level gauge.
• Mount the installation plate on the wall with 6 sets of plug, bolt and washer
(all non-supply) with size M8.
TO DRILL A HOLE IN THE
WALL AND INSTALL A
SLEEVE OF PIPING
3
Access to Internal Components
WARNING
This section is for authorized and licensed electrician/water system installer
only. Work behind the front plate secured by screws must only be carried out
under supervision of qualifi ed contractor, installation engineer or service person.
Please follow the steps below for take out front plate. Before removing the front
plate of Indoor Unit, always switch off all power supply (i.e. Indoor Unit power
supply, heater power supply and Tank Unit power supply).
1. Remove the 2 mounting screws which located at bottom of the front plate.
2. Gently pull the lower section of the front plate towards you to remove the front
plate from left and right hooks.
3. Hold the left edge and right edge of front plate to lift up front plate from hooks.
Screws
Lift up
Hook
Install the Indoor Unit
1. Engage the slots on the Indoor Unit to the hooks of installation plate
1
. Ensure
the hooks are properly seated on the installation plate by moving it left and right.
2. Fix the screws
5
to the holes on the hooks of installation plate
4
, as
illustrated below.
Slots
Installation plate
1
Hooks
Wall
Indoor Unit back
Before choosing the installation site, obtain user approval.
There should not be any heat source or steam near the unit.
A place where air circulation in the room is good.
A place where drainage can be easily done (e.g. Utility room).
A place where Indoor Unit’s operation noise will not cause discomfort
to the user.
A place where Indoor Unit is far from door way.
Ensure to keep minimum distance of spaces as illustrated below from
wall, ceiling, or other obstacles.
Recommended installation height for Indoor Unit shall be at least
1150 mm.
Must install on a vertical wall.
A place where fl ammable gas leaking might not occur.
When install electrical equipment at wooden building of metal
lath or wire lath, according to electrical facility technical standard,
no electrical contact between equipment and building is allowed.
Insulator must be installed in between.
Do not install the unit at outdoor. This is designed for indoor installation only.
100 mm
or more
1150 mm
or more
100 mm
or more
100 mm
or more
Required space for installation
1.
Make a Ø70 mm through hole.
2.
Insert the piping sleeve to the hole.
3.
Fix the bushing to the sleeve.
4.
Cut the sleeve until it extrudes about 15 mm from the wall.
CAUTION
When the wall is hollow, please be sure to use the sleeve for tube
assembly to prevent dangers caused by mice biting the connection cable.
5.
Finish by sealing the sleeve with putty or caulking compound at the fi nal stage.
15 mm
Putty or caulking compound
ø70 mm
through hole
Indoor Outdoor
Sleeve for tube
assembly
Approx. 5 - 7 mm
Bushing for tube assemblys
Wall
 Loading...