25
8. The software installs the driver automatically and the installation process may need some time.
The duration is related to your computer configuration, please wait patiently.
9. After the installation, click "Print &Test Page" button. If your printer prints the test page
successfully, it means that you have installed the driver correctly.
3.2.2.2.2.2. Install as a network printer
1. Turn the power of printer and computer on.
2. Connect the PC to the network.
3. Make sure the printer is connected to the same network as the PC (See Section 4 or 5 to learn
how to configure the network).
4. Insert the setup CD supplied in the CD-ROM of the PC, and double-click on "Pantum XXX
Series_Mac_Driver" – "Pantum Install Tool". (The XXX in Pantum XXX Series refers to product
model.)
5. Read and agree to the terms contained in the End User License Agreement and the Privacy
Policy, click the “Next” button in the lower right corner of the interface to enter the driver installation
interface.
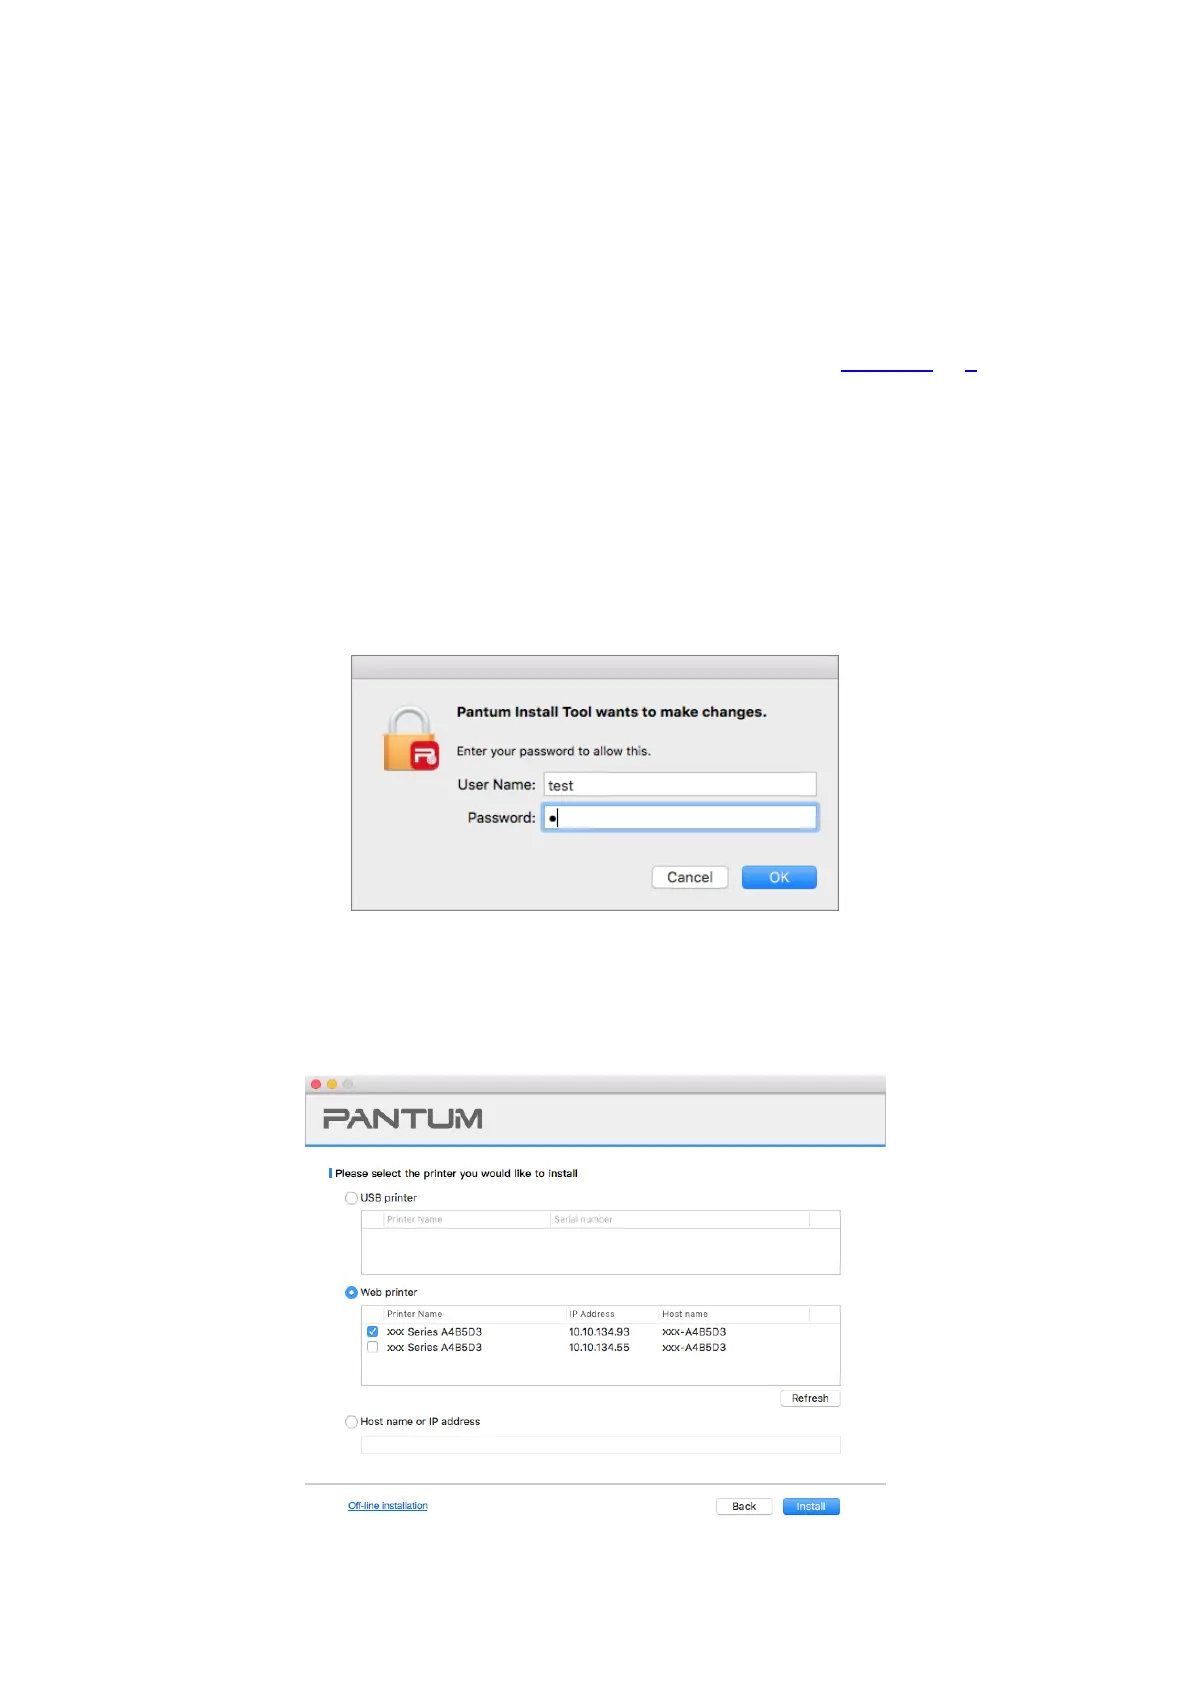
6. Enter the password of the PC, and click on “OK”.
7. Click on “More setup methods” at the bottom of the setup interface for access.
8. Select a network printer from the search results.
9. Click on “Install” on the lower right.
 Loading...