9
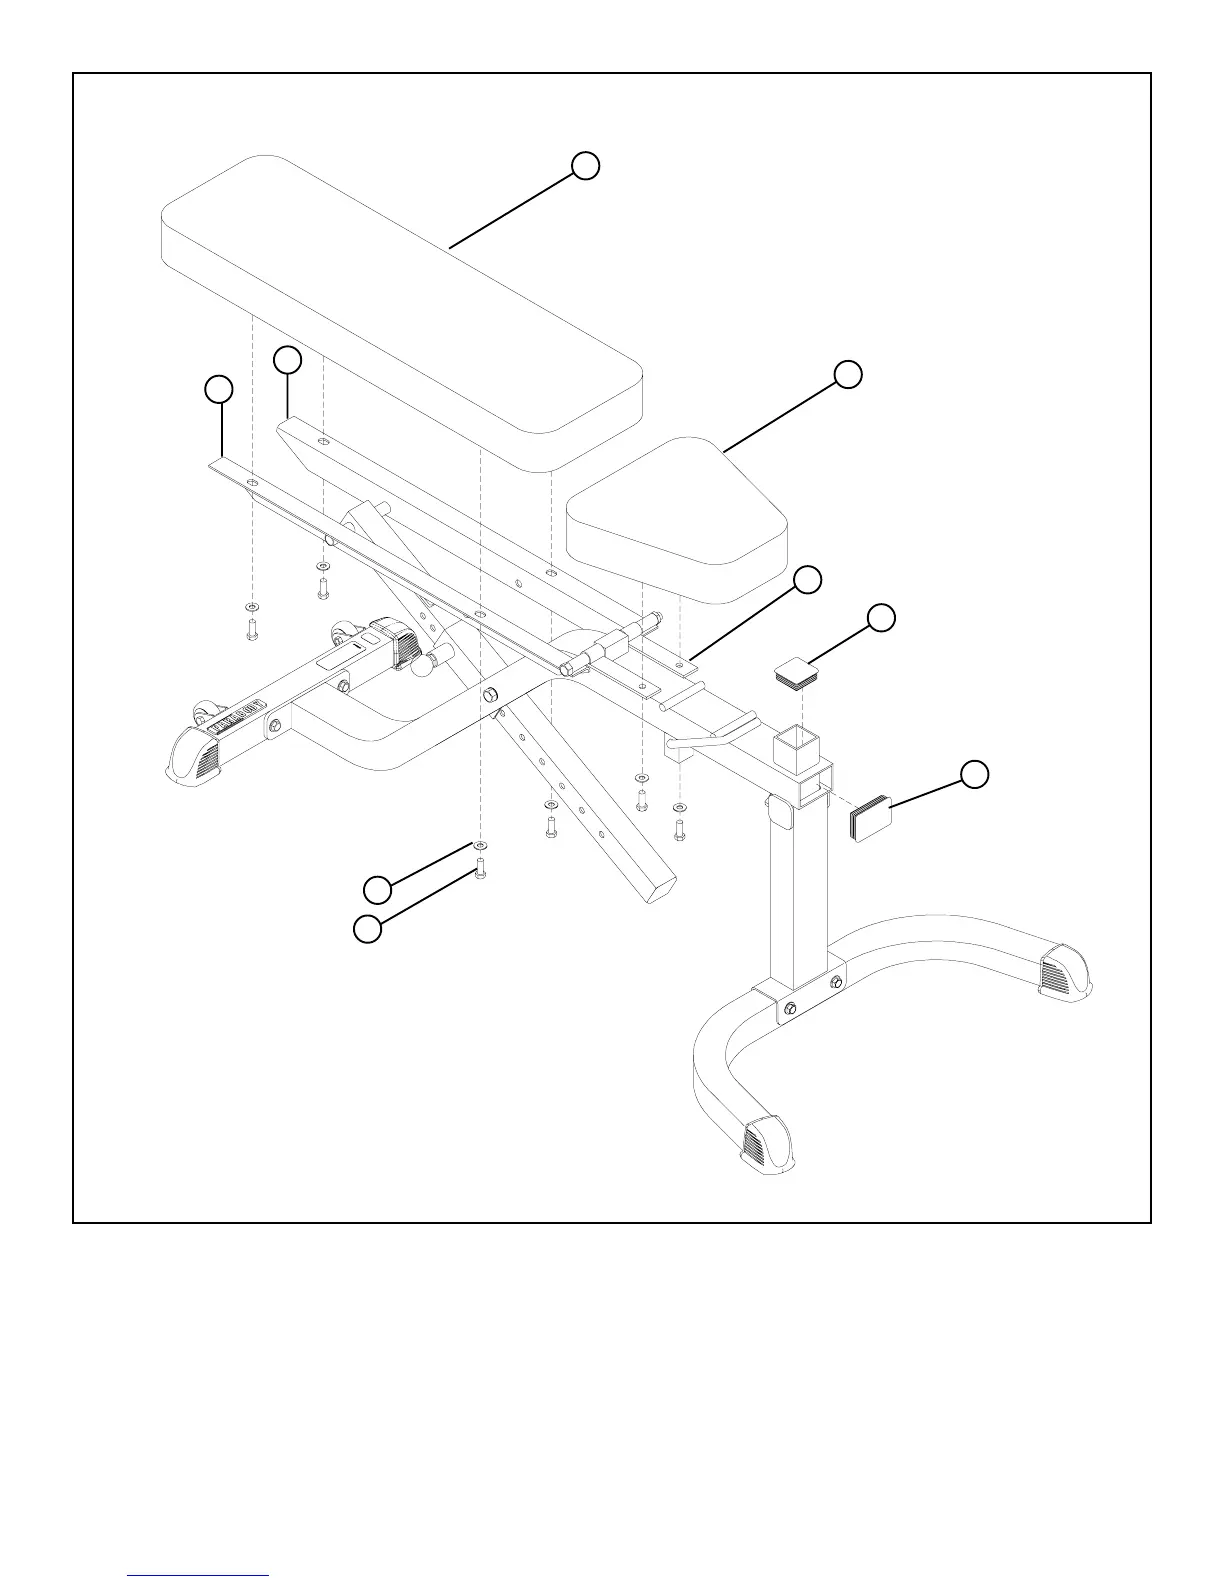
STEP 5:
FIGURE 5
• SECURELY assemble the SEAT PAD (8) to the HINGE TABS (10) using two 3/8 X 1” BOLTS (17) and two 3/8” WASHERS (19) as shown
in FIGURE 5.
3/8 X 1” 17
19
10
13
14
9
8
4
5
• SECURELY assemble the BACK PAD (9) to the LEFT BACK PAD ANGLE (4) and the RIGHT BACK PAD ANGLE (5) using four 3/8
X 1” BOLTS (17) and four 3/8” WASHERS (19) as shown in FIGURE 5.
Thank you for purchasing the Parabody 874101 MULTI-ANGLE BENCH. If unsure of proper use of equip-
ment, call your local Parabody distributor or call the Parabody customer service department at (800) 328-9714.
• Slide one 2” SQ. END CAP (14) into the top of the BENCH FRAME (1) as shown in FIGURE 5.
• Slide one 3 X 2” END CAP (13) into the front of the BENCH FRAME (1) as shown in FIGURE 5.