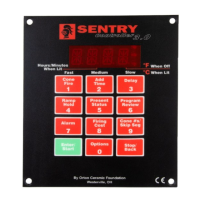
1 Select Fast (1), Medium (2), or Slow (3) when pro
-
gramming a firing.
2 Alter a speed in the Speed [SPD] option.
Every cone has a standard firing schedule, shown on
pages 32 - 33. Select Medium speed (the 2 key) during
Cone-Fire programming, and the cone will fire to the stan
-
dard schedule. Select Fast (1), and the standard schedule
will speed up by 20%. Select Slow (3), and the standard
schedule will slow down by 20%.
In the Speed option, you can further adjust the speed of a
standard schedule 10 - 40% slower or faster:
1 First, program a Cone-Fire.
2 After programming a Cone-Fire, [IDLE]] will ap
-
pear. From
[ IDLE] , press OPTIONS until [SPD]
appears.
3 Press ENTER. Use the 1 or 3 key to scroll through
this selection:
[STD] Same as Medium in cone programming
[F10] 10% faster than standard
[F20] Same as Fast in cone programming
[F30] 30% faster than standard
[F40] 40% faster than standard
[S40] 40% slower than standard
[S30] 30% slower than standard
[S20] Same as Slow in cone programming
[S10] 10% slower than standard
When the speed of choice appears, press ENTER.
4 To go back to [IDLE] , press STOP.
The kiln is now ready to fire with the new speed.
Note: SPD settings do not affect the final ramp
segment of the cone program.
Pointer: If you are not sure whether the Cone-Fire
speeds have been altered, check by going to the
SPD option and pressing Enter.
OFST / Cone Offset
Calibrate Cone-Fire to a Witness Cone
Sometimes the pyrometric cones programmed in
Cone-Fire do not match the bending of the witness cones.
Cone Offset will adjust Cone-Fire to bend the cones.
Note: Thermocouple Offset (see page 22) adjusts
all temperature readings. Cone Offset changes
only the last heating segment of the cone firings. In
the earlier Sentry 2.0 controller, Cone Offset ad
-
justed one particular temperature range of cones.
Cone Offset in the Sentry 3.0 adjusts all the cones
instead of only a range of cones.
Follow these guidelines before deciding that you need to
use Cone Offset:
I
The thermocouple must protrude into the firing cham
-
ber the correct distance: about ¾” for ¼” wide
thermocouples, ½” - 5/8” for 1/8” wide thermocouples.
I
Keep shelves 1”-1½”away from the thermocouple.
I
Keep witness cones at least 2” away from heating ele
-
ments.
I
Place witness cones in several locations in the kiln.
How to Use Cone Offset
Cone Offset changes the shut-off point of the cone by the
degrees of temperature shown in the chart below.
1 First, program a Cone-Fire.
2 From [IDLE] , press OPTIONS until [OFST] ap
-
pears.
3 Press ENTER. The current Cone Offset adjust
-
ment number will appear.
4 Using the 1 and 3 keys, select a new adjustment
number (see chart below). Then press ENTER.
[OFST] will appear. To return to [IDLE], press
STOP.
Cone Offset Settings
Note: select a cone in Cone-Fire before changing Cone Offset.
°F Setting °C Setting Result
0 0 No adjustment
5 3 Kiln will fire hotter
10 6 Kiln will fire hotter
15 8 Kiln will fire hotter
20 11 Kiln will fire hotter
-5 -3 Kiln will fire cooler
-10 -6 Kiln will fire cooler
-15 -8 Kiln will fire cooler
-20 -11 Kiln will fire cooler
A cone offset remains in memory unless you use the Re
-
set option (page 26).
Interpreting Cone Bending
Position the witness cones in the kiln according to the in
-
structions on page 11.
The cone bent to 6 o’clock: No
calibration in Cone Offset needed.
The self-supporting cone has fired
to maturity when the tip is close to
even with the cone base as shown.
Theconedidnotbendfar
enough: Use a positive Cone Off
-
set number for a hotter firing, such
as 10 (°F).
20 Cone-Fire / Ramp-Hold Do not leave your kiln unattended during operation.