X. Ajuste la cadena utilizando los tensores de cadena (#24, #25, #26).
Gire el barril de ajuste (#24) en una dirección para apretar la cadena. Gire
el barril de ajuste en dirección contraria para aflojar la cadena. La cade-
na debe tensarse para que tenga una ligera holgura. No tensione dema-
siado la cadena.
Y.
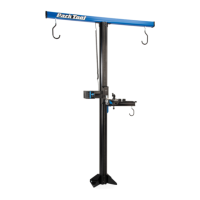
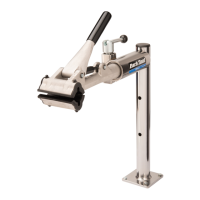
Using Phillips head screwdriver, attach end caps (#10) to cross bar
(#8) with end cap screws (#11). The cross bar has space to accommodate
optional hooks for hanging wheels. Use Park Tool #450 Machine Thread
Hooks (not included with PRS-33) and install before attaching end caps.
Y.
A l’aide du tournevis cruciforme, fixer les caches d’embouts (#10) à la
barre horizontale (#8) avec les vis (#11). La barre horizontale offre assez
d’espace pour accueillir des crochets supplémentaires pour suspendre
des roues. Utiliser le crochet Park Tool #450 (non fournis avec le PRS-33
et installer avant de mettre en place les caches d’embouts.
Y. Setzen Sie die Abschlusskappen (#10) auf den Querträger (#8) und
drehen Sie die Schrauben (#11) mit einem Kreuzschlitzschraubendreher
fest. Der Querträger bietet Platz für zusätzliche Haken zum Aufhängen
von Laufrädern. Verwenden Sie bei Bedarf die #450 Haken mit Maschi-
nengewinde von Park Tool (nicht im Lieferumfang des PRS-33) und mon-
tieren Sie diese vor der Anbringung der Abdeckkappen.
Y.
Utilice el desarmador tipo Phillips y fije las tapas (#10) a la barra supe-
rior transversal (#8) con los tornillos (#11). La barra superior transversal
tiene espacio para instalar ganchos por si desea colgar llantas o rines.
Utilice los Ganchos Roscados de Acero #450 de Park Tool (no incluidos en
el PRS-33) e instálelos antes de colocar las tapas.
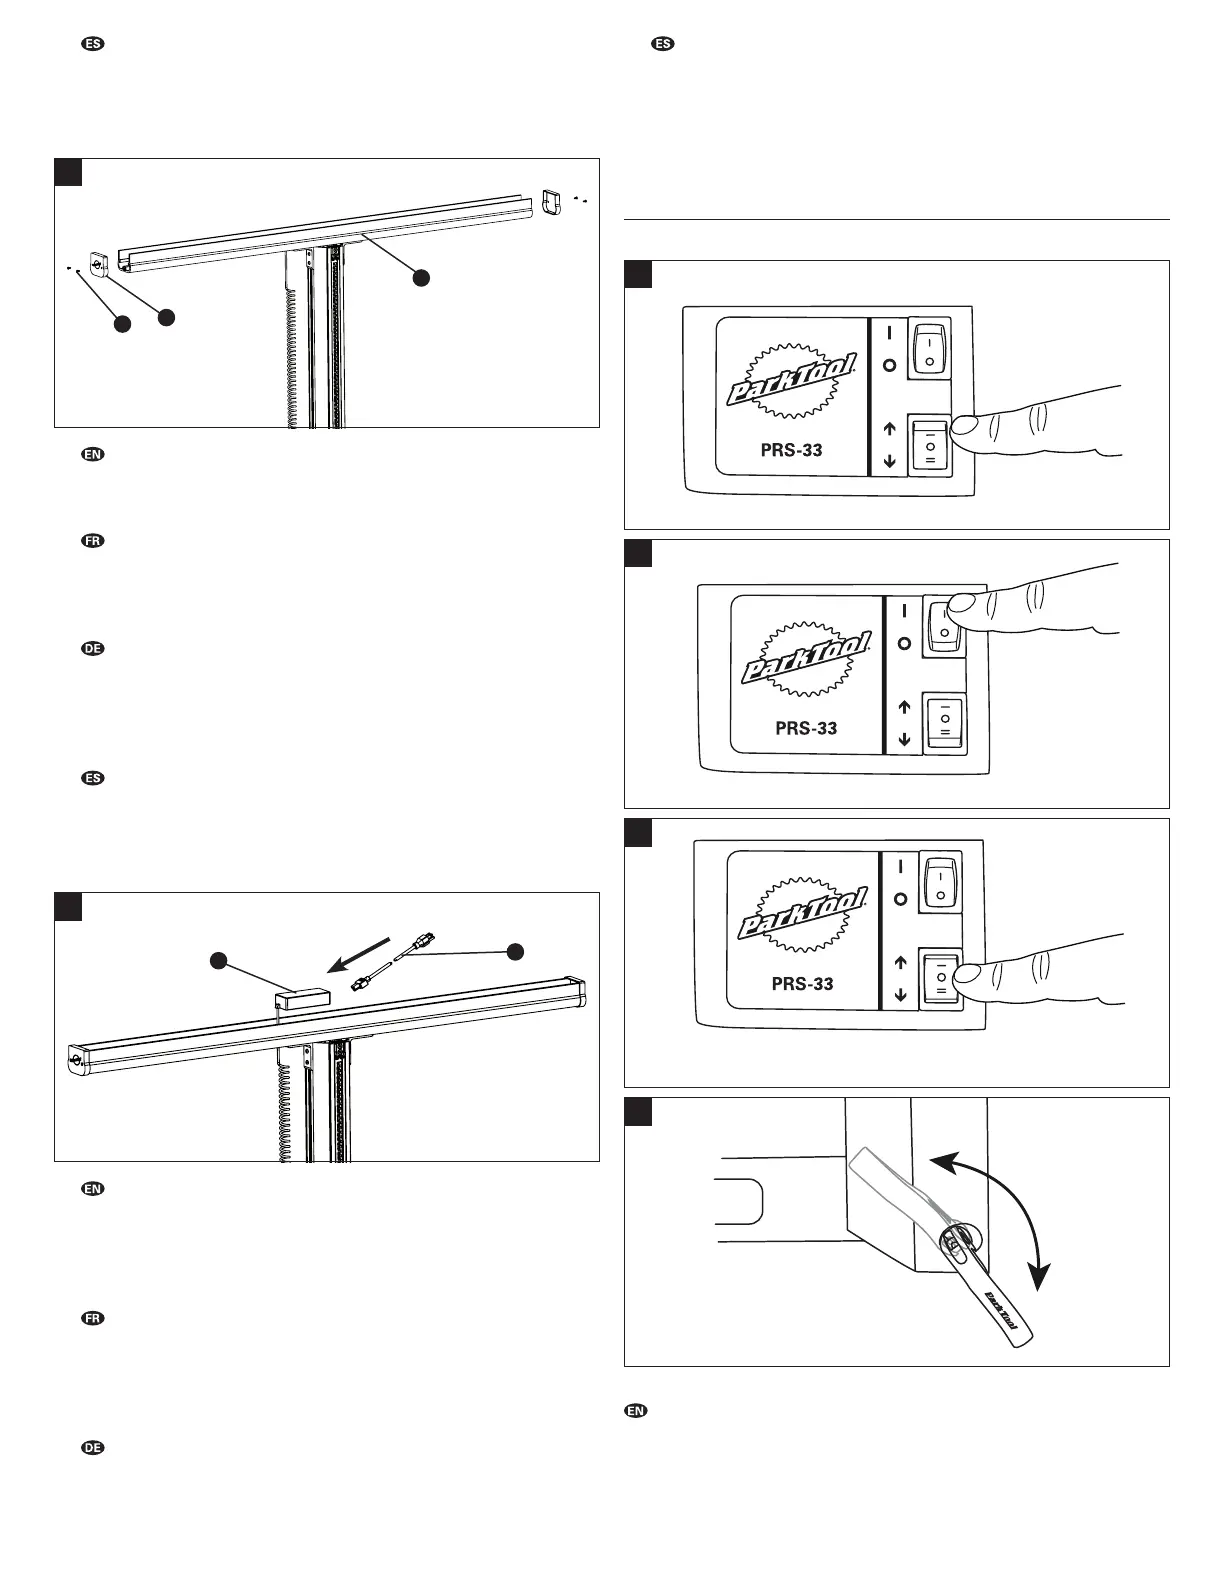
Z. Plug one end of power cord (#32) into the power supply (#31) and oth-
er end into appropriate electrical outlet (use an appropriate extension
cord if necessary). The PRS-33 is shipped to Park Tool distributors with
a power cord appropriate to the common electrical outlets used in their
location: USA, Australia, China, Europe, Japan, Switzerland, or United
Kingdom. The PRS-33 is ready for use.
Z. Insérer un coté du câble d’alimentation (#32) dans le transformateur
(#31) et l’autre coté dans une prise murale appropriée (utiliser une ral-
longe appropriée si nécessaire). Le PRS-33 est expédié aux distributeurs
Park Tool avec un câble d’alimentation approprié à l’usage sur leur terri-
toire: USA, Australie, Chine, Europe, Japon, Suisse, ou Grande Bretagne.
Le PRS-33 est prêt à l’emploi.
Z.
Stecken Sie das Netzkabel (#32) in das Netzteil (#31) und den Stecker
in eine passende Steckdose. Verwenden Sie bei Bedarf ein geeignetes
Verlängerungskabel. Der PRS-33 wird werkseitig mit länderspezifischen
Netzkabeln ausgeliefert: USA, Australien, China, Europa, Japan, Schweiz
oder Großbritannien. Der PRS-33 ist jetzt einsatzbereit.
Z. Conecte un extremo del cable de alimentación (#32) en la fuente de
poder (#31) y el otro extremo en una toma de corriente adecuada (puede
utilizar una extensión apropiada si es necesario). El PRS-33 es suminis-
trado a los distribuidores de Park Tool con un cable de alimentación apro-
piado para la toma de corriente comúnmente utilizada en: Estados Uni-
dos, Australia, China, Europa, Japón, Suiza, o Reino Unido. Ya puede
utilizar el PRS-33.
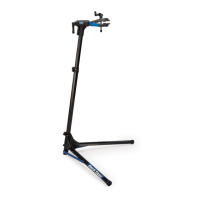
OPERATING INSTRUCTIONS
Adjusting Clamp Height
The PRS-33’s electric motor can adjust the clamp height from 6” to 78”
(16cm-198cm), making it easy to clamp the bike on the floor, raise it to a com-
fortable working height, adjust the height as needed during a repair, and low-
er the bike for easy release from the clamp. Adjustments to the clamp height
Y
8
10
11
Z
31
32
1
2
3
4